Overview
Reimbursement process, how and when to create an expense report using MyExpense (Concur).
MyExpense
Considerations before starting an expense report
- Refer to Claim Expenses for Reimbursement for links to important policy and timing considerations, and verify that MyExpense is the appropriate method for the reimbursement.
- Ask your Finance Manager which Department ID/Cost Center, SpeedType (funding), and Authorized Approver you should enter on the expense report.
- Gather and organize receipts and other documentation; refer to Claim Expenses for Reimbursement and these FAQ for guidance on receipt requirements, etc. For foreign individuals, obtain a signed Certification of Academic Activity Form.
- Guest expense reports: When submitting an expense report for a Guest (non-employee), ask for an address where they would like the check mailed. On the expense report, remember to select the UCSF Guest Expense Policy from the Policy dropdown on the report header.
- Delegates: When submitting an expense report as a delegate for another employee, remember to turn on the acting as a delegate feature in MyExpense before starting the expense report; see instructions below. When finished, remember to stop acting as a delegate.
Acting as a Delegate in MyExpense
First, the employee must grant you delegate access in their profile; refer to Grant Delegate Access for instructions. Then, you can act as a delegate:
- In MyExpense, click on the User Profile icon in the top right corner of your screen, and then select Act as Another User.

- Start typing the person's name in the search box, and select their name.
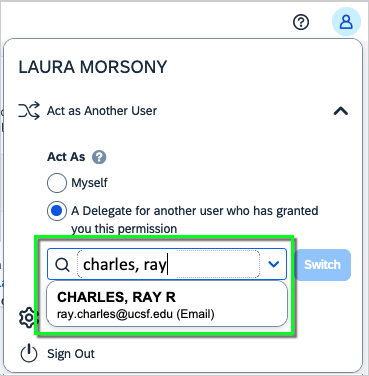
- Click the Switch button on the right.
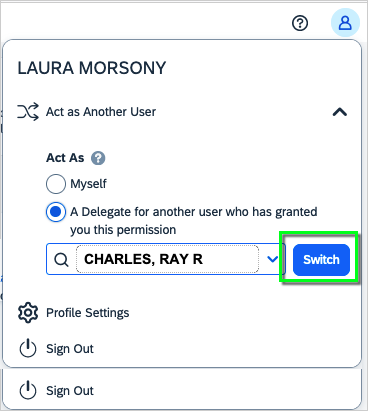
- You will now see a message at the top warning you that you are acting as another user.

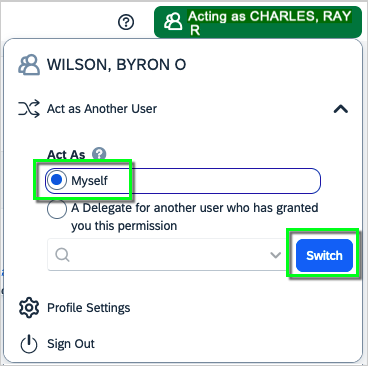
- When you're done, click the "Acting as" button (at the top). Then, select Myself and click the Switch button.
Mass Delegate Request in MyExpense
The Mass Delegate Template is used when requesting delegate assignment for more than 10 employees. Submitting a Mass Delegate Template saves you time in situations where you need to assign one delegate to an entire department, faculty, or student population.
When assigning a delegate for less than 10 employees, please refer to Grant Delegate Access.
Please ensure the following before submitting a ServiceNow ticket for Mass Delegate Requests:
- The requestor is the Financial Administrator.
- You are submitting a request to assign a delegate for more than 10 employees.
- You have filled out a separate Mass Delegate Template Excel Form for each delegate being assigned to your department.
Mass Delegate Request and Template Instructions
To request mass delegate assignments, the requestor must be the Financial Administrator and must fill out the Mass Delegate Template excel form for each delegate along with a ServiceNow ticket to the SCM Response Team.
Using the Mass Delegate Template (below), add the employees’ last name, first name, and employee ID to the corresponding columns followed by the delegate’s last name, first name, and employee ID:
Once the template has been filled out, submit a ServiceNow ticket to the SCM Response team and attach the excel form(s) for upload to MyExpense.
Accessing MyExpense
- Log into your UCSF MyAccess account, and select the MyExpense link to open the application.
- Note: You may need to click the Manage Favorites button in UCSF MyAccess to view the complete list of applications.

Start an Expense Report and Complete the Report Header
On the MyExpense homepage, click the Create Expense Report button.
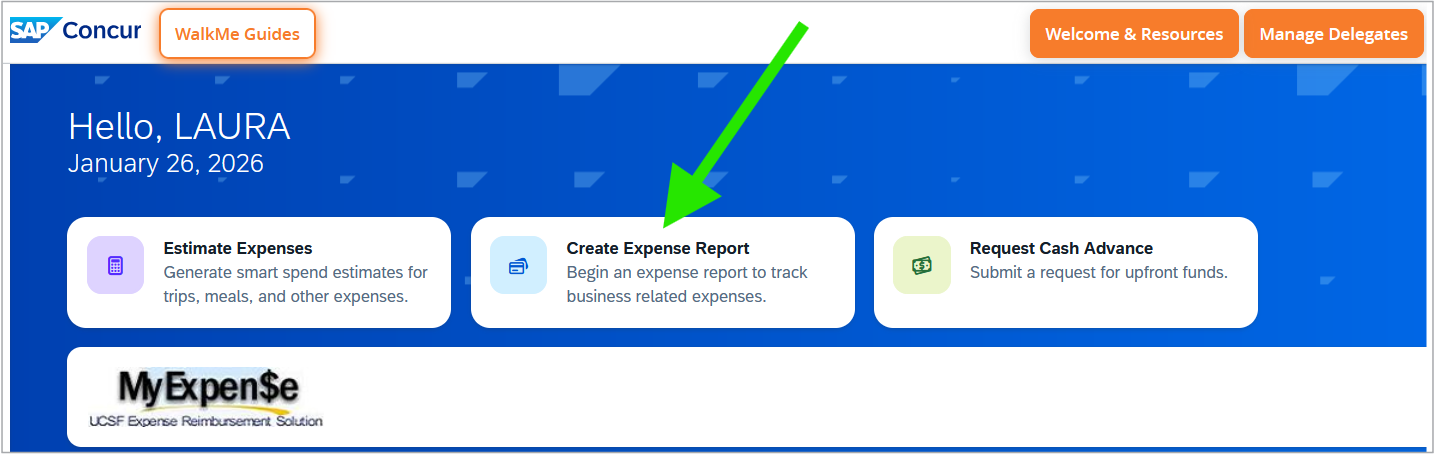
- The Create New Report pane will open.
- Enter information in the fields. All required fields are indicated by a red asterisk (*).
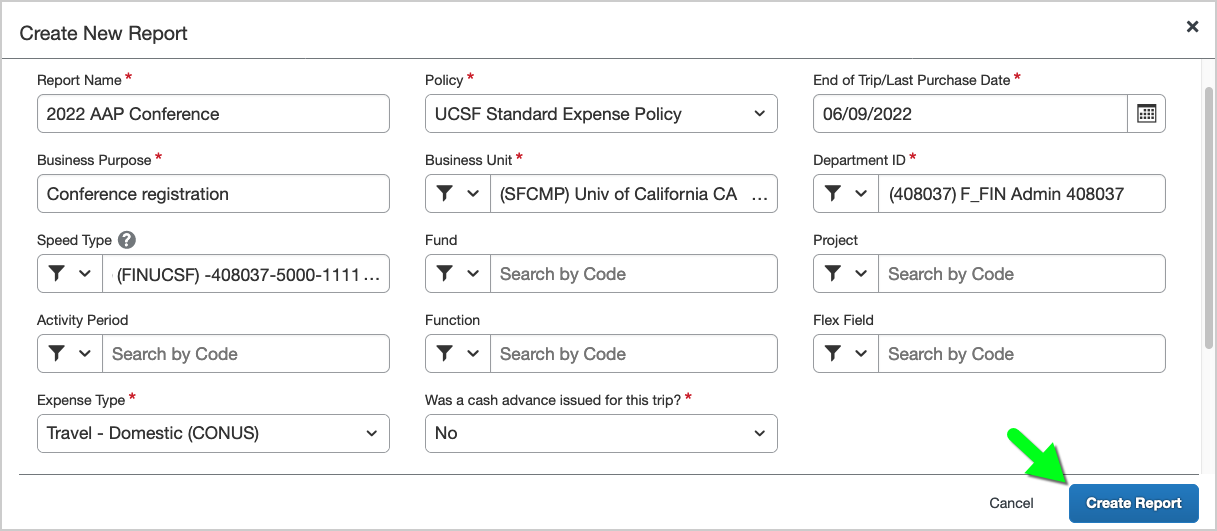
- Report Name: Enter a descriptive name, such as the trip return date – destination (e.g., 10/8/2017 – UCSD Trip).
- Policy: The report defaults to UCSF Standard Expense Policy, which is used for employee expense reports only. For non-employee expense reports, select UCSF Guest Expense Policy, and enter the Guest's name, address, etc., and a valid three-digit country code in the Guest Country field (such as USA); for valid Country Codes refer to Country Codes for MyExpense.
- End of Trip/Last Purchase Date: For business travel, enter the last day of the trip. For miscellaneous purchases, enter the last purchase date of the items. The report must be submitted within 45 days of this date to ensure timely reporting. Late expense reports may be reported as taxable income and subject to applicable taxes; read more about late expense reports.
- Business Purpose: Provide a detailed business purpose for the expenses (e.g., "Foundation Fundraising”).
- Business Unit: The report defaults to the UCSF Campus Business Unit (SFCMP). For expenses related to other units, click your cursor in the Business Unit field and select the relevant business unit from the dropdown (e.g., SFMED).
- Department ID (Cost Center): A value will default from your profile or you can start typing the code and make a selection from the dropdown.
- SpeedType: Enter a SpeedType or Fund-Project-Activity Period-Function-Flex Field (leave these fields blank when using a SpeedType).
- SpeedType: The SpeedType field is optional. Place your cursor in the box to view a list of available SpeedTypes related to your Department ID (Cost Center). Note: When using a SpeedType, do not enter the Fund-Project-Activity Period-Function-Flex Field (leave these boxes blank) or you will receive an error message.

- Fund-Project-Activity Period-Function-Flex Field: Only enter values in these boxes when you're not using a SpeedType (and leave the SpeedType field blank). The Fund-Project-Activity Period-Function fields are required, and the Flex Field is optional. Enter the Project before the Activity Period—when you place your cursor in the Activity Period box, a dropdown displays available Activity Periods for the Project. When using a non-sponsored Project, you must select NA from the Activity Period dropdown or you will receive an error message.

- SpeedType: The SpeedType field is optional. Place your cursor in the box to view a list of available SpeedTypes related to your Department ID (Cost Center). Note: When using a SpeedType, do not enter the Fund-Project-Activity Period-Function-Flex Field (leave these boxes blank) or you will receive an error message.
- Expense Type: Select an expense type from the dropdown, such as Travel – Domestic (CONUS).
- Was a cash advance issued for this trip?: The report defaults to No. Select "Yes" if a cash advance was issued for the trip.
- In the Comment box, enter any relevant information you think will help your Approver(s) understand the reason and justification for the expenses.
- Finally, click the Create Report button (at the bottom).
Assign an Available Expense to the Report and attach Receipts/Documents
Corporate Travel Card transactions and Cash Advances are automatically uploaded to your MyExpense account. In addition, you may email a receipt to [email protected] or upload the receipt via the SAP Concur Mobile App to automatically upload the expense to your MyExpense account. Otherwise, you may skip this step and enter expenses manually.
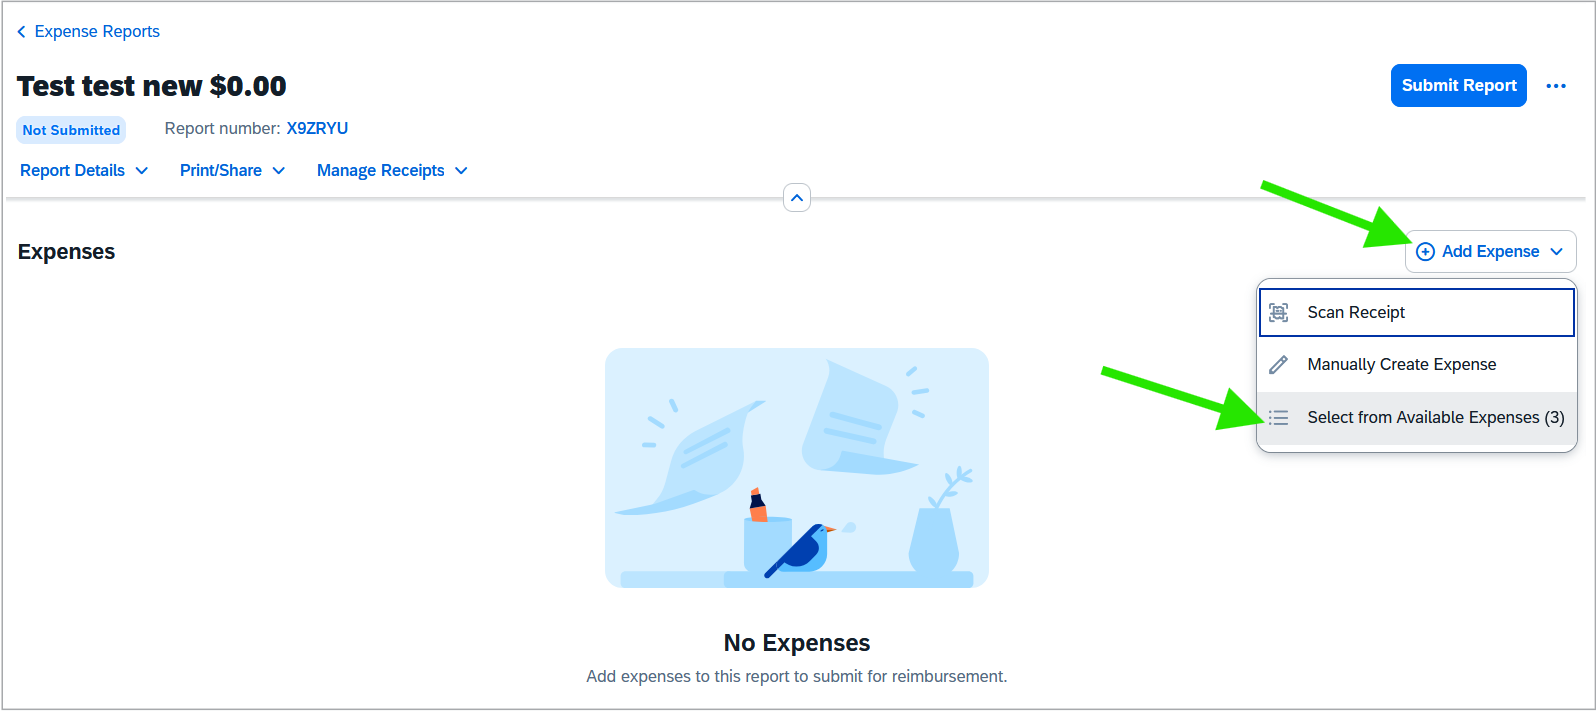
To assign an Available Expense to your expense report:
Click on the Add Expense button, and click Select from Available Expenses.
Tick the checkbox to the left of each expense, and click the Add to Report button.
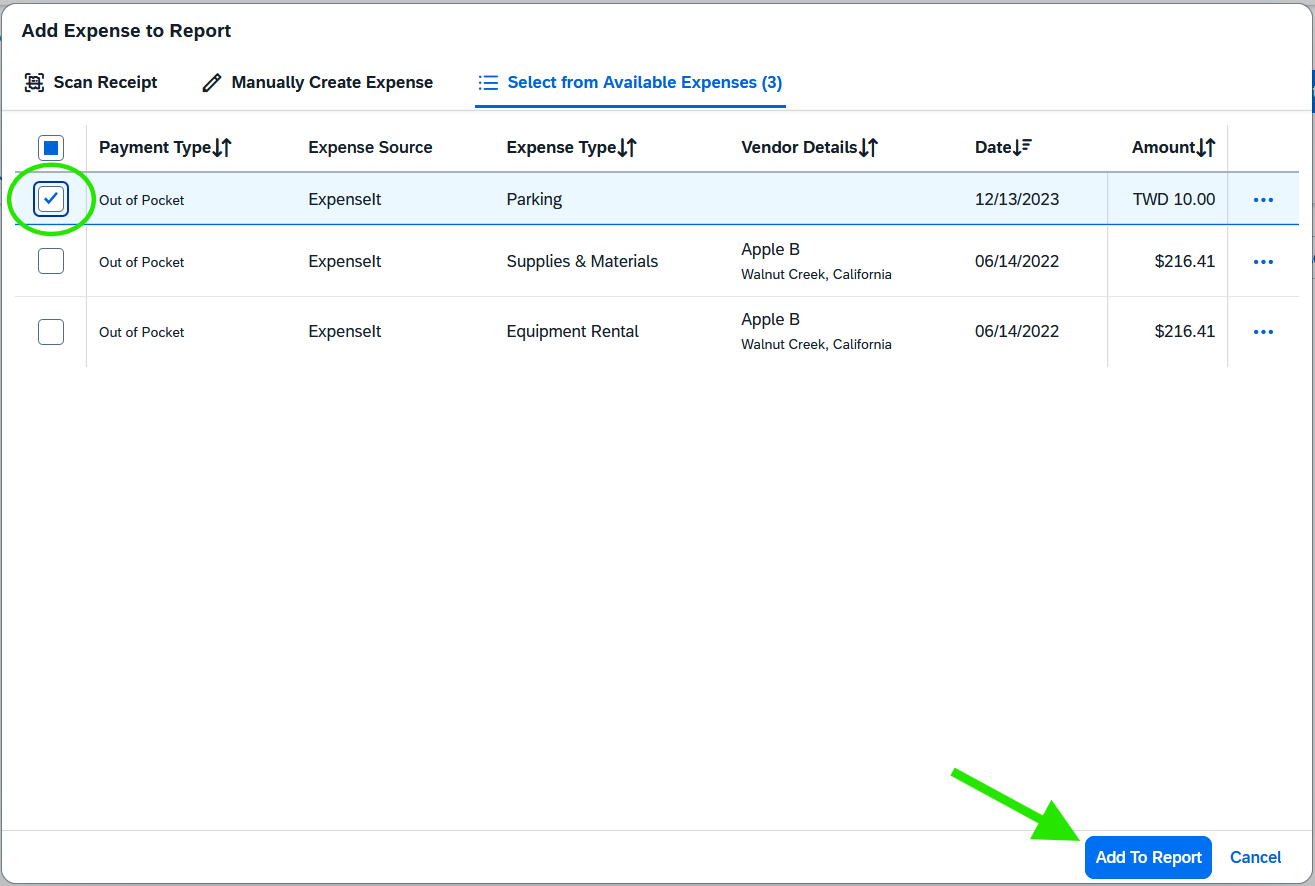
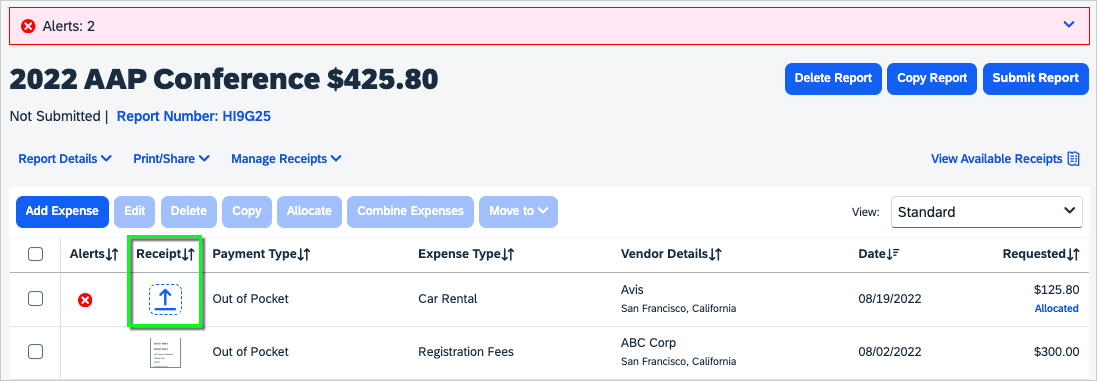
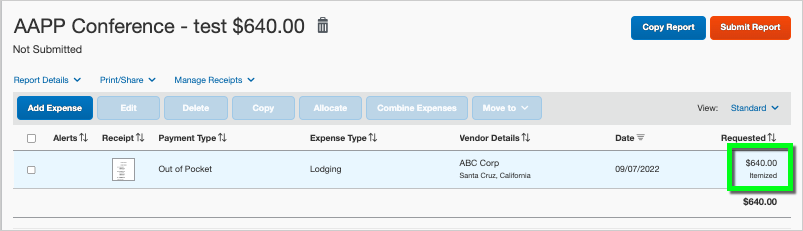
- The expense now appears on your expense report.
- Click on the expense line to double-check the accuracy of the expense details and make any corrections or attach a receipt.
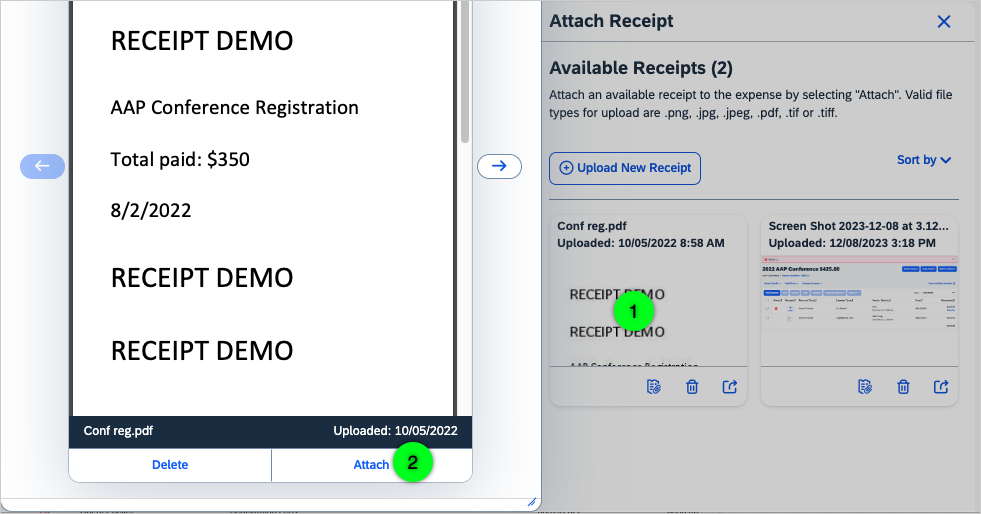
- An alert may appear next to the expense line, such as when a receipt is required. To add a receipt, click the Attach Receipt icon. Drag and drop the receipt into the window or click Upload New Receipt to search for the receipt on your computer.

Manually enter an Expense and attach Receipts/Documents
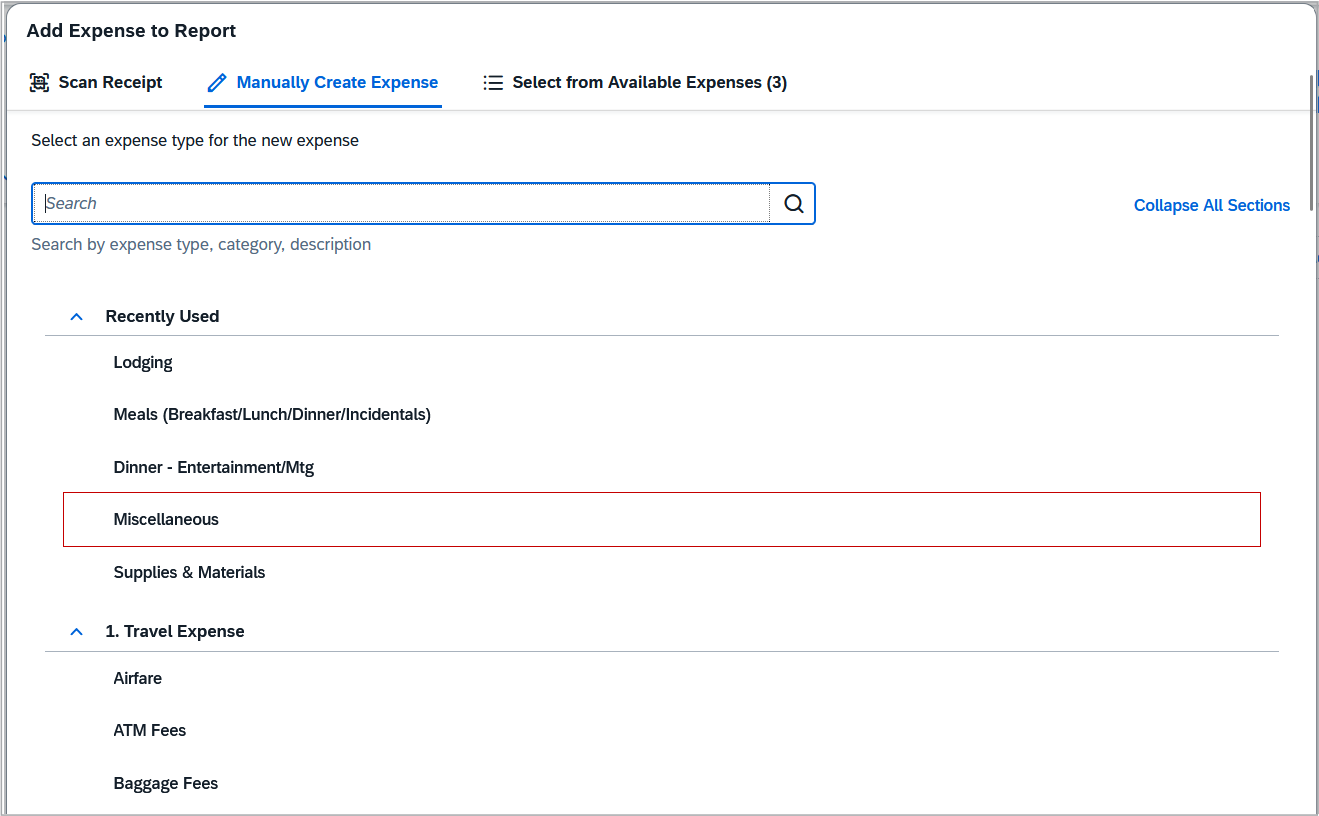
Click the Add Expense button (on the right), and click Manually Create Expense.

Select an expense type from the list or search for an expense type.
- Enter the expense details. All required fields are indicated by a red asterisk (*).
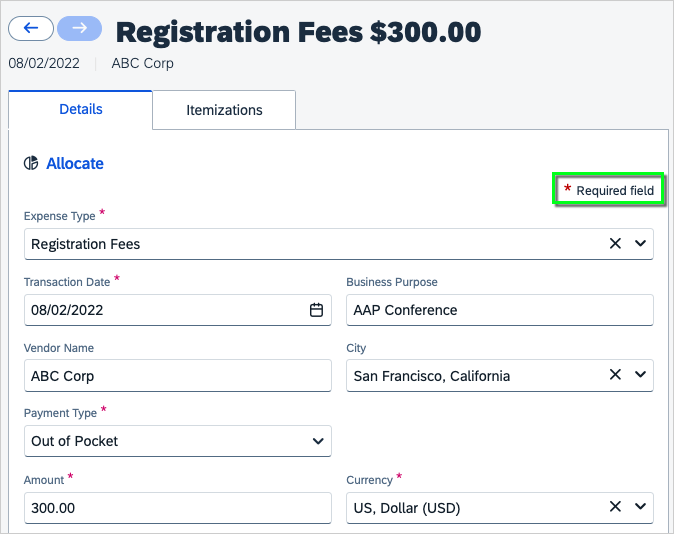
- Resolve any alerts that appear at the top. For instance, a receipt may be required. You may upload a receipt to your account by emailing the receipt to [email protected]. The receipt will be available to select when you click the Add Receipt button (select the receipt image and then click the "Attach" link under the receipt image); otherwise, select the Upload New Receipt button to search for the receipt on your computer.
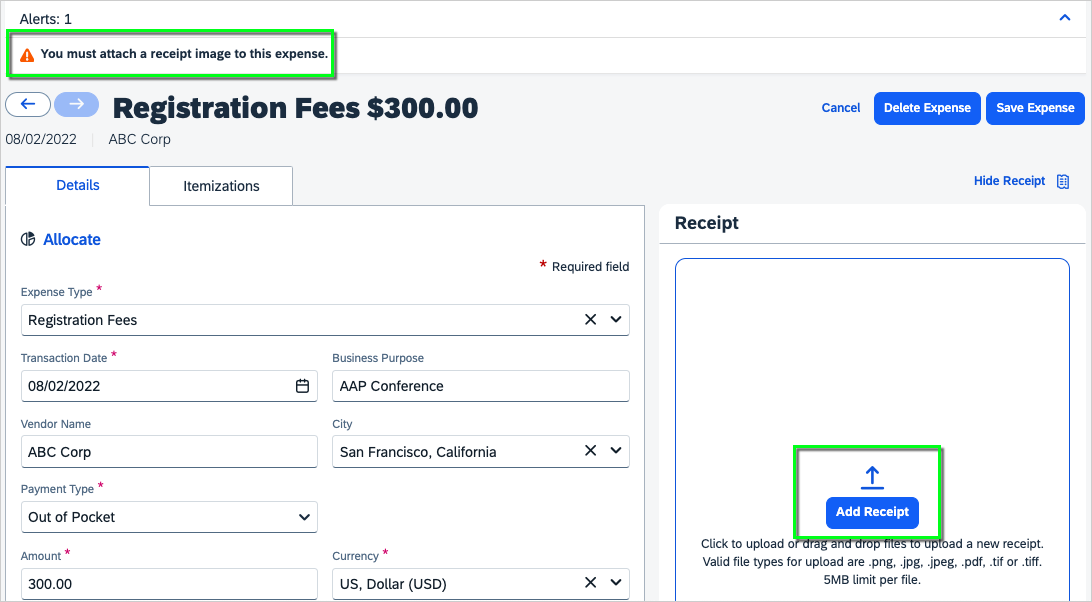
- Click the Save Expense button.
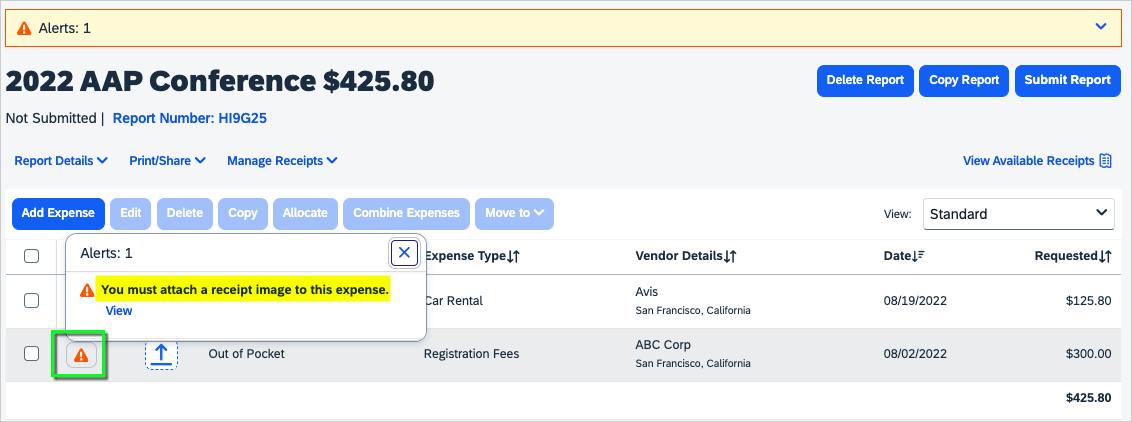
- The expense now appears on your expense report. Again, take note of any alerts (icons to the left of the expense). Click on the Alert icon to read the message, and click View to make corrections.
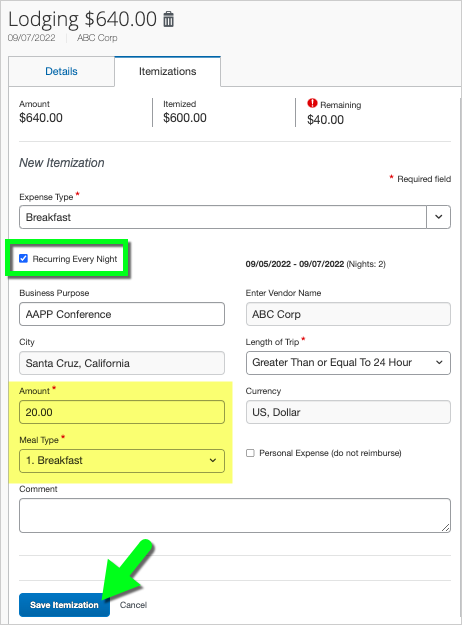
Itemize an Expense (Lodging example)
You may need to itemize an expense, such as a hotel receipt that includes the nightly room rate, taxes, internet fees, and other charges.
Note: Some uploaded receipts will be itemized automatically, but it depends how the vendor itemized the receipt.
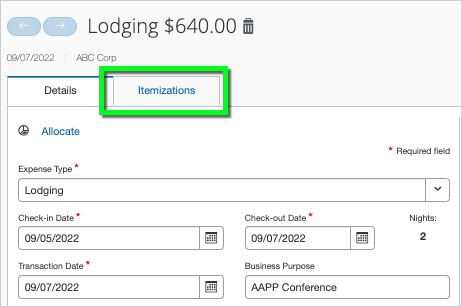
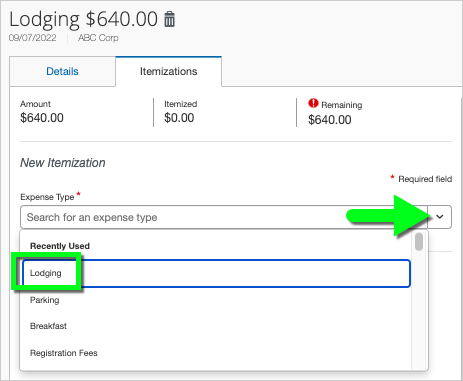
- On the expense details, click the Itemizations tab.
- Click the Create Itemization button.
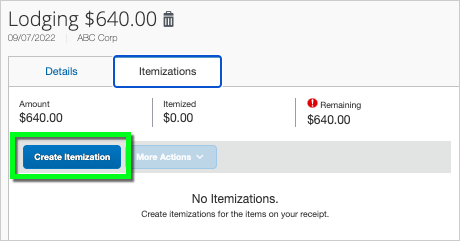
- Select an Expense Type from the dropdown. In this example, we've selected Lodging to enter the nightly room charges.
- Enter the expense details being careful to complete all fields marked with a red asterisk (*). You'll have different options depending on the type of expense. For lodging, you can choose Recurring Itemization (for multiple nights at one hotel) and choose whether the charges were The Same Every Night or Not the Same and enter the rate for each night. Be certain to enter the Room Rate separately from other charges, such as tax or internet fees.
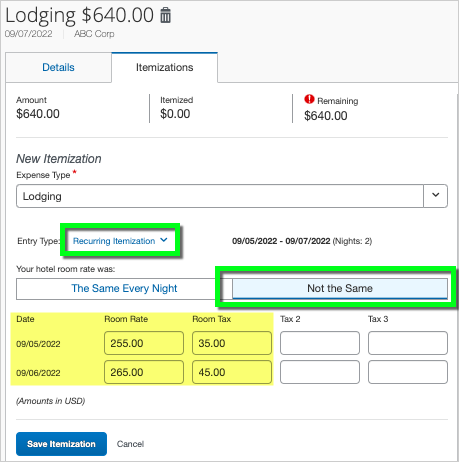
- Click the Save Itemization button.

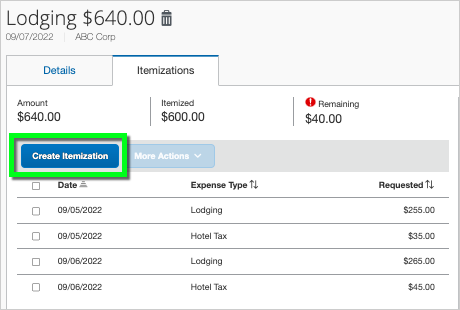
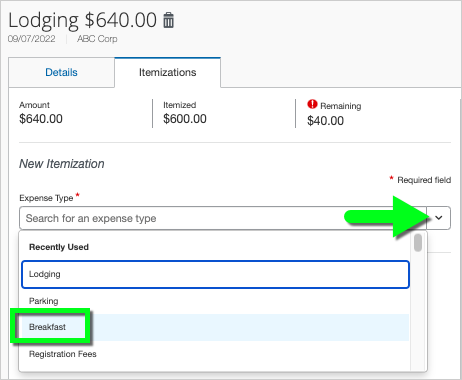
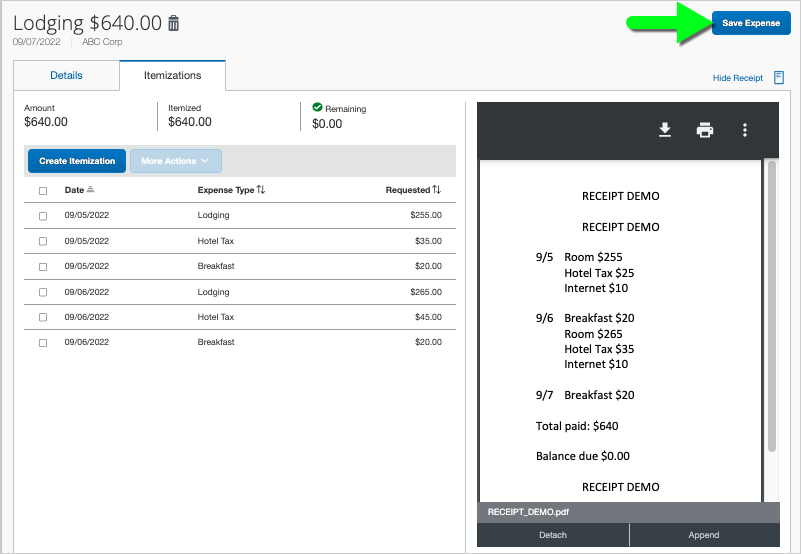
- Repeat steps 2-5 until the Remaining balance is $0.00. In this example, we've added a recurring breakfast charge of $20 per day.
- Upload/Attach a receipt, if required.
- Finally, click the Save Expense button.
Allocate an Expense across several Chartstrings/Funding Sources
Note: Skip this step if you are using a single SpeedType/Funding Source.
You may allocate an expense to split the cost among several different chartstrings/funding sources.
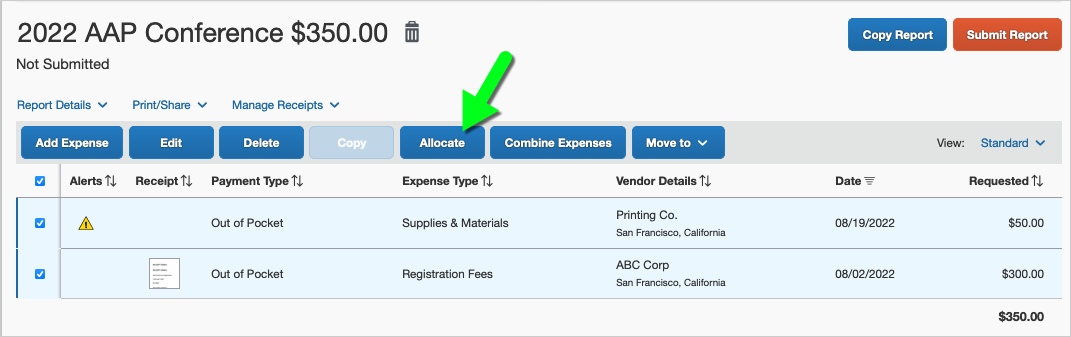
- On the expense report, check the box to the left of the expense line(s) to allocate.
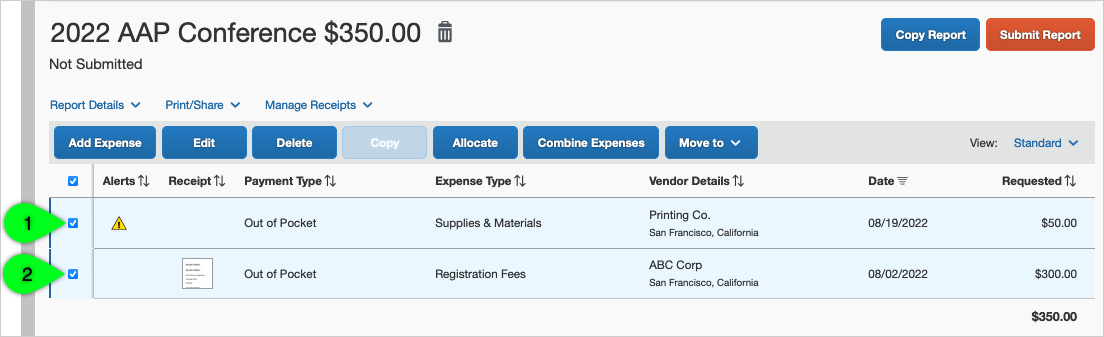
- Select the Allocate button.
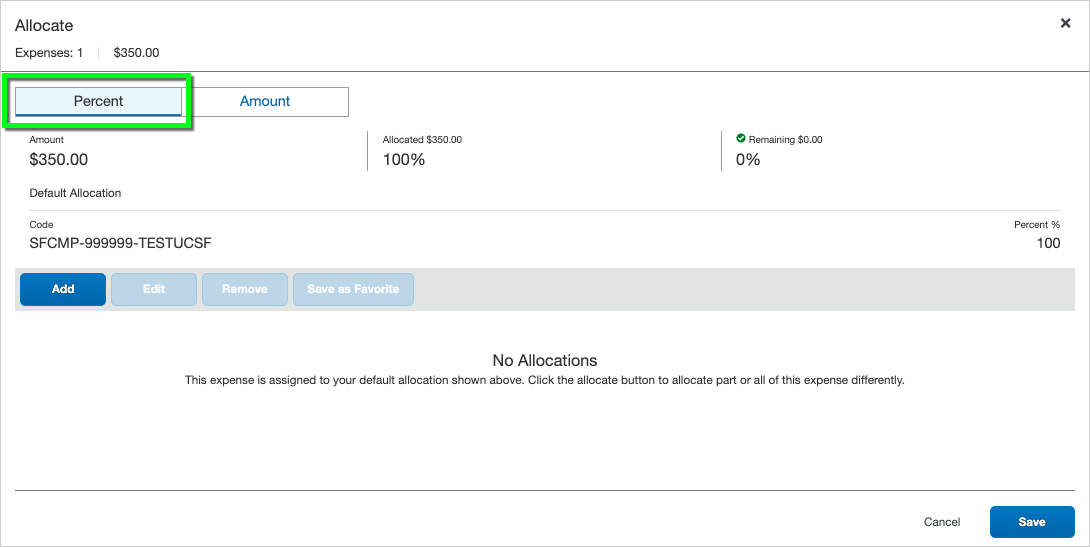
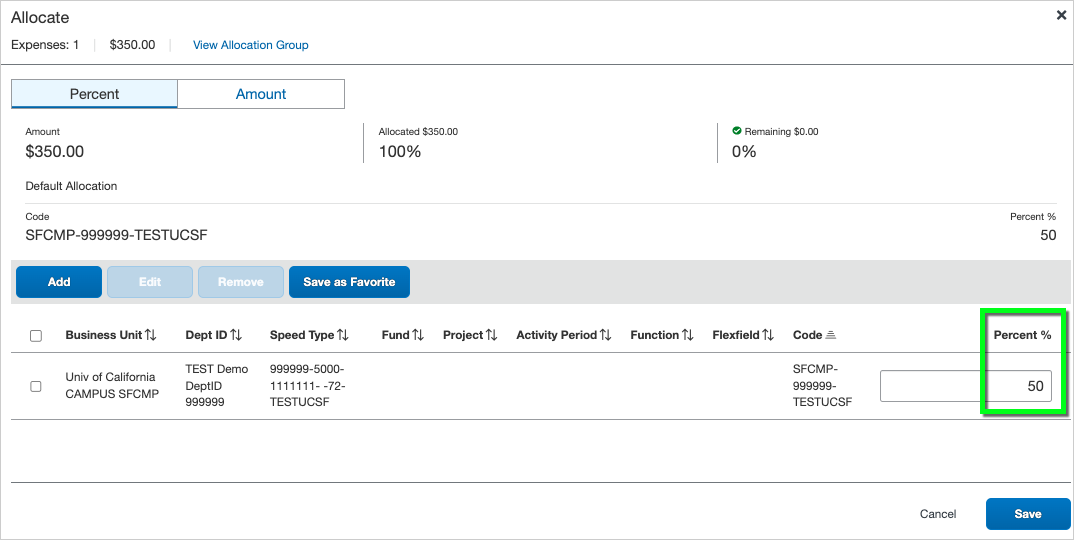
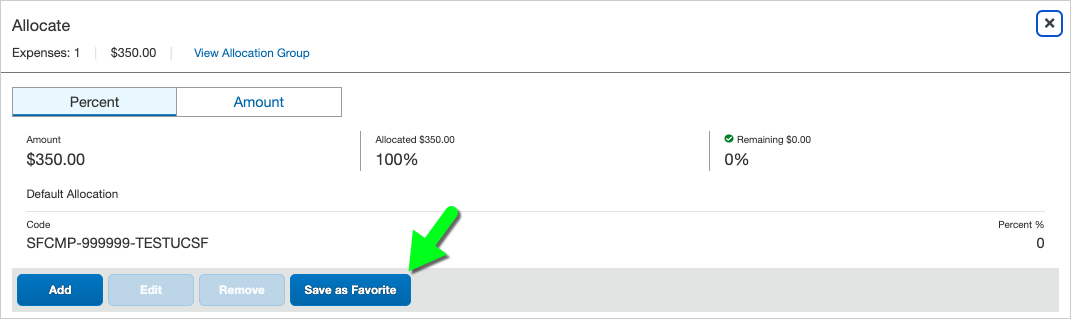
- Make a selection to split the cost based on the Percent or a specific dollar Amount. In this example, we'll split by percent.
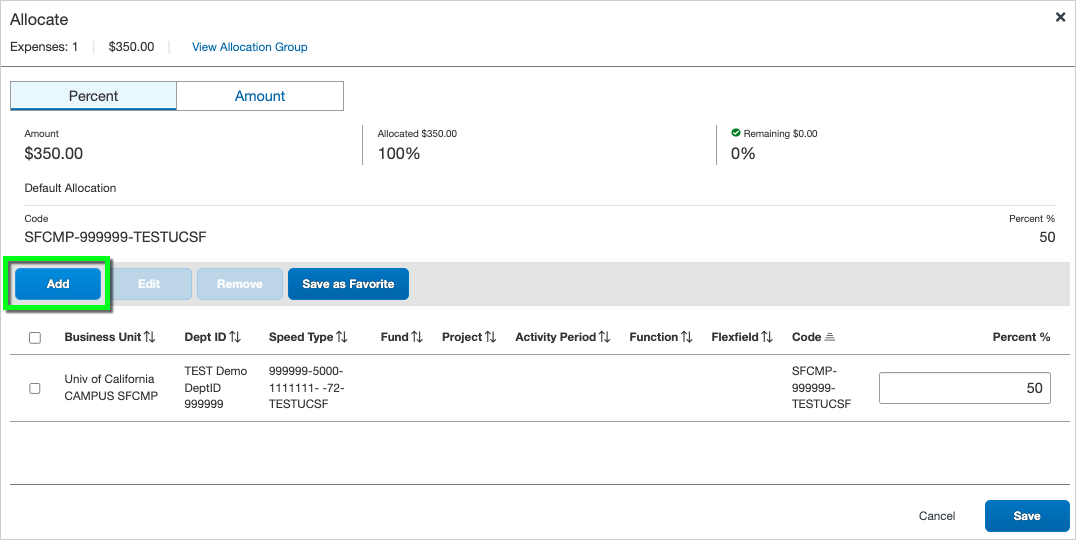
- Click the Add button.
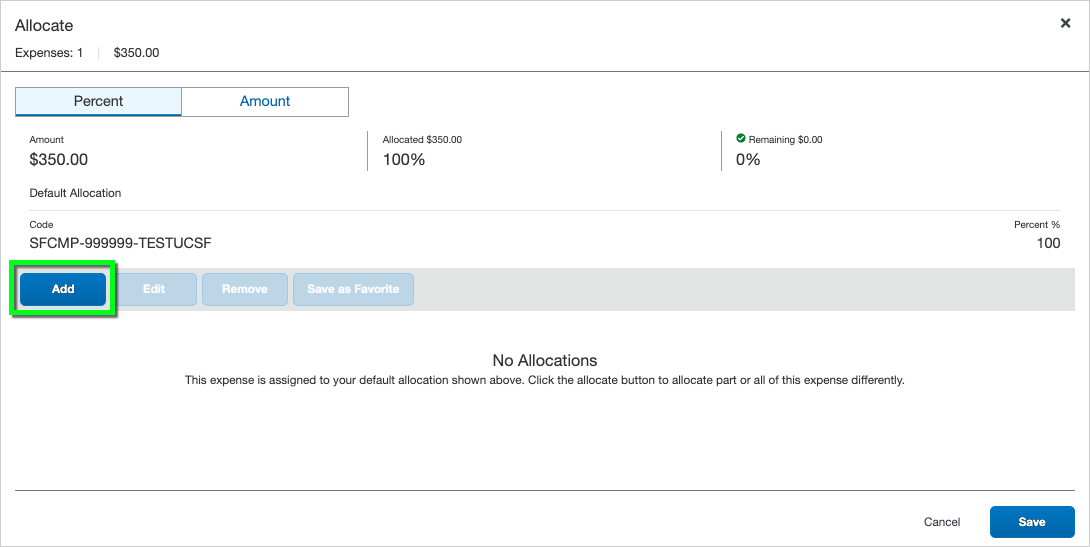
- If you'd like to use the chartstring/funding you entered on the Report Header, simply click the Save button without making any changes.
- Enter the percentage (on the right).
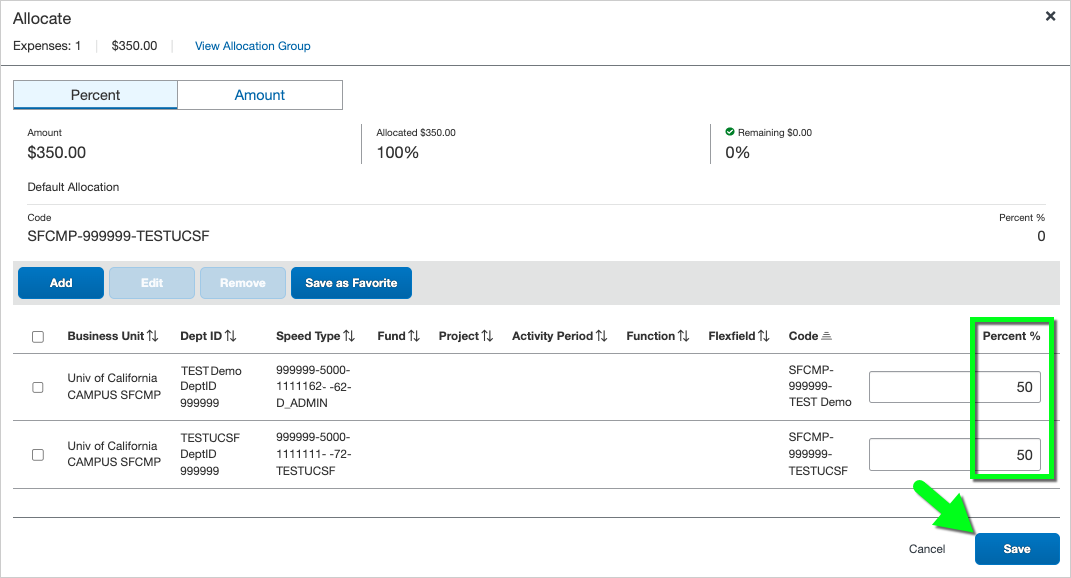
- Next, click the Add button again to add your next funding source.
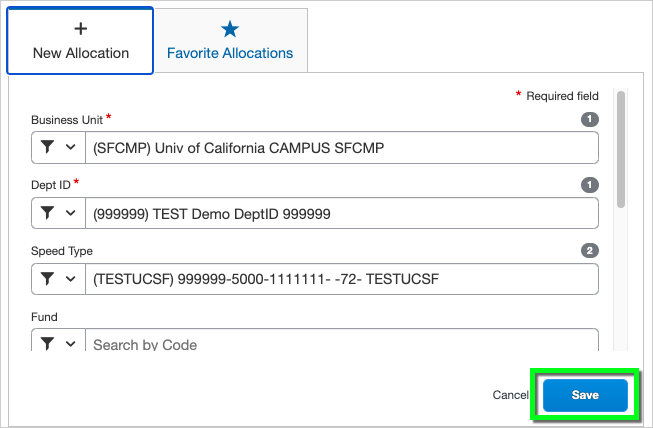
- Place your cursor in the SpeedType field to view available SpeedTypes (based on the Dept ID/Cost Center). You may enter a new Business Unit and/or Dept ID (Cost Center), if desired.
Note: If you aren't using a SpeedType, leave this field blank and instead enter the Fund-Project-Activity Period-Function-Flex Field. Enter the Project before the Activity Period—when you place your cursor in the Activity Period box, a dropdown displays available Activity Periods for the Project. When using a non-sponsored Project, you must select NA from the Activity Period dropdown or you will receive an error message. The Flex Field is optional.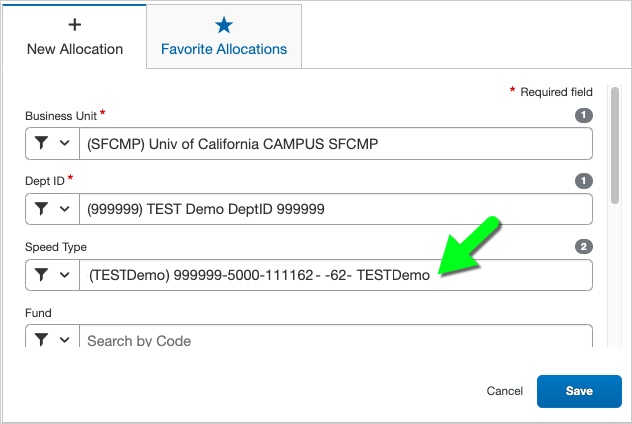
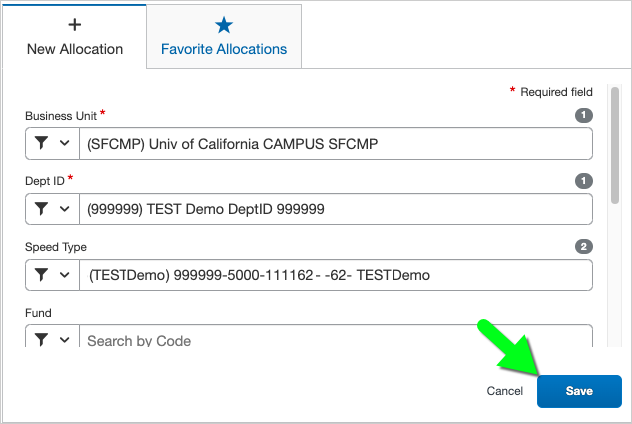
- Click the Save button.
- Update the percentage (on the right), if necessary.
- Repeat steps 7–10 as needed to enter the desired chartstrings.
- Optional: To save this allocation for future use, click the Save As Favorite button. Follow the prompts to enter a Favorite Name, and click Save.
- Next, double-check that your percentages are correct and add up to 100%. Finally, click the Save button.
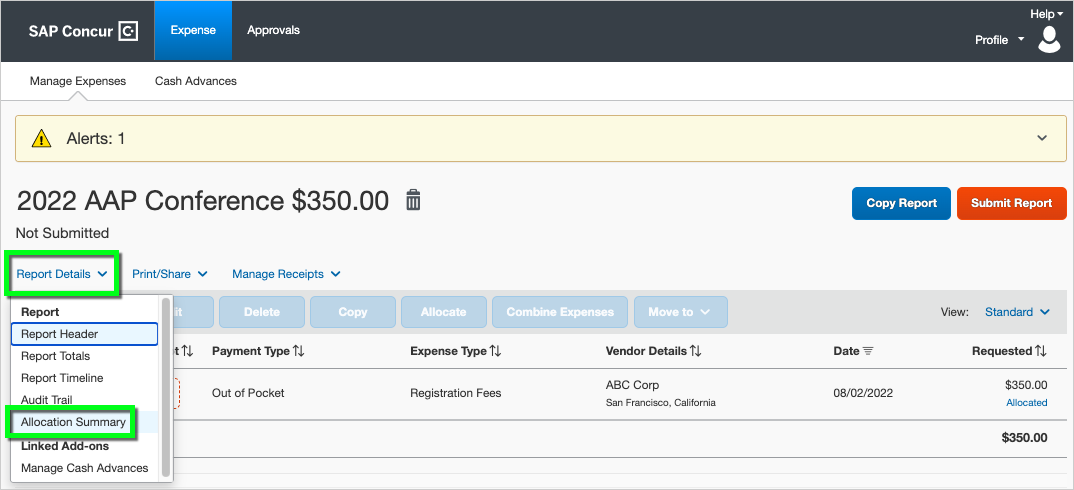
- To view the expense allocations for this expense report, click on Report Details > Allocation Summary.
Handling a Cash Advance
Note: Skip this step if you didn't request a cash advance for this trip. For instructions, please refer to Cash Advance.
Submit the Expense Report (and Add Approvers)
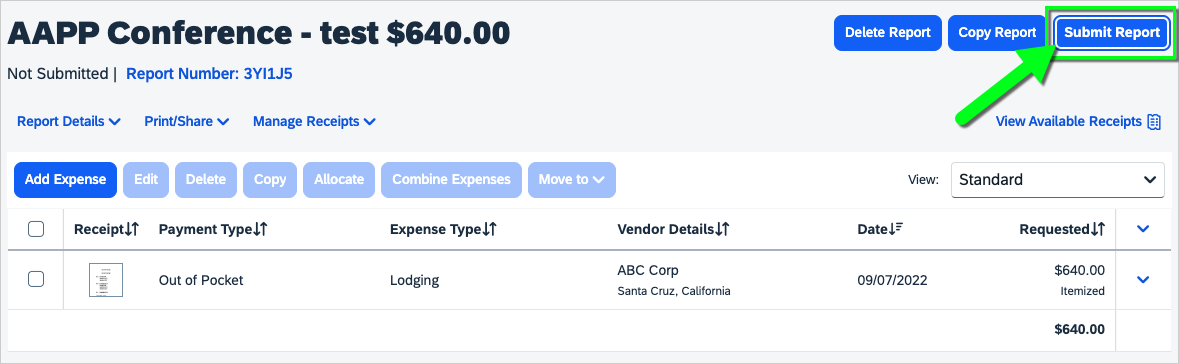
- When you're ready, click the Submit Report button and follow the prompts to complete the submission process.
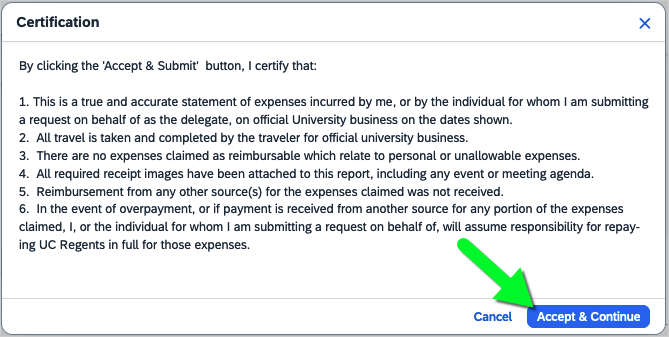
- Read the Certification statement and click the Accept & Continue button (you may need to scroll all the way to the bottom of the statement before the button is clickable).
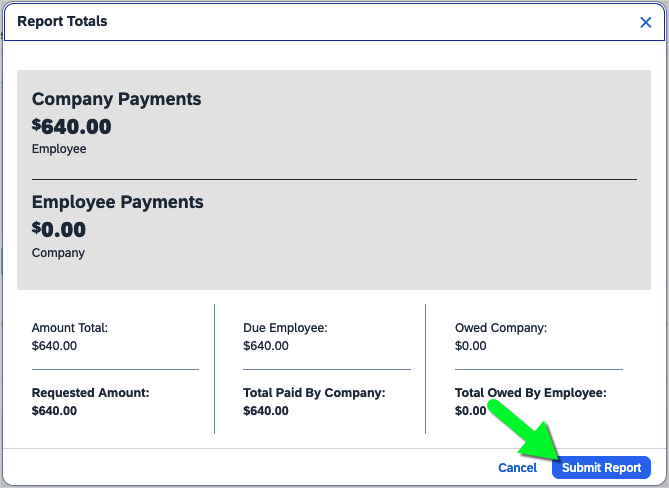
- Review the Report Totals and click Submit Report.
- Review the Approval Flow and add Approvers, if necessary.
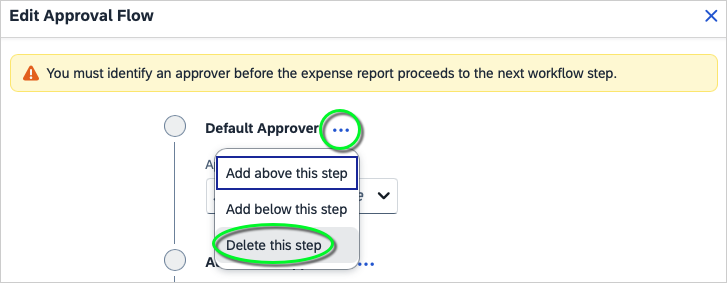
The Default Approver field is optional; delete this field if blank. To delete the Default Approver field, click the ellipsis (...) next to the Default Approver field and select Delete this step.
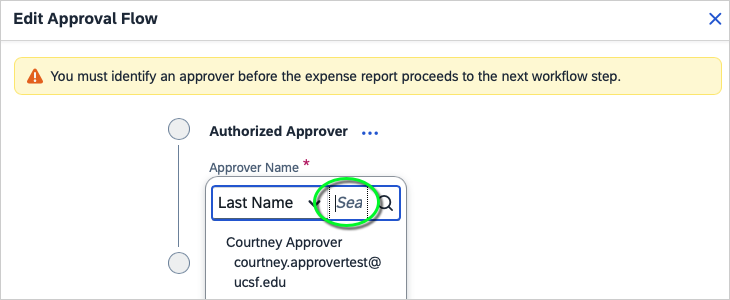
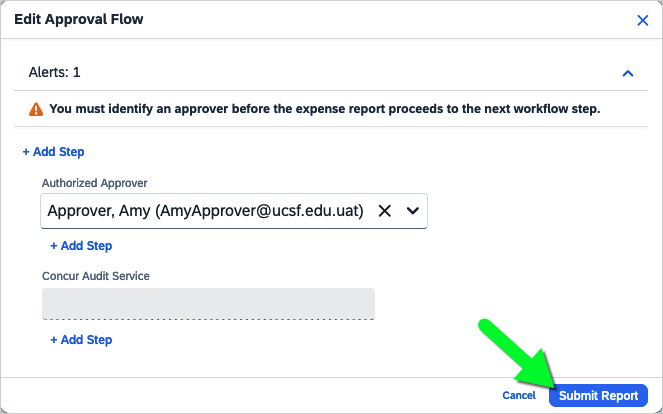
At least one Authorized Approver is required. If your Default Approver is an Authorized Approver, you don't need to enter a name in the Authorized Approver field. Otherwise, place your cursor in the Authorized Approver field and select a name (the options are based on the Dept ID/Cost Center you entered on the report).
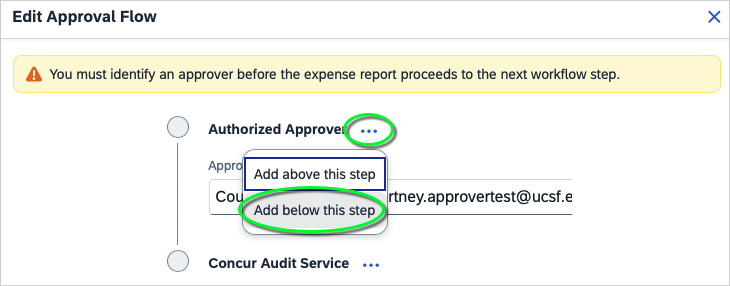
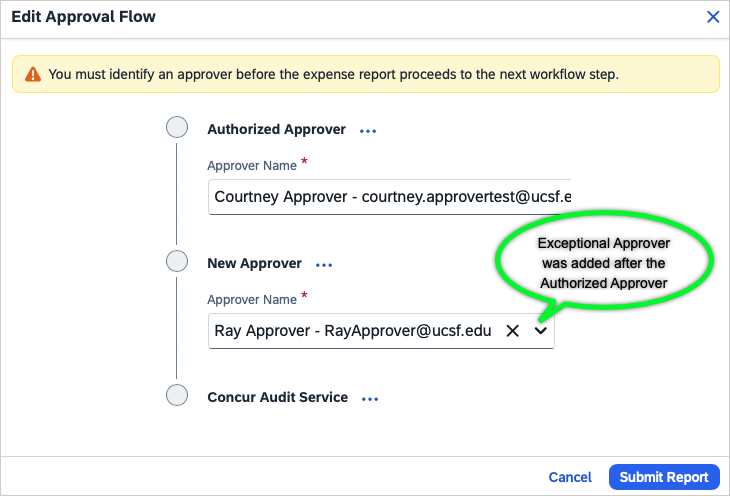
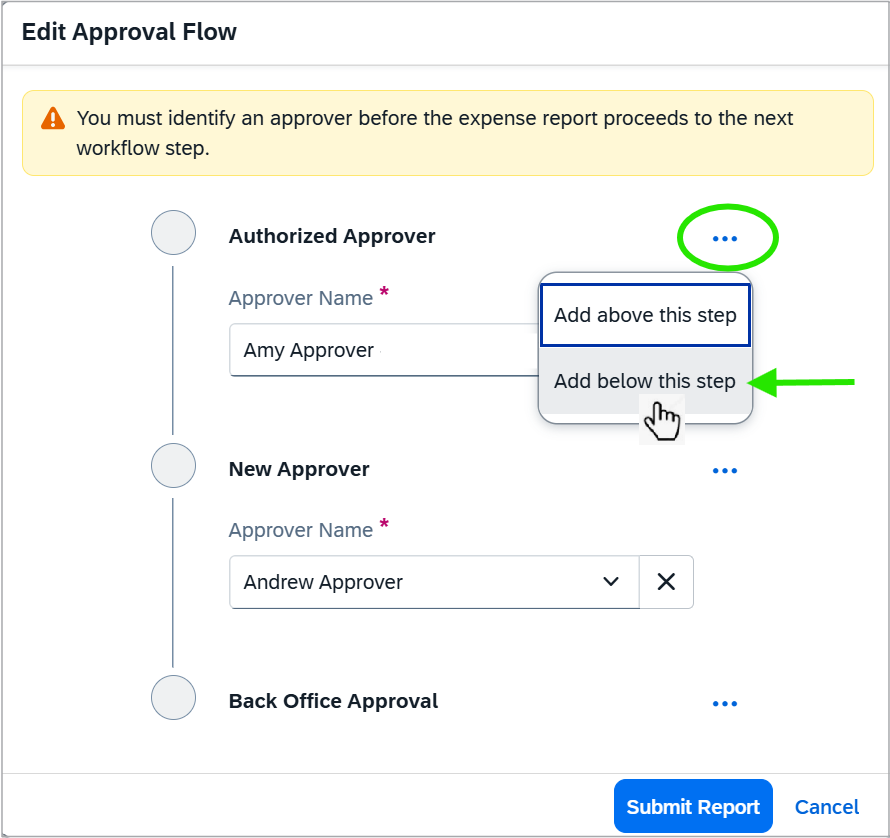
You may add additional approvers by clicking the ellipsis (...) next to another approval step and selecting Add above this step or Add below this step. When adding an Exceptional Approver, review the UCSF Travel and Meeting & Entertainment Approval Matrix to determine who has exceptional approval authority for your area. Add the Exceptional Approver only when necessary, and add them immediately after any other approvers you added/selected. Do not add approvers after the Concur Audit Service or Back Office Approval steps (if any).
- Finally, click the Submit Report button to submit the report.
- A confirmation will display on your screen.
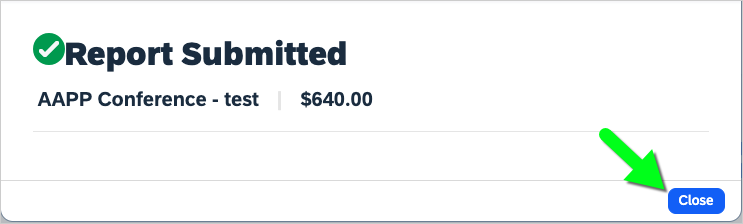
Frequently Asked Questions
Q: How do I upload and view receipts/expenses in my MyExpense account?
A:
- Corporate Travel Card transactions are automatically uploaded to your MyExpense account and saved in your Available Expenses.
- Cash Advances are saved in your Available Expenses.
- Receipts emailed to [email protected] or uploaded via the SAP Concur Mobile App are automatically uploaded to your MyExpense account and saved in your Available Expenses. The receipt image will generate an expense line.
- Receipts emailed to [email protected] or uploaded manually from your computer will be available to select from the receipt panel inside expense reports (but they will not appear in your Available Expenses).
- Note: You may need to verify your email address before you can upload receipts via email.
Q: How do I mark an expense as "personal" (not reimbursable)?
A: As a best practice, business expenses should not be mixed with personal expenses. For mixed expenses, you should enter only the amount to be reimbursed.
Alternatively, you can mark an expense (or part of an expense) as "personal" so it won't be reimbursed. On the expense details, select the "Personal Expense (do not reimburse)" checkbox. For an expense that is partially reimbursable and partially non-reimbursable (personal), you may itemize the expense and select the "Personal Expense (do not reimburse)" checkbox for the appropriate amount.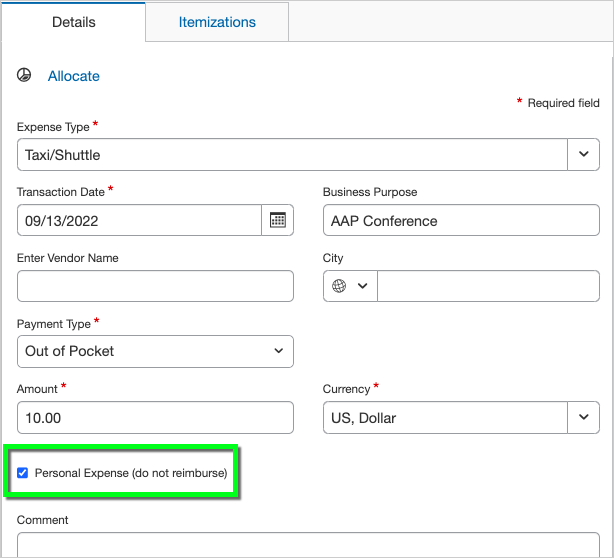
Q: How do I add an Exceptional Approver to the workflow?
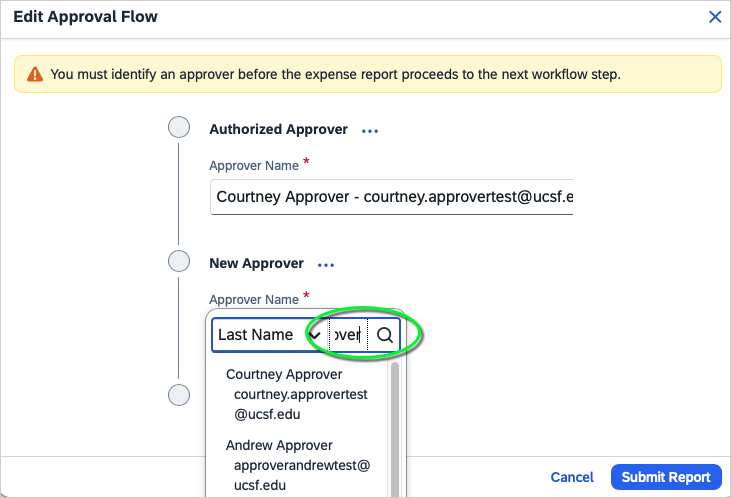
A: When submitting the report, you'll be prompted to review the Approval Flow. Click the ellipsis (...) to the right of your Default or Authorized Approver (whichever is last) and select Add below this step. Be sure to add the step after your Default/Authorized Approver but before the Back Office Approval step (if any). Review the UCSF Travel and Meeting & Entertainment Approval Matrix to determine who has exceptional approval authority for your area. Then, enter their name in the New Approver box.
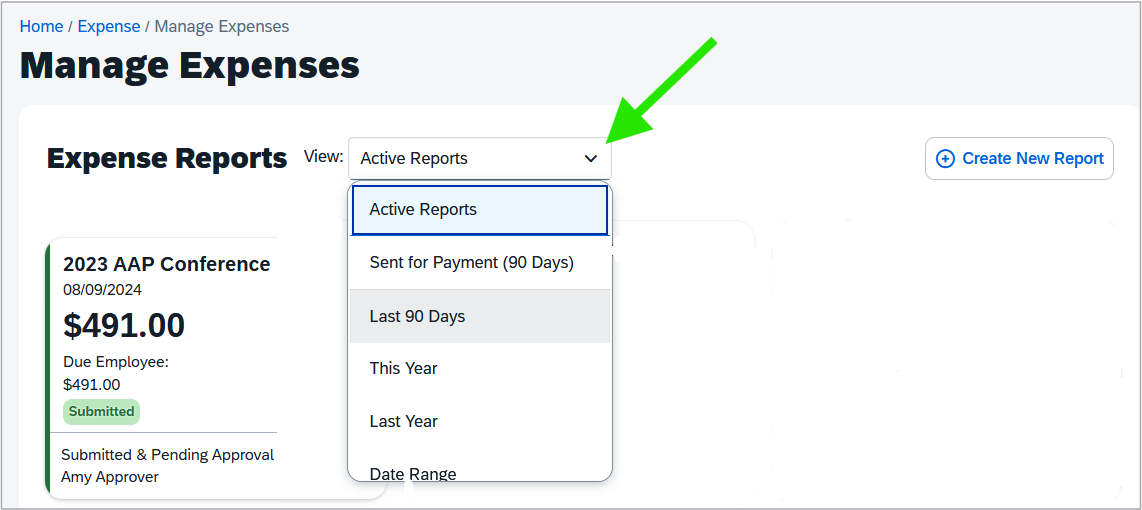
Q: How do I view the status of my reports?
A:
Click the Expense icon on the left side your screen, and select Expense.

This will display your active expense reports and the status of each report.
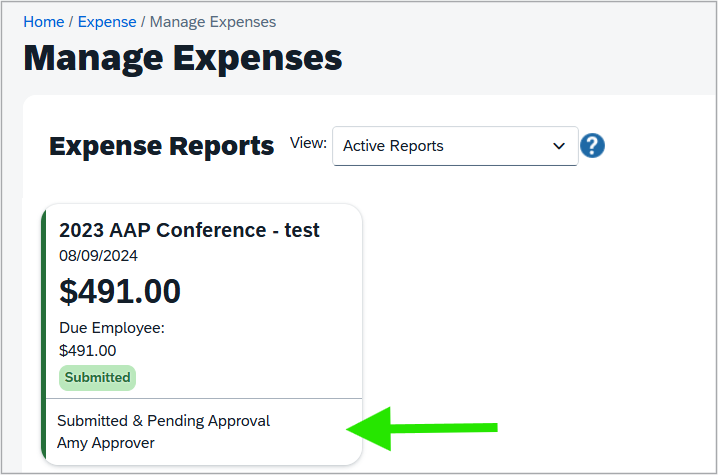
To view other reports, click the View dropdown and make a selection, such as Last 90 Days.
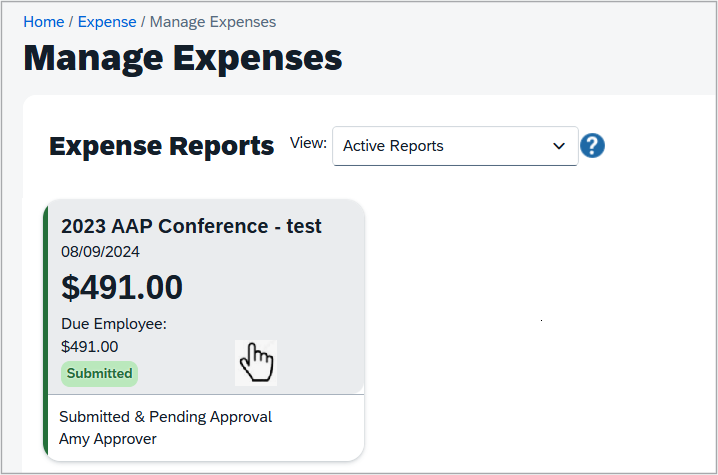
Q: How do I recall an expense report?
A:
Click the Expense icon on the left side your screen, and select Expense.

Select the report you wish to recall.
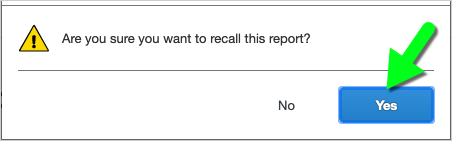
- Click the Recall Report button (on the right).
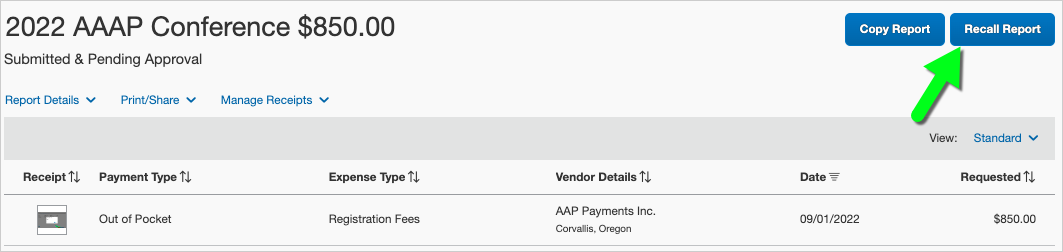
- Select "Yes" to recall the expense report.