Overview
Creating and updating your MyExpense (Concur) user profile.
This guide demonstrates how to save common profile settings, including funding sources and default approvers. If you set values in the profile, your expense reports will be automatically populated with the values.
Accessing MyExpense
Accessing MyExpense
- Log into your UCSF MyAccess account.
- Select the MyExpense link to open the application.
- Note: You may need to click the Manage Favorites button in UCSF MyAccess to view the complete list of applications.

View Your Profile
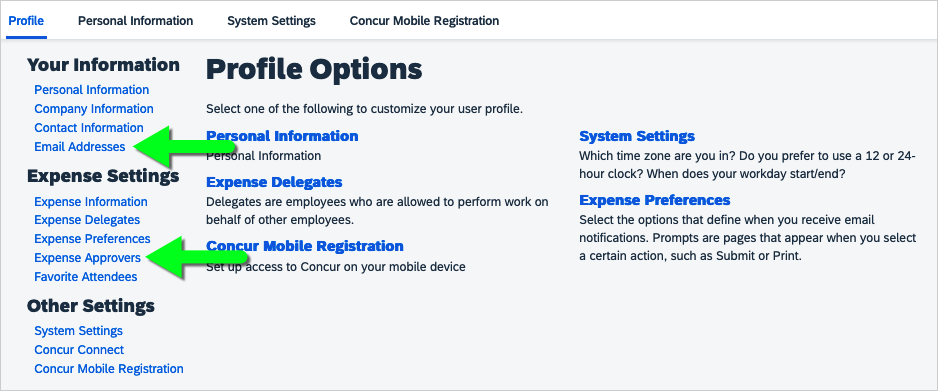
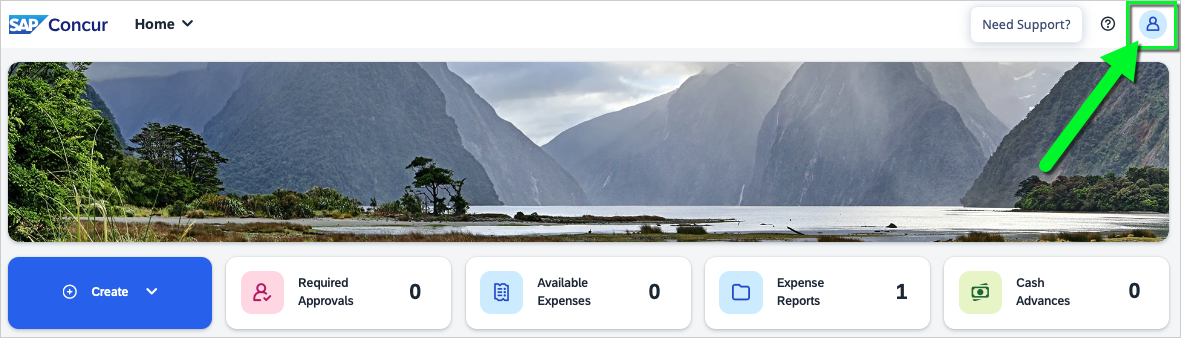
Navigate to your User Profile
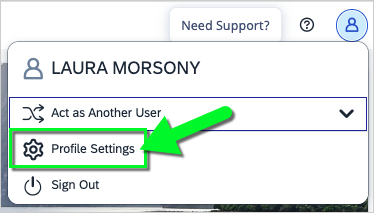
- Click on the User Profile icon in the top right corner of your screen, and then select Profile Settings.

- Make a selection from the menu on the left to view your profile settings, such as your Email Addresses or Expense Approvers.
Updating Your Profile
Change your default Business Unit
- Click on the User Profile icon > Profile Settings > Expense Information.
- Select your Business Unit from the dropdown, and click Save.
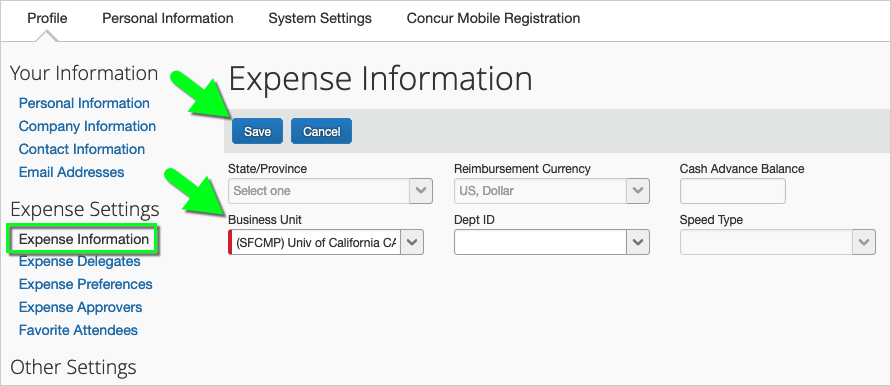
- Note: The default value is SFCMP (UCSF Campus) unless you select otherwise.
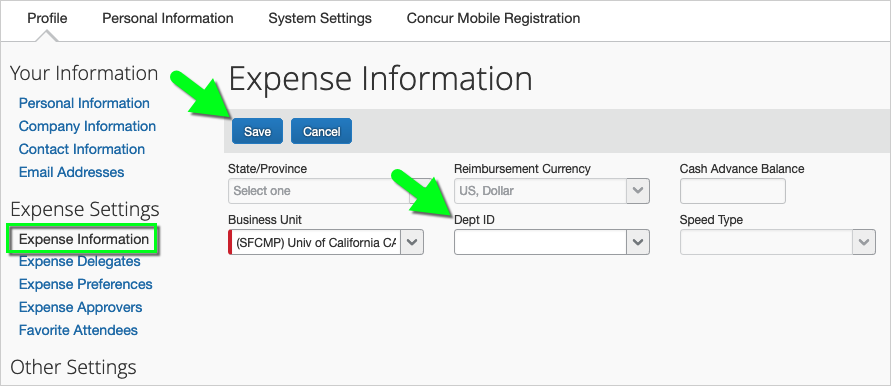
Save a default Dept ID
- Click on the User Profile icon > Profile Settings > Expense Information.
- Enter your Dept ID (Cost Center), and click Save.
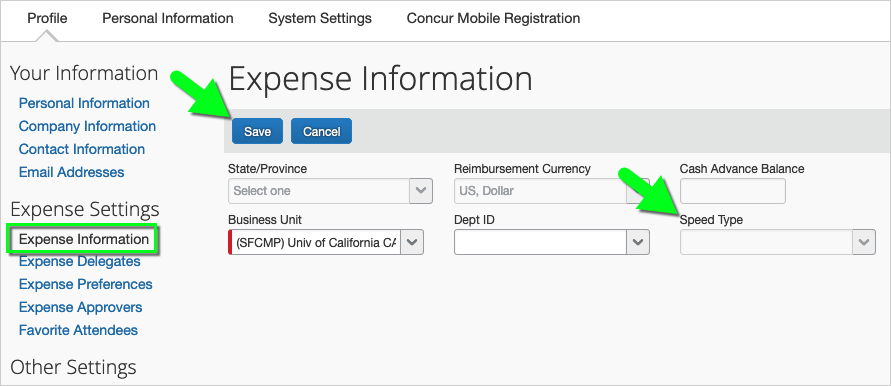
Save a default SpeedType
- Click on the User Profile icon > Profile Settings > Expense Information.
- Enter your SpeedType, and click Save.
Grant Delegate Access (for submitting expense reports)
You may grant permission to a delegate(s) to enter and submit expense reports on your behalf.
Click on your User Profile icon in the top right corner of your screen.
Then, select Profile Settings from the dropdown menu.
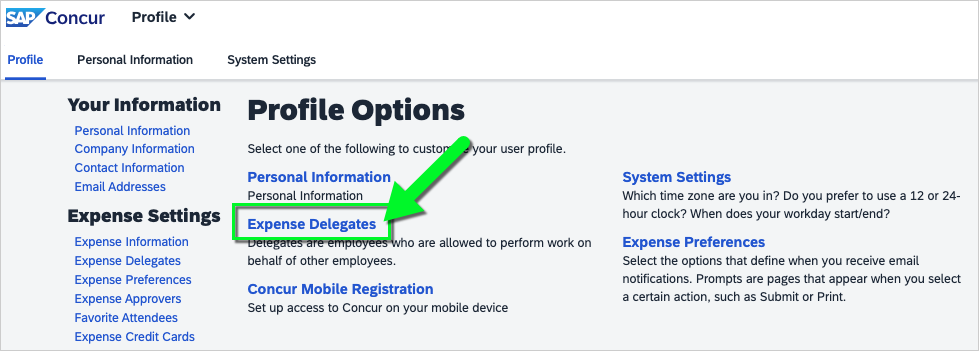
Next, select Expense Delegates.
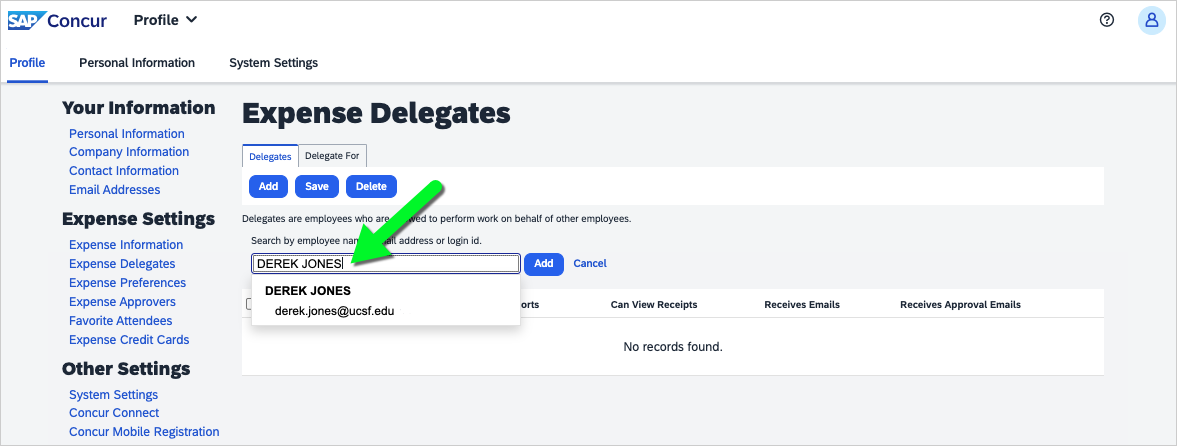
Click the Add button.

Search for your desired delegate, and select their name.
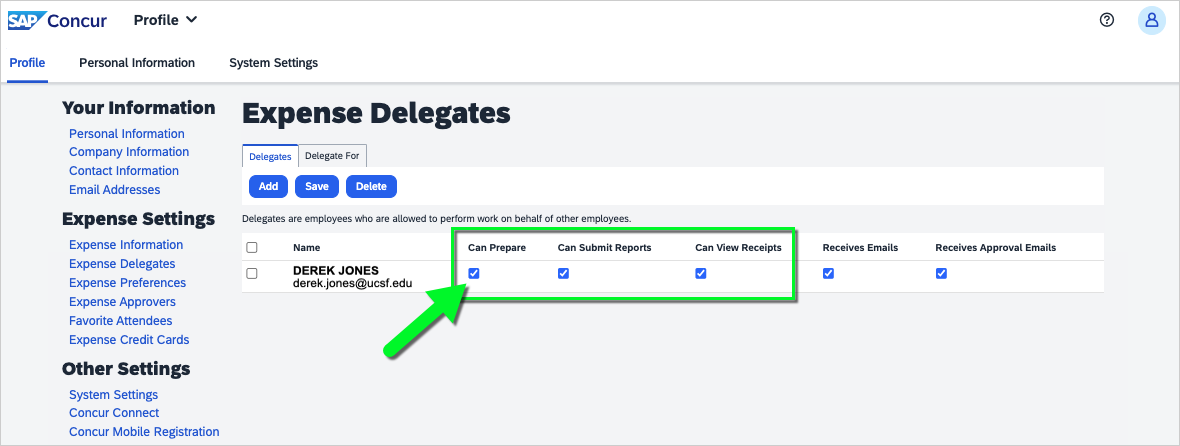
Check the boxes to grant the delegate permissions. At a minimum, select Can Prepare, Can Submit Reports, and Can View Receipts. Note: If you don't make any selections, the delegate won't be able to do anything.
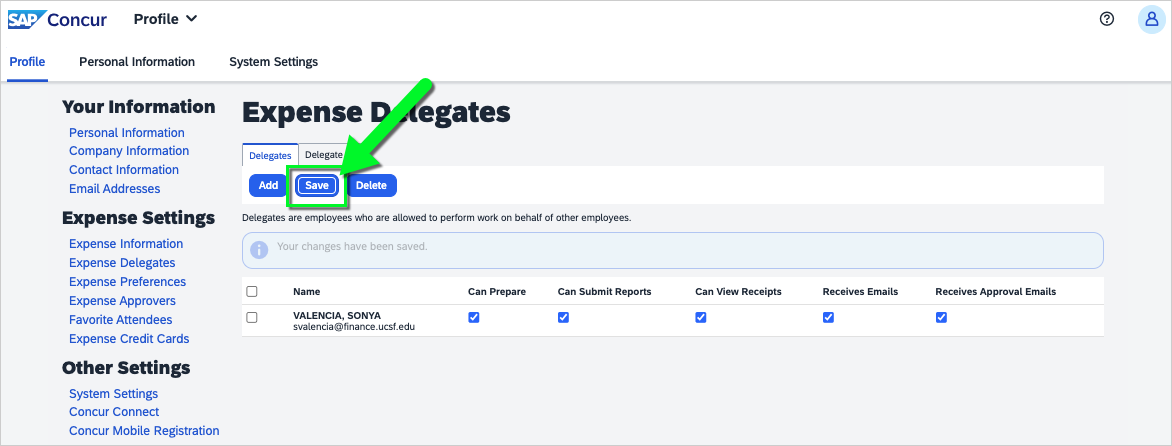
Click the Save button.
Description of Delegate Permission Settings:
- Can Prepare - The delegate can prepare your expense reports
- Can Submit Reports - The delegate can submit your expense reports
- Can View Reports - The delegate can view your saved receipts
- Receives Emails - The delegate receives a copy of your MyExpense emails
- Receives Approval Emails - The delegate receives a copy of your approval emails
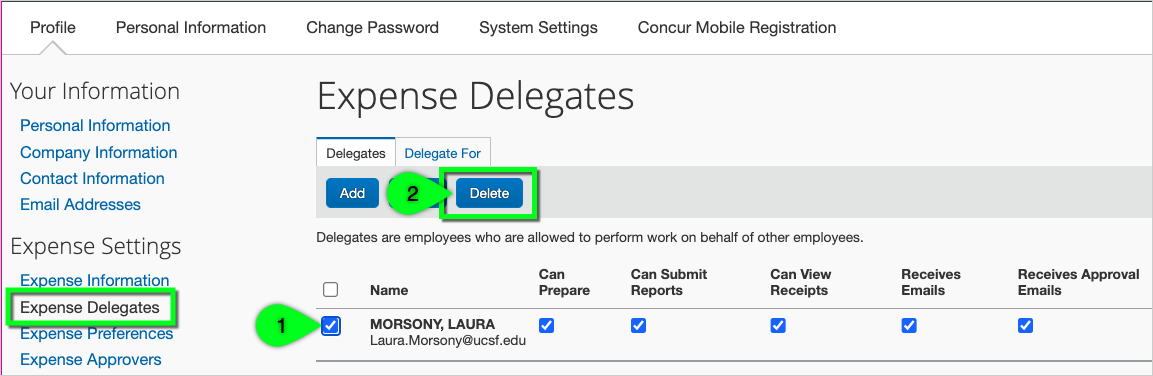
Remove Delegate Access
- Click on the User Profile icon > Profile Settings > Expense Delegates.
- Tick the checkbox located to the left of the delegate's name.
- Click the Delete button, and select OK in the pop-up message.
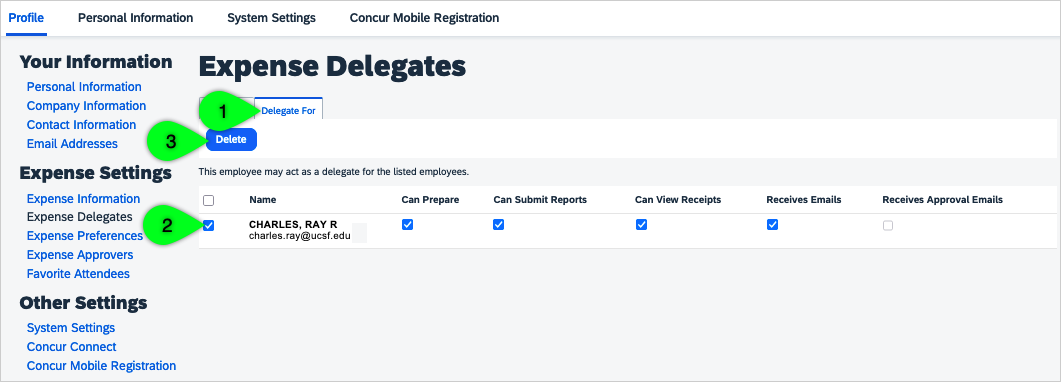
Remove Yourself As A Delegate
- Click on the User Profile icon > Profile Settings > Expense Delegates.
- Select the "Delegate For" tab.
- Tick the checkbox located to the left of the person's name for which you no longer wish to be a delegate.
- Click the Delete button, and select OK in the pop-up message.
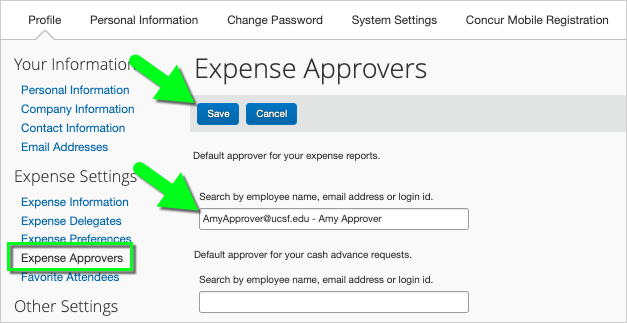
Save a default Expense Report Approver
You may enter any employee's name as your default approver (including any Authorized Approver). When you submit an expense report, you will be prompted to enter a valid Authorized Approver into the workflow, if required. If your default Approver is a designated Authorized Approver, you may leave the "Authorized Approver" field blank when submitting the expense report.
- Click on the User Profile icon > Profile Settings > Expense Approvers.
- Start typing the approver's name in the search box, and select their name. Then, click Save.
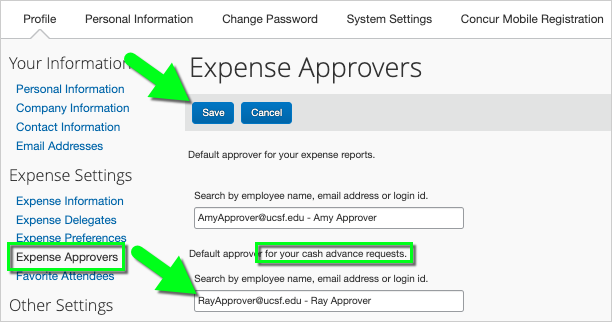
Save a default Cash Advance Approver
- Click on the User Profile icon > Profile Settings > Expense Approvers.
- Start typing the approver's name in the search box, and select their name. Then, click Save.
Set your Email Notification Preferences
- Click on the User Profile icon > Profile Settings > Expense Preferences.
- Check (or uncheck) the options for which you want to receive notifications, and click Save.
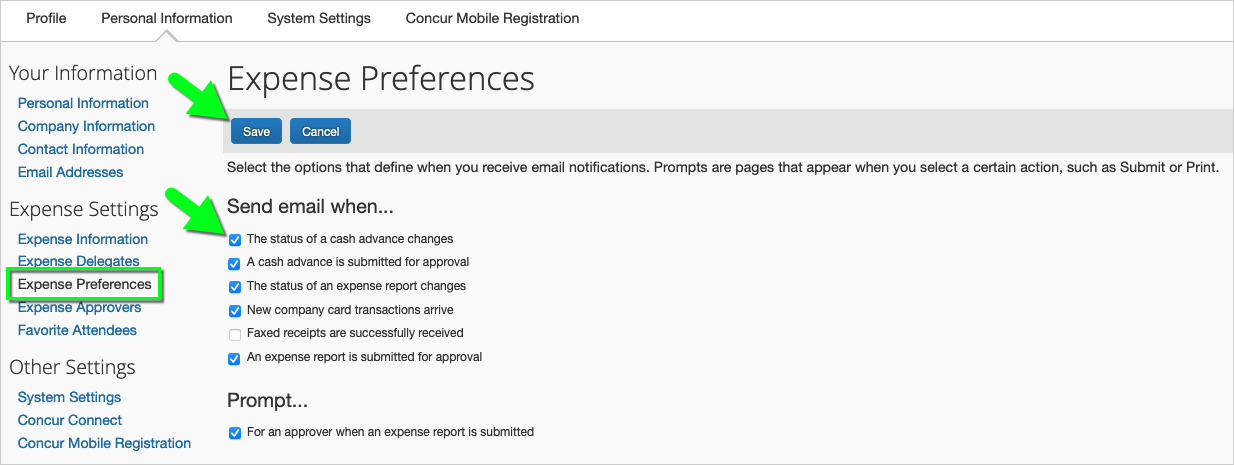
- Warning: Do not uncheck the prompt "For an approver when an expense report is submitted." You want this option checked so that you will receive a prompt to add an Approver to the approvals workflow (if required) when submitting your Expense Reports.
Verify your Email Address (for uploading receipts via email)
With a verified email address, you can email receipts to [email protected] (receipt image will be uploaded to your MyExpense account in your Available Receipts) or email [email protected] (receipt image will be analyzed and uploaded to your MyExpense account as an expense line in your Available Expenses).
- Click on the User Profile icon > Profile Settings > Personal Information.
- Scroll down to the Email Addresses section.
- Select the Verify link next to the email address.*
- You will be sent a verification email. Locate the code included in the email.
- Enter the code in the Enter Code field next to the email address you’re verifying in your MyExpense profile (you may need to refresh your browser and/or log out of MyExpense and log in again to make the Enter Code field appear).
- Click OK to complete verification.
*If you need to add a new email address, click "Add an email address," enter the email address, and click OK.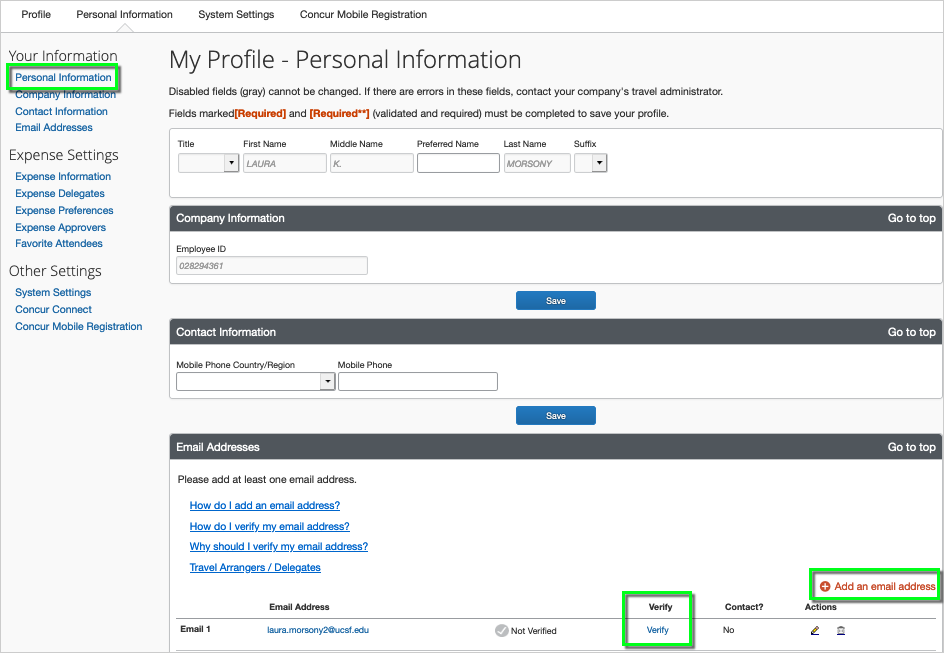
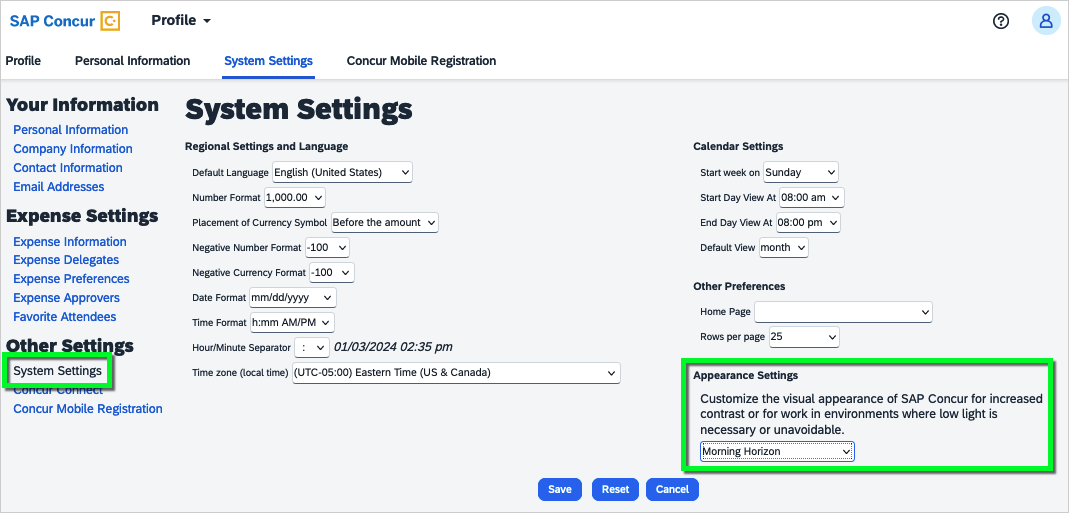
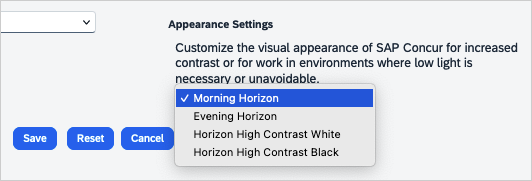
Change the color theme
- Click on the User Profile icon > Profile Settings > System Settings.
- Select a theme from the Appearance Settings dropdown, and click Save.