Overview
This is BearBuy training on when and how to use receiving options. Receiving is not required in the BearBuy system, and it will not impact invoice processing or payment. However, campus departments are required by Audit to maintain records confirming physical receipt of goods or documentation showing that services were in fact rendered by the supplier. There is an optional receiving function in BearBuy to help departments maintain these records. Most commonly, departments use the receiving function to upload scanned images of packing slips.
BearBuy can also be used for receiving that is required by certain sponsored funding agencies.
Notes:
- Receipts cannot be attached or canceled once the purchase order (PO) is closed.
- Shoppers can create and view receipts for their own orders only.
- Requesters and Approvers can create and view receipts for all orders.
- Viewers can view all receipts, but they can't create receipts.
Accessing BearBuy
- Login to your UCSF MyAccess account, and go to the App Library.
- Search for BearBuy, and click the Launch button to open the application.
Note: You may need to click the All Applications tab before you search. - Note: You may need to click on the Manage Favorites button to view the complete list of applications.
Enter a Receipt
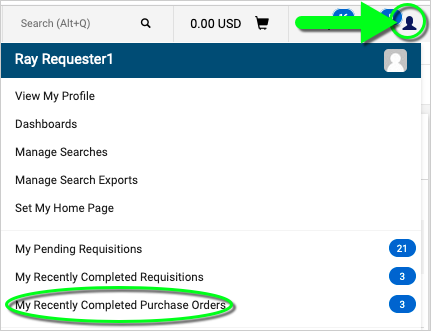
- Navigate to the Purchase Order (PO) in BearBuy. You can navigate to the PO by searching for the PO Number in the Quick Search bar at the top of your screen or click on your user profile icon and select My Recently Completed Purchase Orders to view a list of your orders from the last 90 days.

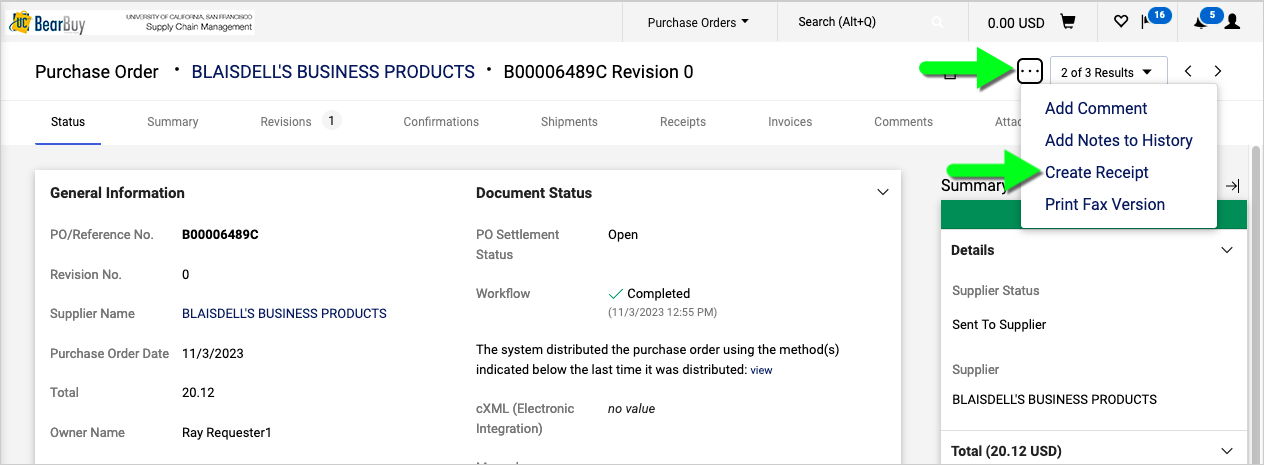
- On the PO, click the ellipses at the top and select Create Receipt.
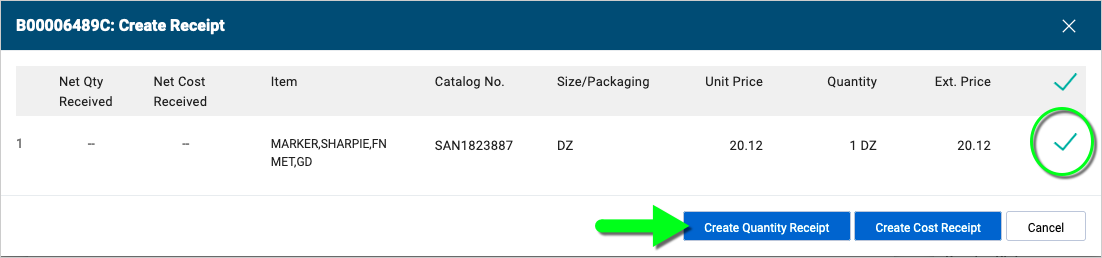
- In the Create Receipt window, ensure all relevant line items are checked. You may be given the option to select Create Quantity Receipt or Create Cost Receipt. In this example, we'll select Create Quantity Receipt for this shipment of office supplies.
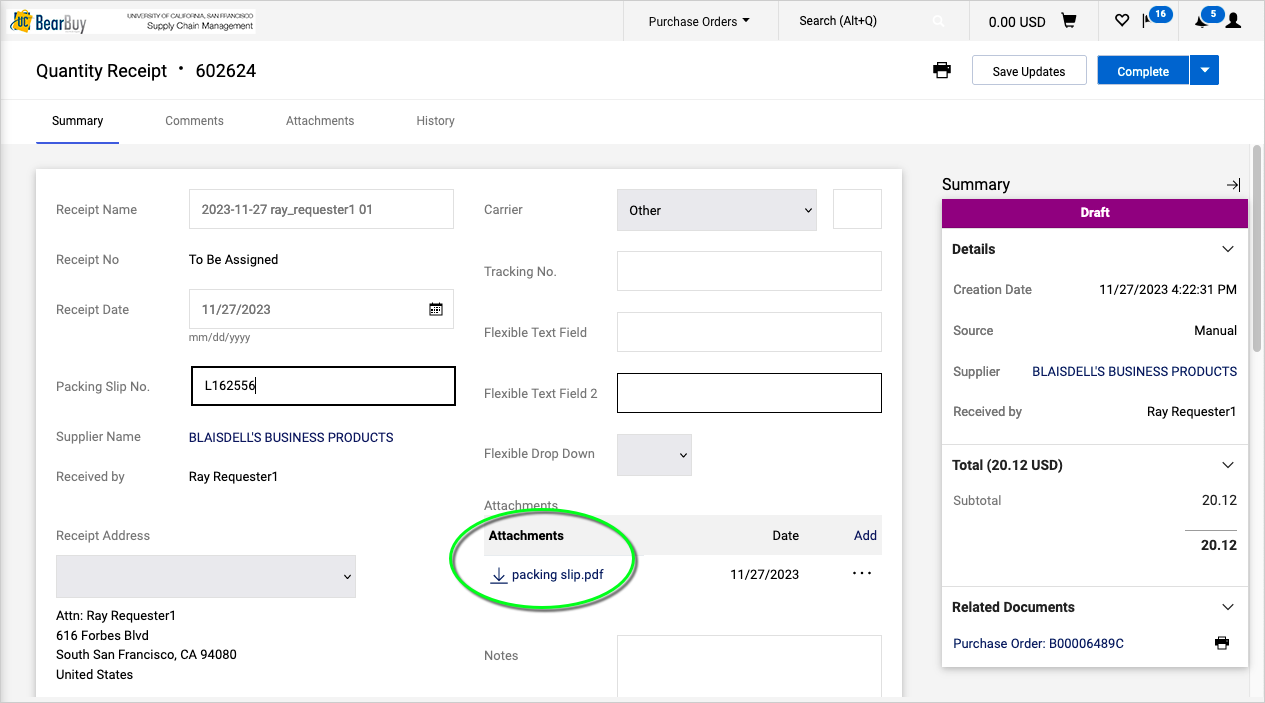
- Optional: Enter the packing slip number, tracking number, notes, edit the Receipt Name as desired, etc. To add an attachment (such as an image of the packing slip) click the Add link located to the right of the Attachments field. In the pop-up window, select the Browse button to select a document or drag and drop the file into the window. Then, click the Save Changes button.
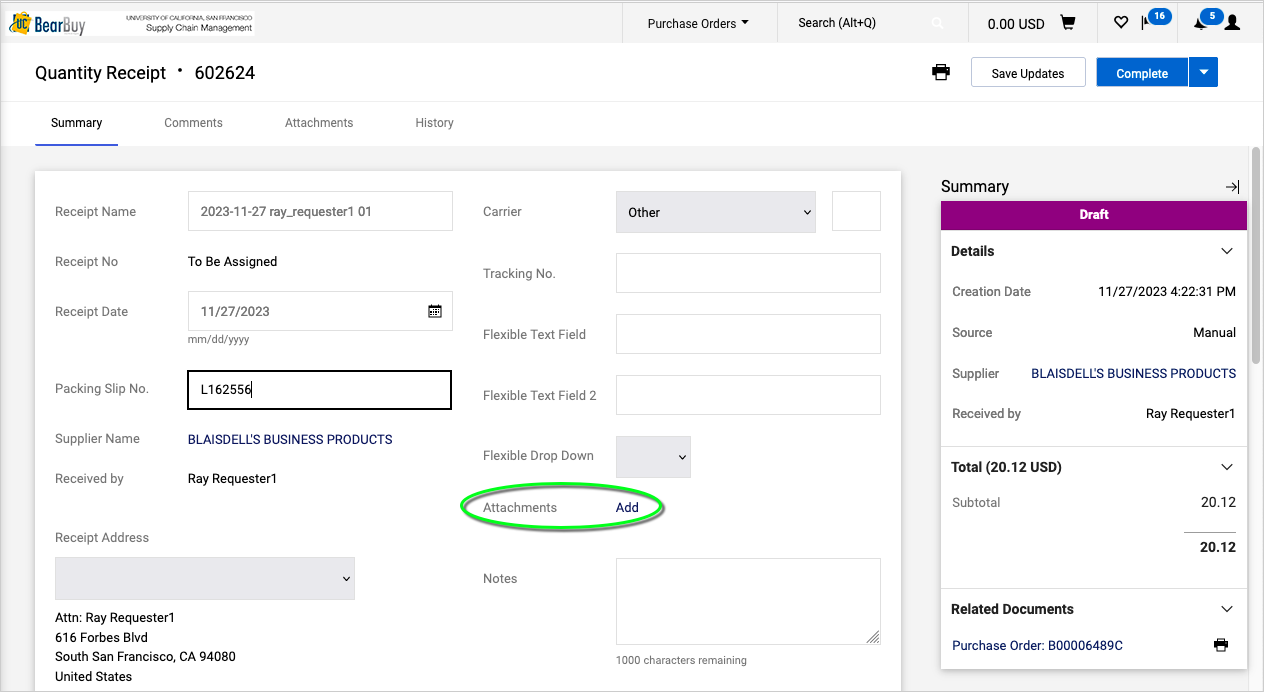

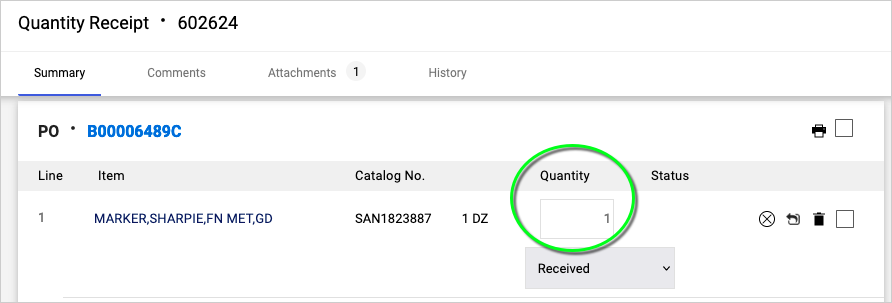
- Enter the received Quantity (or Cost) next to each line item on the order.
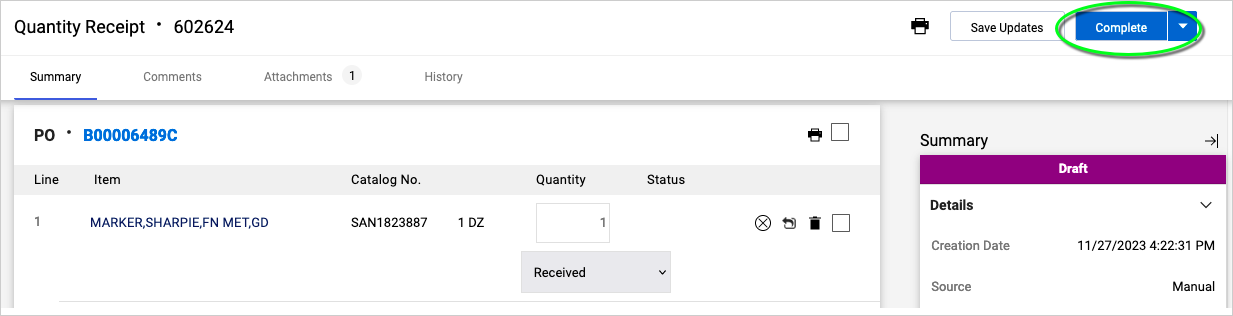
- Note: You may click the Save Updates button to save the receipt as a draft to work on later.
- When done, click the Complete button.
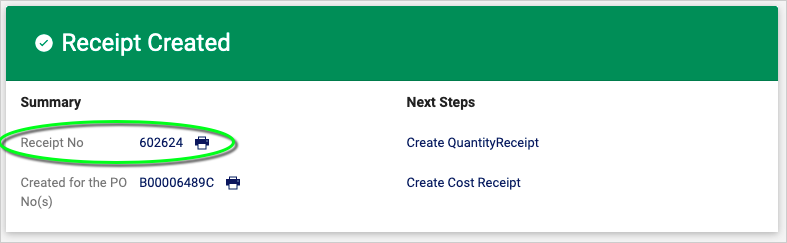
- A confirmation page will display with the Receipt Number and PO Number.
Enter a Receipt and a Return
- Start by following steps 1-5 above to Enter a Receipt.
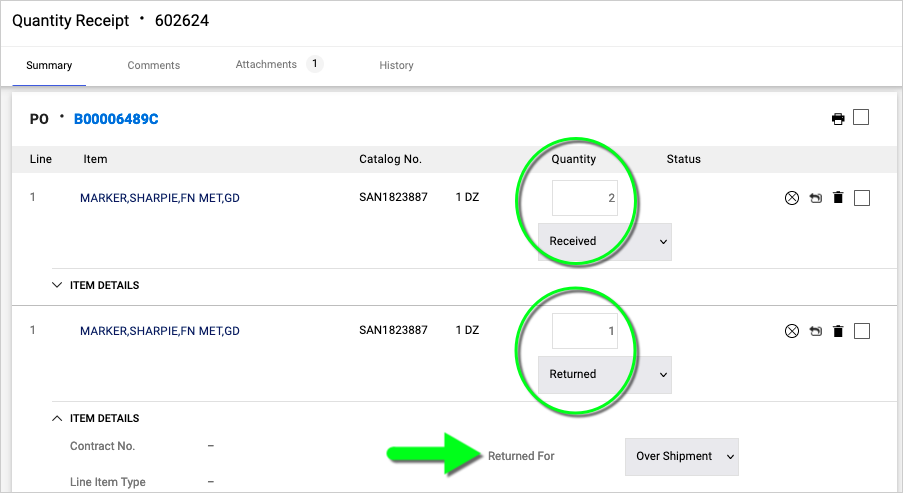
- Then, click the Return icon located to the right of the line item (it looks like an arrow).

- A second line will appear where you will enter the the Quantity (or Cost) that was Returned. In this example, we've entered 2 Received, 1 Returned, and selected the reason for return is Over Shipment.
- Note: You may click the Save Updates button to save the receipt as a draft to work on later.
- When done, click the Complete button.
- A confirmation page will display noting the Receipt Number and PO Number.
View Draft Receipts
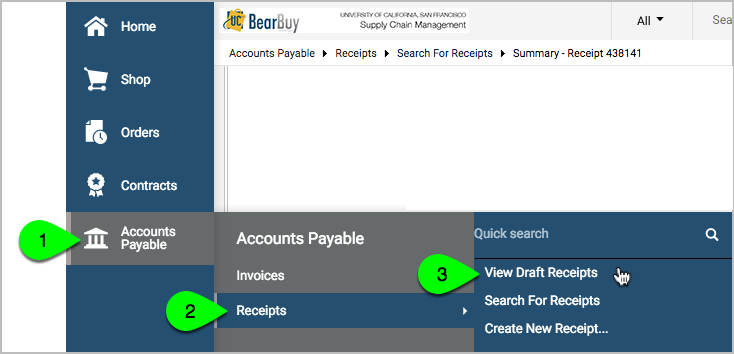
- From the side navigation bar, go to Accounts Payable > Receipts > View Draft Receipts.
- Select the Draft Receipt that you wish to complete.
- Note that you can delete a draft receipt by clicking the Delete button on the right side.
Search for My Receipts
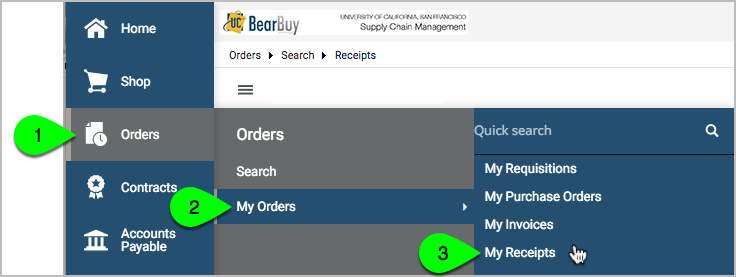
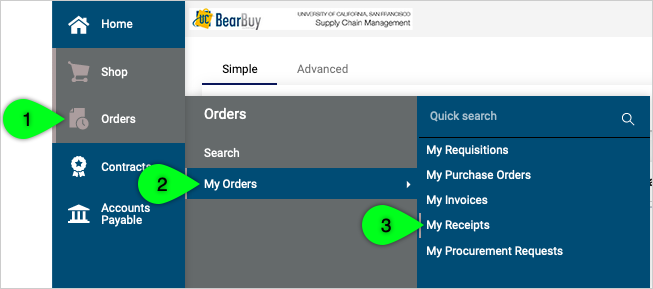
- From the side navigation bar, go to Orders > My Orders > My Receipts.
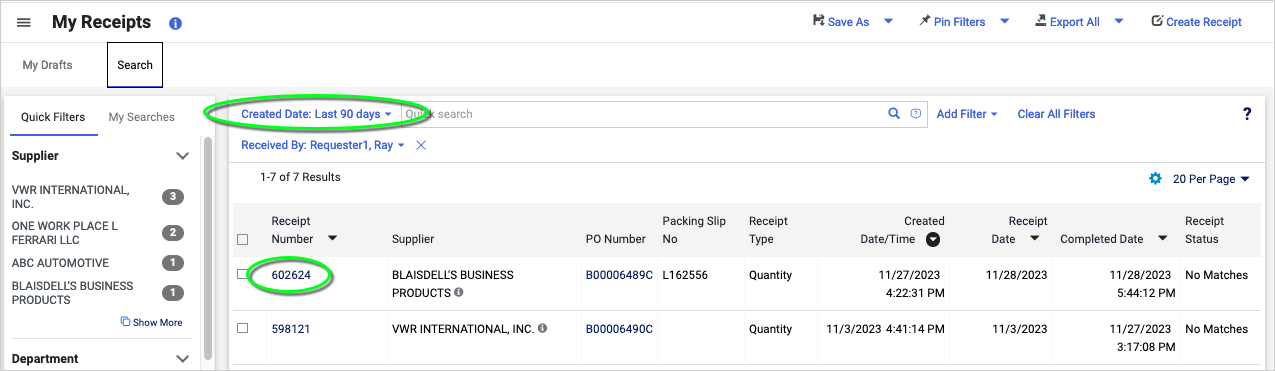
- The search defaults to receipts you created in the Last 90 Days. Adjust the filters as needed.

Search by Receipt or PO Number
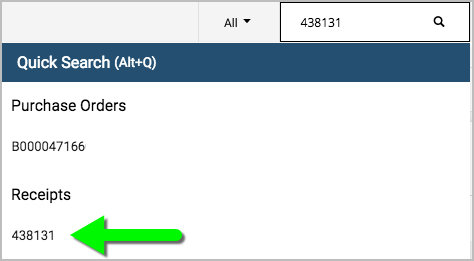
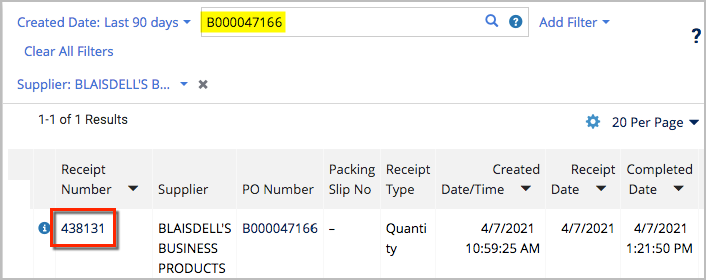
- Enter the Receipt or PO Number in the search bar at the very top of BearBuy.

- Select "All" from the dropdown. (Alternatively, select a specific document type, such as Receipts, to search only that field.)

- Click the magnifying glass to run the search.

- Click on the Receipt Number to view the receipt details.
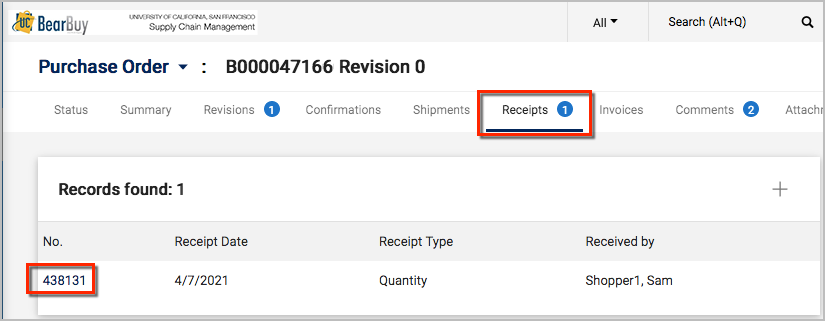
Helpful Tip: When viewing a PO, click the Receipts tab to view all receipts associated with the order. Then, click on the Receipt Number to view the receipt details.
Search Receipts
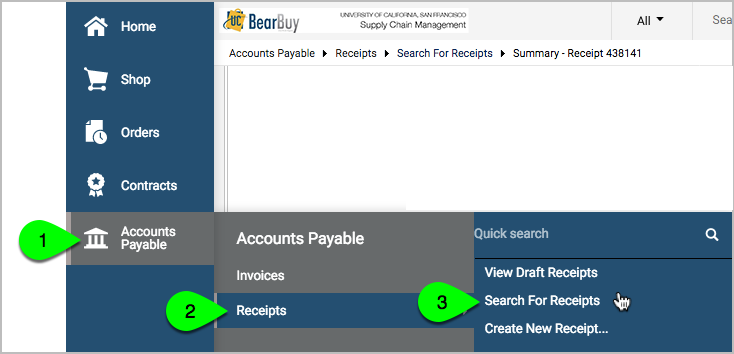
- From the side navigation bar, go to Accounts Payable > Receipts > Search For Receipts.
- The search defaults to receipts created in the Last 90 Days. Adjust the filters as needed.

- Enter any of the following criteria in the Quick search bar: PO Number, Receipt Number, Receipt Name, Packing Slip Number, Supplier, Participant, Catalog Number, Manufacturer Number, Product Description, Tracking Number. Note: You may need to use a comma to separate values in a list.

- Optional: Click the question mark for tips to improve your search.

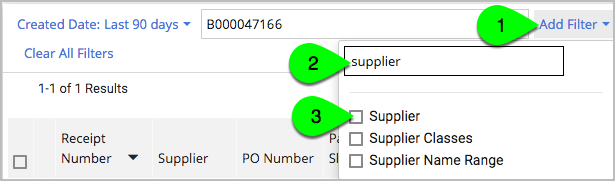
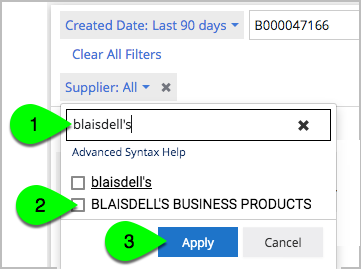
- Optional: Add filters, such as the Supplier, Department ID, or Project, as needed. Click the Add Filters link, start typing the filter name (such as "Supplier"), and select the filter. Then, enter a value for the filter (such as the Supplier's name), and click the Apply button. Helpful Tip: Checking the box next to the Supplier's name that appears in all caps will give you most the precise results.
- Click the magnifying glass to run the search.

- Click on the Receipt Number to view the receipt details.
Edit or Delete a Receipt
Note: Once the PO is invoiced, the receipts cannot be modified; however, you can add a comment to the PO for recordkeeping purposes.
- Navigate to the receipt in BearBuy. On the left side menu, select Orders > My Orders > My Receipts. This will display a list of your receipts from the last 90 days. Select the receipt (or adjust the date filter as needed).
- On the receipt, click the Reopen Receipt button located in the upper right corner of your screen. Note: If you don't see this button, the PO was invoiced and receipts can no longer be edited.

- Enter a comment in the pop-up window (required), and click the Reopen Receipt button.
- The receipt can now be edited.
- When done, click the Complete button.
Frequently Asked Questions
Q: Who can receive in BearBuy?
A: Shoppers, Requesters, and Approvers can create receipts in BearBuy. Viewers can't create receipts in BearBuy.
Q: I want to enter my receipt but I can’t. Why not?
A: The PO is closed or you have the Viewer role and are unable to enter receipts. You may enter a Comment on the PO for recordkeeping purposes.
Q: I want to edit my packing slip but I can’t. Why not?
A: The PO is closed or the matching process has been run against the receipt. You may enter a Comment on the PO for recordkeeping purposes.