Overview
Guide for the Approver role and process steps in MyExpense.
The MyExpense Approver Role
MyExpense is the UCSF automated reimbursement system for employee travel and non-travel expenses (except employee relocation) and guest travel expenses (payment in USD only).
All expense reports must be approved by a Department Authorized Approver. This role is granted automatically to UCSF Department Heads, Business Officers, Health C-Level/SVPs, and Health Executive Directors.
Department Heads can delegate approval authority to others using the MyExpense Delegation of Approval Authority Form. Email the completed, signed form to [email protected].
Approval Considerations
- Before approving an expense report or cash advance, approvers should be sure that the report complies with all applicable policies. If you have questions, please contact SCM Response Team.
- Employee expense reports must be submitted to an Approver within 45 days after the trip or last purchase date to avoid tax consequences. Approvers must confirm that the date entered in the “End of Trip/Last Purchase Date” is accurate and matches submitted documentation.
Access to MyExpense
- Log into your UCSF MyAccess account.
- Select the MyExpense link to open the application.
- Note: You may need to click the Manage Favorites button in UCSF MyAccess to view the complete list of applications.

Review a Pending Expense Report
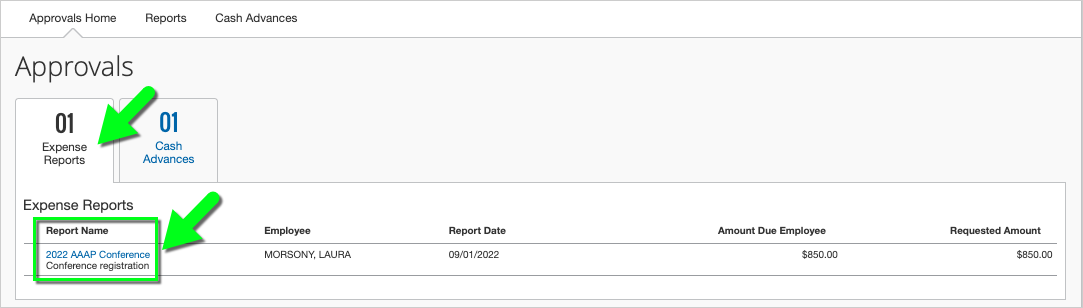
- On the MyExpense homepage, click on your Required Approvals.

- Click on the Expense Reports tab (if necessary), and click the Report Name to view an expense report.
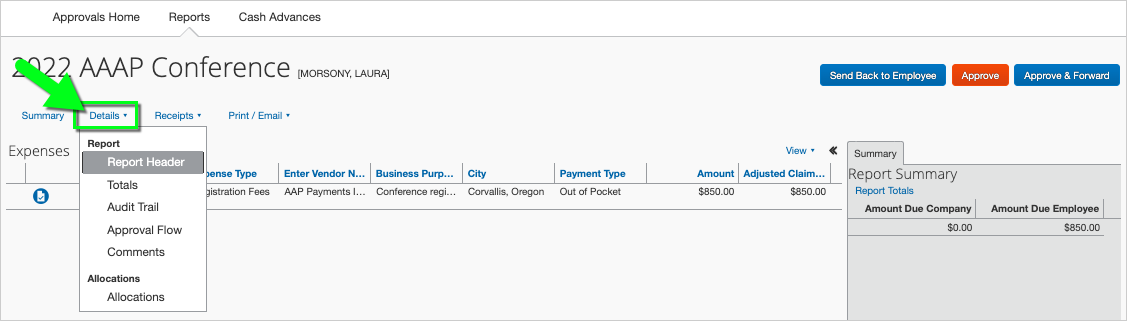
- The report summary displays by default. To view the Report Header (funding, Approval Flow, Comments), click on Details > Report Header.
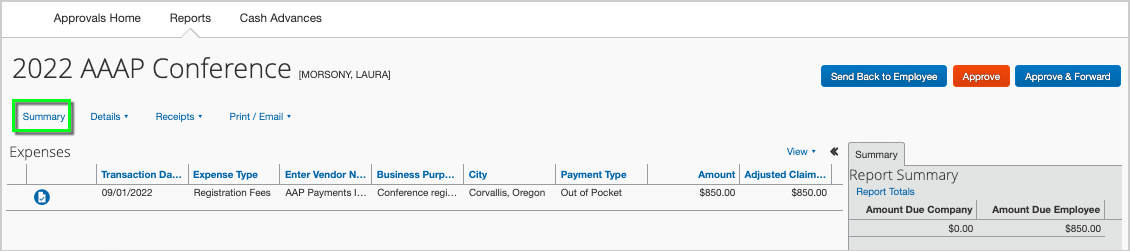
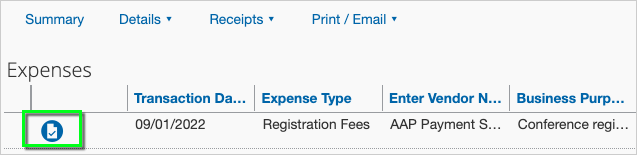
- Pay attention to alerts that may require your attention/action, such as:
- Receipt attached - click the icon to view the receipt, or go to Receipts > View Receipts in new window
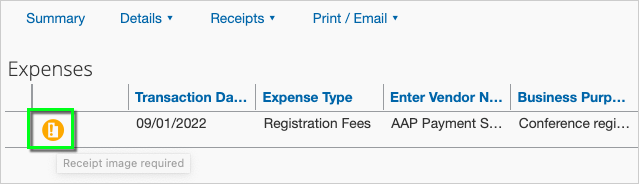
- Receipt missing - click the icon to upload a receipt or go to Receipts > Attach Receipt Images. If necessary, return the expense report for correction.
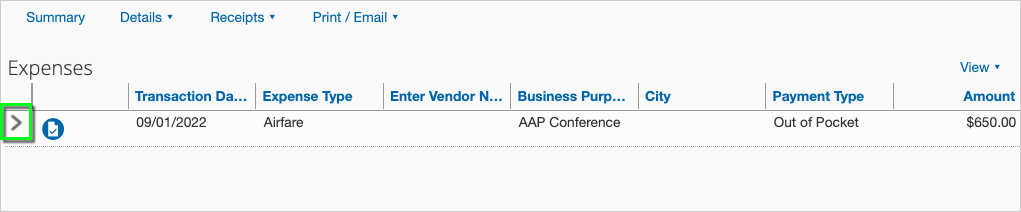
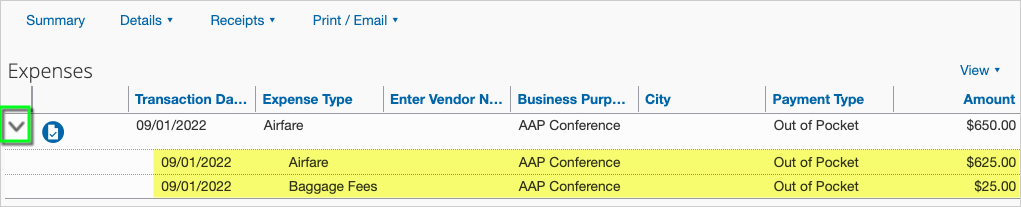
- Itemized expense - click the icon to view details
- Exceptional expense - click the icon to view details, or click Show Exceptions (on the right). If necessary, add an additional approver to the workflow before approving the expense report.
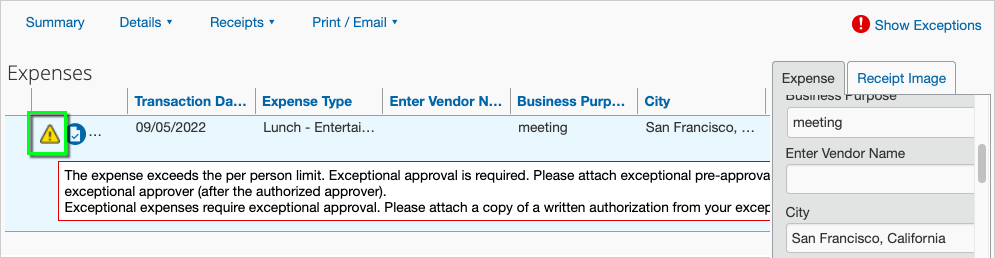
- Policy violation - the policy violation must be remedied before the expense report can be approved. If necessary, return the expense report for correction.

- Receipt attached - click the icon to view the receipt, or go to Receipts > View Receipts in new window
Add an Additional Approver to Expense Report (Optional)
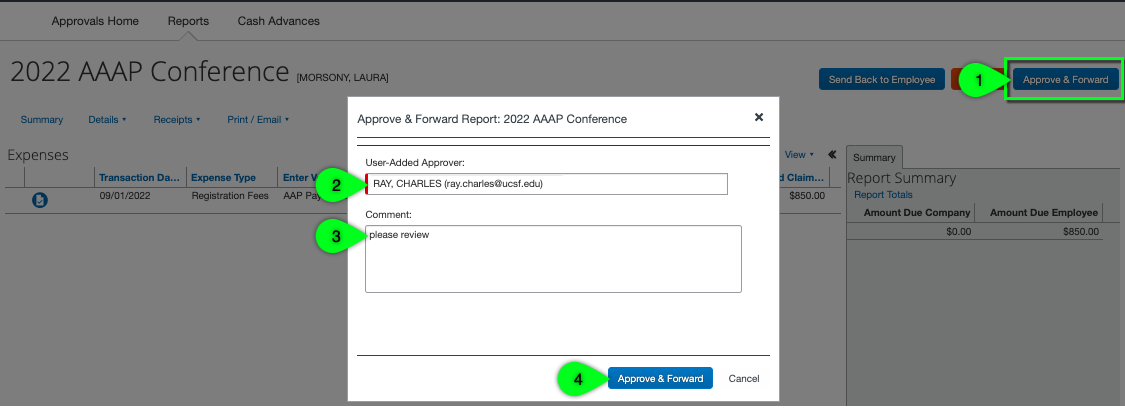
Before approving an expense report, you can add one additional approver to the workflow (if necessary).
- After reviewing the report, click the Approve & Forward button (on the right).
- In the pop-up window, start typing the approver's name (last name, first name) in the User-Added Approver box. If you need to add an Exceptional Approver, you can find the name of the Exceptional Approver for your area in the UCSF Travel and Meeting & Entertainment Approval Matrix.
- Enter a Comment.
- Click the Approve & Forward button.
Approve an Expense Report
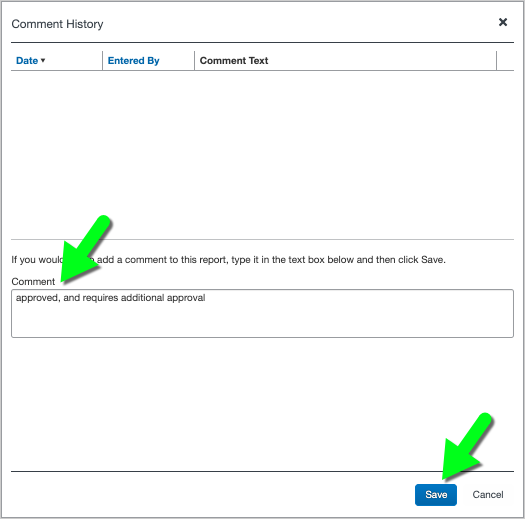
- After reviewing the report, you may add a Comment before approving the report. Click on the Details dropdown, and select Comments. Enter your comment in the pop-up window, and click the Save button.
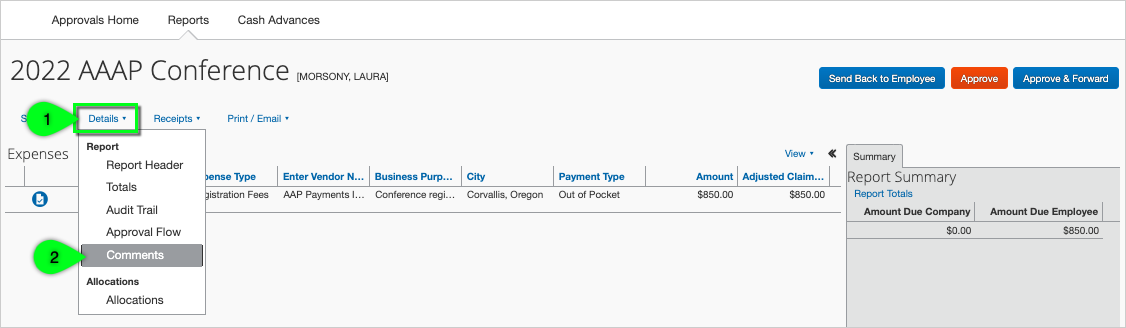
- When you are finished reviewing the report, click the Approve button (on the right).
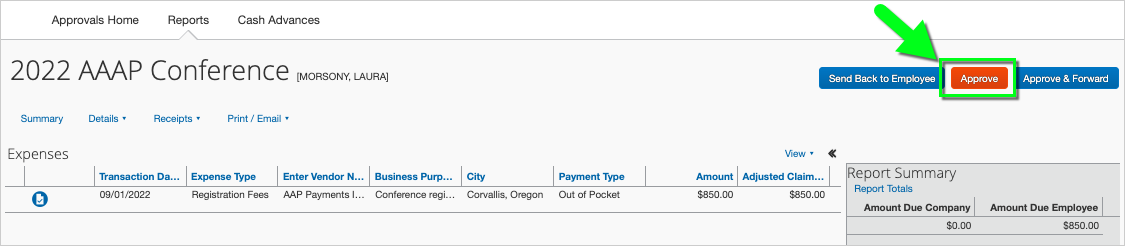
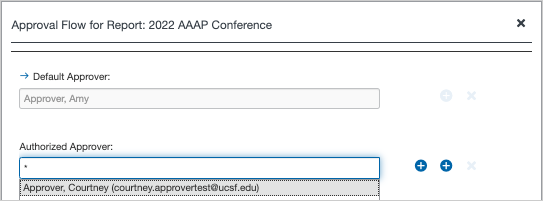
- Note: If prompted to enter an Authorized Approver, enter an asterisk (*) in the Authorized Approver box and select an approver (these are eligible Authorized Approvers based on the Dept ID/Cost Center on the report). Then, click the Approve button.
Return or Deny an Expense Report
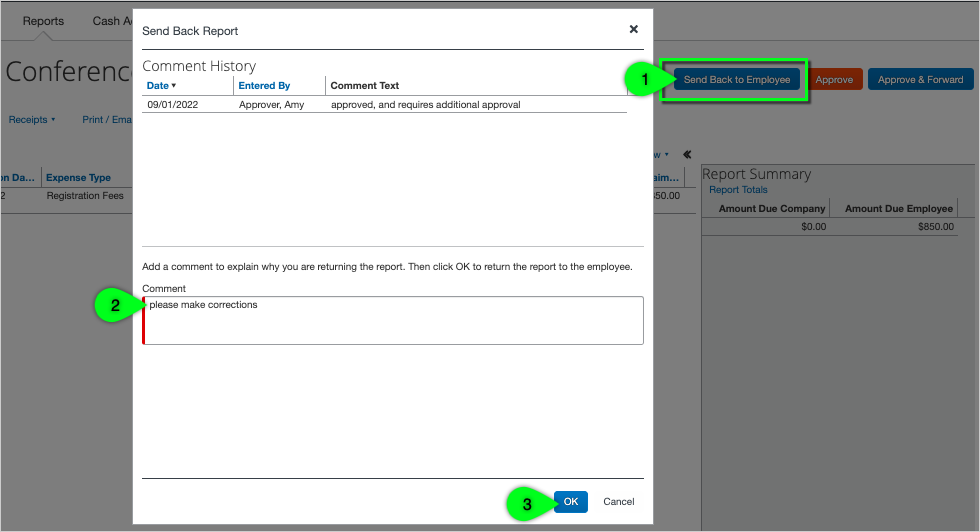
- When you are finished reviewing the expense report, click the Send Back to Employee button.
- Enter a Comment in the pop-up box to instruct the employee on how to correct the report, or provide a justification for denying the report.
- Click OK to send the report back to the employee.
Approver Process for Cash Advances
Review a Pending Cash Advance
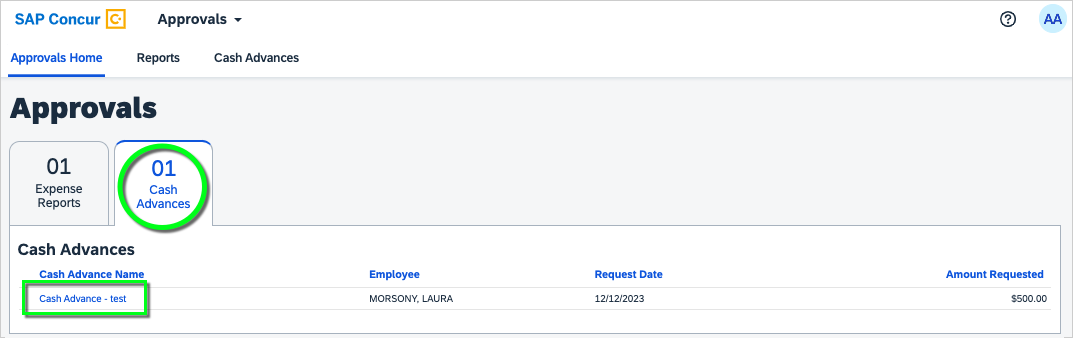
- On the MyExpense homepage, click on your Required Approvals.

- Click on the Cash Advances tab (if necessary), and then click on the Cash Advance Name to view the request.
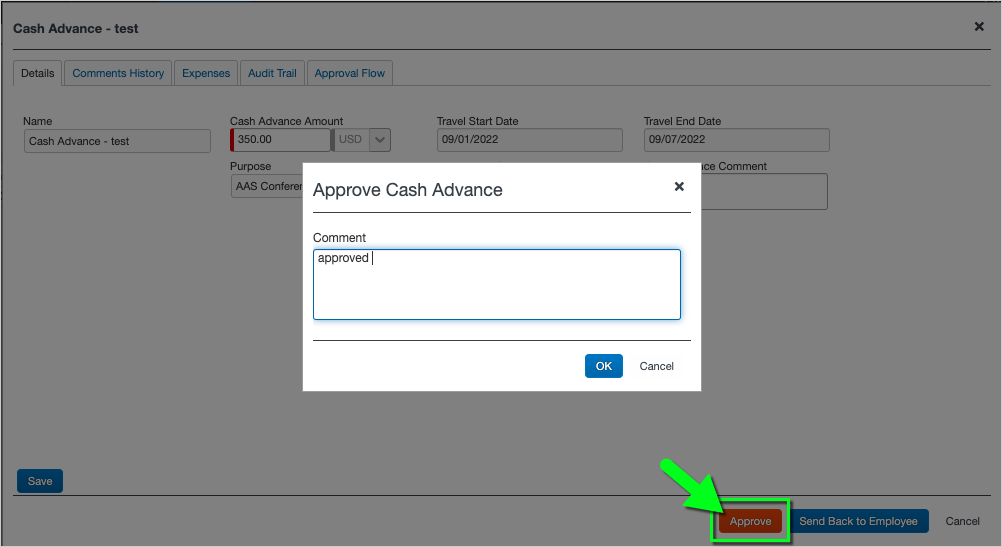
Approve a Cash Advance
- When you are finished reviewing the request, click the Approve button.
- Enter a Comment in the pop-up box.
- Click OK to approve the request.
Return or Deny a Cash Advance
- When you are finished reviewing the request, click the Send Back to Employee button.
- Enter a Comment in the pop-up box to instruct the employee on how to correct the request, or provide a justification for denying the request.
- Click OK to send the request back to the employee.

Reviewing Approval History
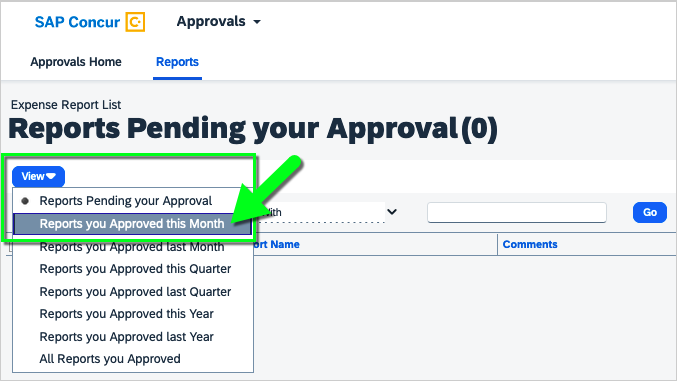
View Expense Reports you Recently Approved
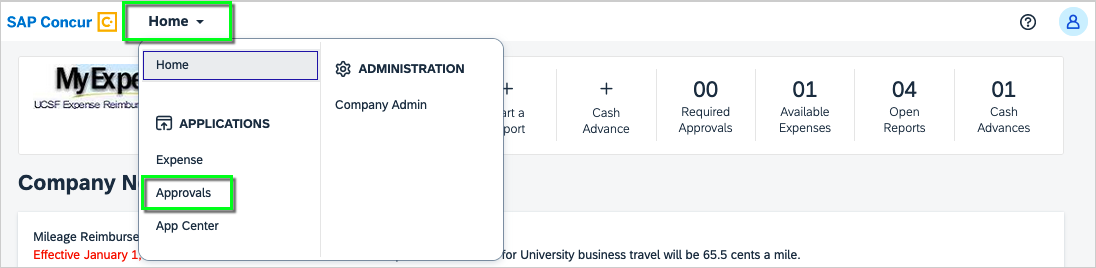
- On the MyExpense homepage, select Home > Approvals.
- On the Approvals page, select the Reports tab.
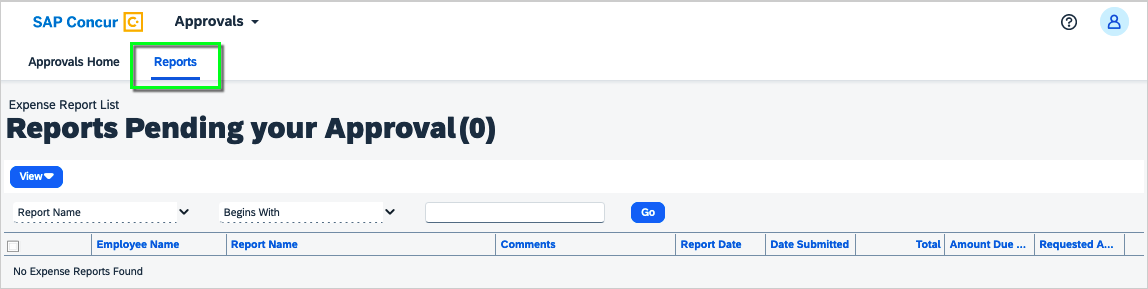
- Click the View button, and select an option such as Reports you Approved this Month.