Overview
How to review and update aspects of your BearBuy user profile.
Profile Aspects Updated Outside of BearBuy
A few critical fields in BearBuy are populated by other campus systems. Your First and Last Name, Email Address, Phone Number, Home Department, and BearBuy Role cannot be edited directly in your BearBuy profile.
First Name: BearBuy will display your legal first name by default, unless you specify a preferred first name in the UCSF Directory or UCPath. To edit your first name in BearBuy, add a Preferred First Name to your UCSF Directory listing or UCPath profile. The update will display in BearBuy the next business day.
Phone Number: To update the phone number listed in your BearBuy profile, edit your listing in the UCSF Directory. The update will display in BearBuy the next business day.
BearBuy Role: To change your BearBuy role, contact your department’s Access Administrator for assistance. The Access Administrator will need to submit a request in the Access Management system, which is accessible through UCSF MyAccess.
Accessing BearBuy
- Login to your UCSF MyAccess account.
- Click on the BearBuy link to open the application.
Navigating to your User Profile
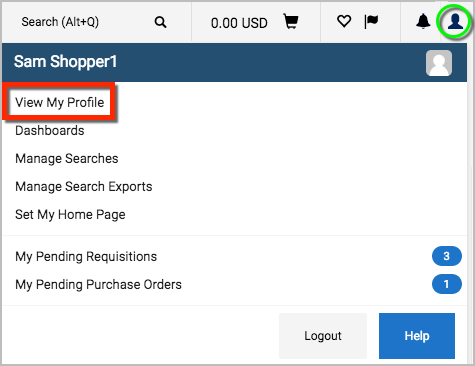
- Click on your User Profile icon at the very top of BearBuy.
- Then, click on the View My Profile link.
Shipping Addresses
Be careful when setting default values in your profile. The address will automatically populate on all of your BearBuy orders.
- Click on your User Profile icon > View My Profile.
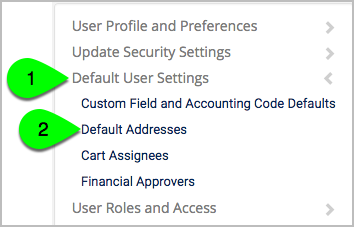
- On the left, select Default User Settings, and then Default Addresses.
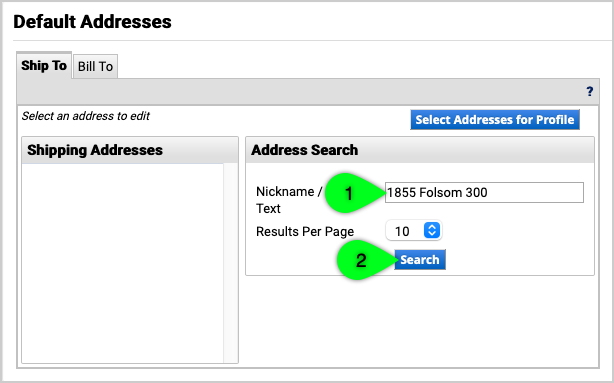
- Under the Ship To tab, click the Select Addresses for Profile button.

- Enter your address in the Address Search box, and click the Search button.
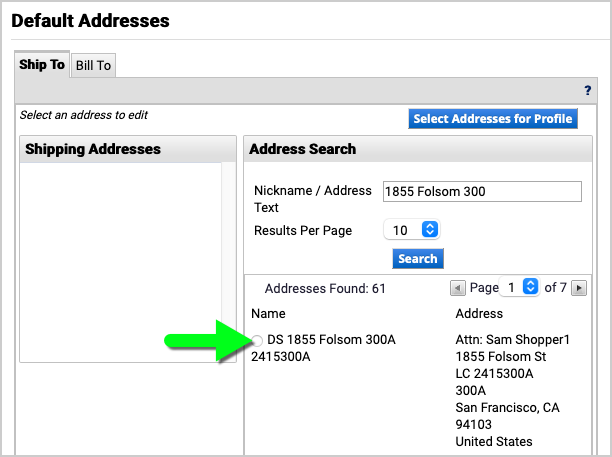
- Once you have found the address, click the radio button next to the address to select it.
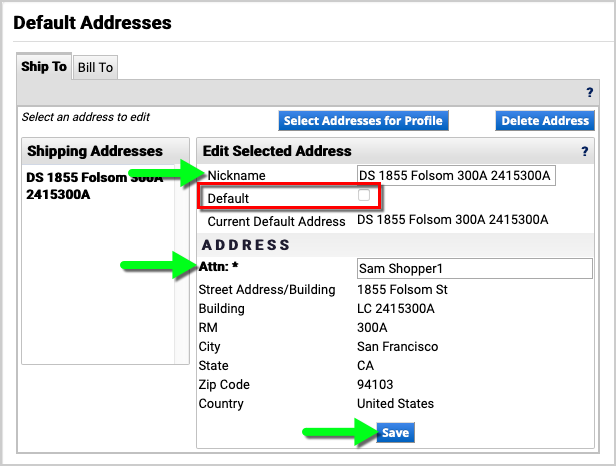
- Edit the Nickname and Attention Line (optional), check the Default checkbox (optional), and click the Save button.
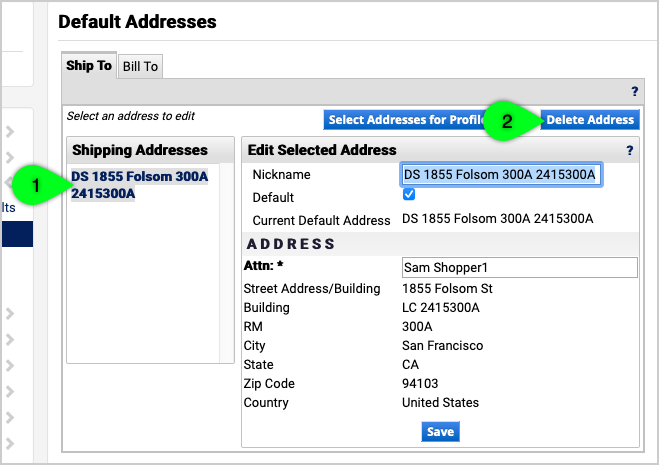
To remove an address from your profile, follow Steps 1-2 above. Next, select the address to be removed and click the Delete Address button.
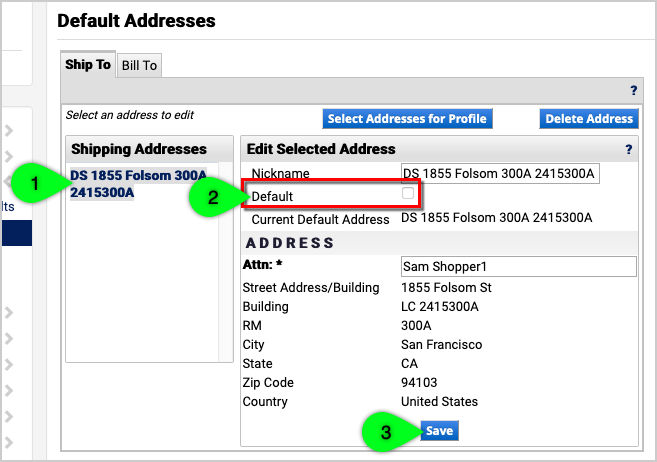
If you no longer need an address defaulted in your profile, follow Steps 1-2 above. Next, select the address, uncheck the Default checkbox, and click the Save button.
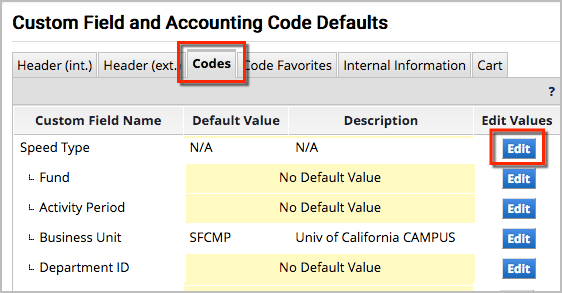
Accounting Codes
Be careful when setting default values in your profile. The Accounting Codes will automatically populate on all of your BearBuy requisitions.
- Click on your User Profile icon > View My Profile.
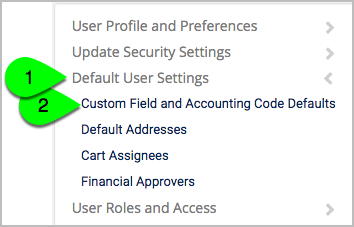
- On the left, select Default User Settings, and then Custom Field and Accounting Code Defaults.
- Select the Codes tab at the top.
- Click the Edit button that corresponds to the value you would like to save, such as Department ID, Project, or SpeedType.
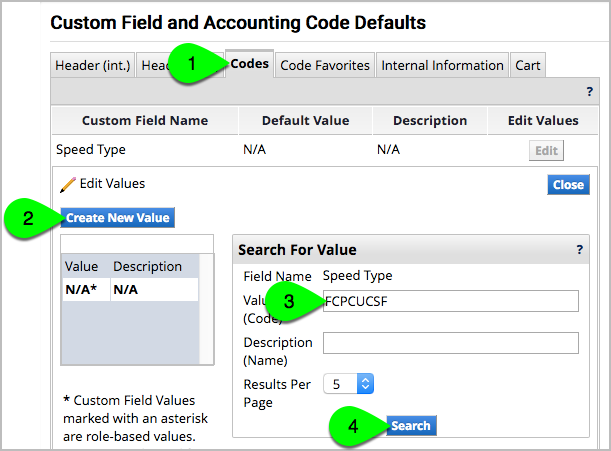
- Next, click the Create New Value button.
- Enter the desired value, and click the Search button.
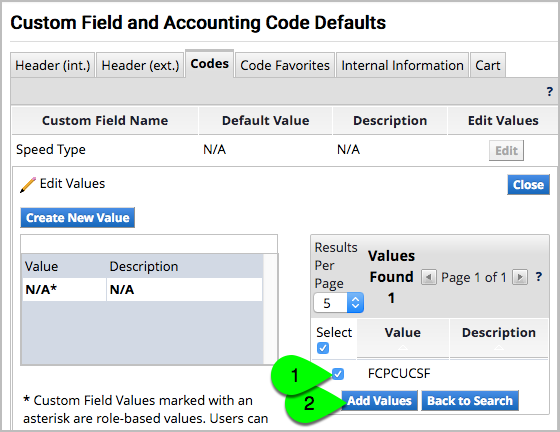
- Select the checkbox next to the values you want to save, and then click the Add Values button.
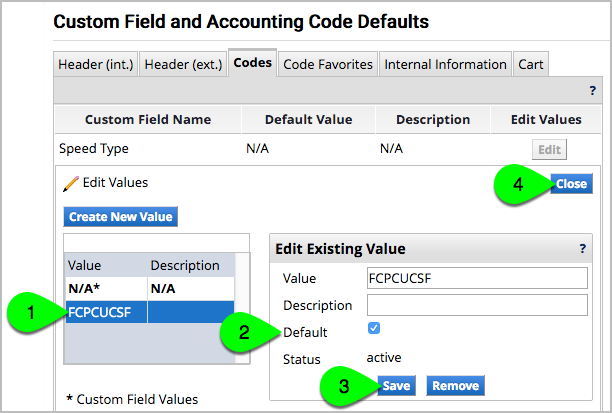
- (Optional) To save a value as your default, select the value from the left, check the Default checkbox, and click the Save button.
To save a combination of Accounting Codes, go to User Profile icon > View My Profile > Default User Settings > Custom Field and Accounting Codes Defaults > select the Code Favorites tab at the top > click the Add button next to the Accounting Codes section > enter a Nickname and your desired codes > (Optional) add a split > Save.
To remove Accounting Codes from your profile, follow Steps 1-4 above. Next, click on a value to be removed, and click the Remove button on the right.
When you no longer want an Accounting Codes value defaulted in your profile, follow Steps 1-4 above. Next, click on the value, uncheck the Default checkbox, and click the Save button.
Procurement Dept Code
The Procurement Dept Code signifies which department owns the order and determines who has authority to approve the order and associated invoices.
- Click on your User Profile icon > View My Profile.
- On the left, select Default User Settings, and then Custom Field and Accounting Code Defaults.
- Select the Codes tab at the top.
- Click the Edit button that corresponds to Procurement Dept Code.
- Next, click the Create New Value button.
- Enter the desired value, and click the Search button.
- Select the checkbox next to the value(s) you want to save and click the Add Values button.
- (Optional) To save a value as your default Procurement Dept Code, select the value from the left, check the Default checkbox, and click the Save button.
To remove a Procurement Dept Code from your profile, follow Steps 1-4 above. Next, click on a value to be removed, and click the Remove button on the right.
When you no longer want the Procurement Dept Code defaulted in your profile, follow Steps 1-4 above. Next, click on the value, uncheck the Default checkbox, and click the Save button.
Cart Assignee (Shoppers)
The cart assignee is typically your department’s Requester who submits orders for you.
- Click on your User Profile icon > View My Profile.
- On the left, select Default User Settings, and then Cart Assignees.
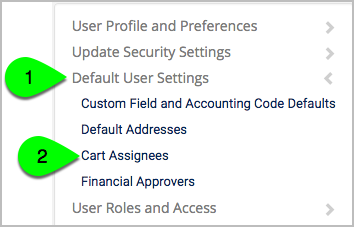
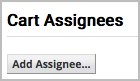
- Click the Add Assignee… button at the top.
- Search for your cart assignee (i.e., your Requester), and then click the select link next to their name.
- Click the Set As Preferred button (if desired).
Approval Code (Requisition Approvers)
For Requisition Approvers, saving an Approval Code in your profile enables you to approve a requisition from your email (without logging into BearBuy).
- Click your User Profile icon > View My Profile.
- On the left, select Update Security Settings, and then Change Email Approval Code.
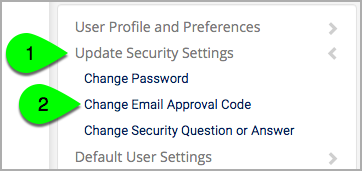
- Enter your desired Approval Code in the Email Approval Password box. The Approval Code can be alphanumeric and must be at least 6 characters.
- Click the Save Changes button.
The next time you receive an email requesting your approval on a requisition, you will have the option to be redirected to an interim page to approve the requisition using your Approval Code.
Notification Preferences
By default, you will receive notification emails from BearBuy for certain purchasing or invoice activities. The notifications will also appear under the Notifications bell icon at the top of BearBuy. You can set additional notifications or stop notifications.
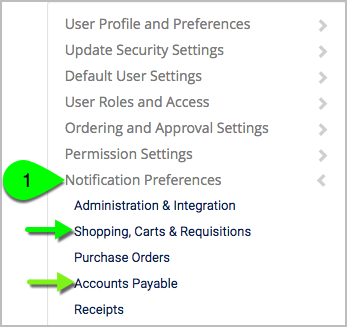
- Click your User Profile icon > View My Profile.
- On the left, select Notification Preferences. To update notifications related to placing or approving orders, select Shopping, Carts & Requisitions. To update notifications related to invoices, select Accounts Payable.
- Click the Edit Section link at the top. Radio buttons appear.
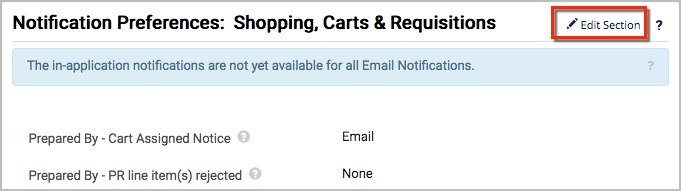
- To view a description of a notification, click the ? (question mark) on the right.
- Click the Override button and make a selection from the dropdown list that appears. Email means you will only receive an email notification, whereas Notification means you will not receive an email but the notification will be listed under your Notifications bell icon at the top of BearBuy. Select “None” to stop the notification.
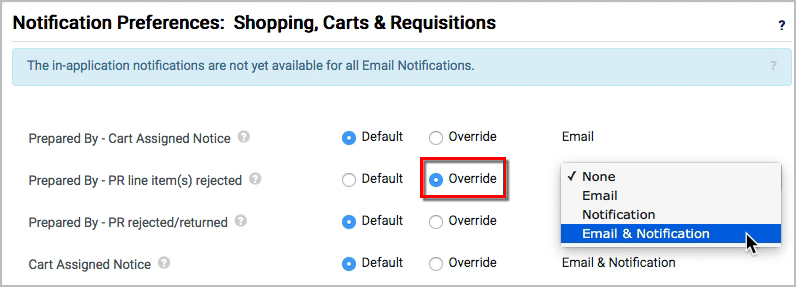
- Finally, click the Save Changes button located at the bottom of the page.

Substitutes (Assigned Carts)
This guide demonstrates how to set a substitute for your Assigned Carts. When someone assigns a cart to you, the cart will be automatically redirected to your substitute. This feature is typically used by Requesters.
Requisition Approvers, Voucher Approvers, and Match Exception Handlers should refer to their respective BearBuy training guides for instructions on how to set a substitute approver.
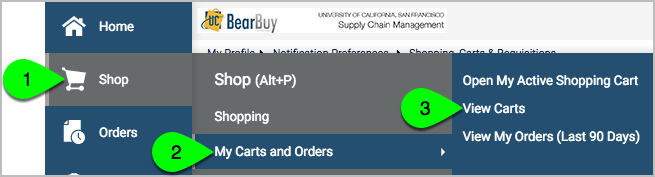
- Navigate to Shop > My Carts and Orders > View Carts.
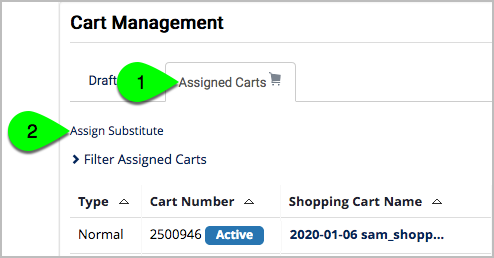
- Click on the Assigned Carts tab at the top.
- Click the Assign Substitute link.
- Search for your desired substitute, and then click the select link next to their name.
- To end the substitution, go to Shop > My Carts and Orders > View Carts > select the Assigned Carts tab at the top > click the End Substitution link.
Note: The substitute must already have the Requester role in order to submit requisitions.
BearBuy Bookmarks
Bookmarks can be configured for quick access to commonly used pages.
- To set a bookmark, navigate to the page you would like to bookmark.
- Click the Bookmarks heart icon at the very top of BearBuy.
- Select the Bookmark this page button.

Set Your BearBuy Homepage
When you open BearBuy, the application opens with the Shopping page displayed; however, you may prefer to set a different landing page.
Note: Only pages available through the menus can be selected as a homepage.
- Navigate to the desired page.
- Next, click on your User Profile icon at the very top of BearBuy.
- Select the Set My Home Page link.
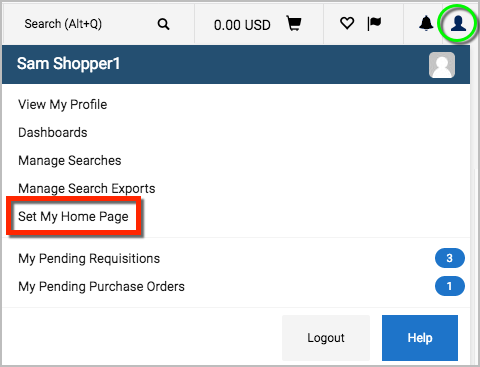
- Finally, click the Save Changes button.