Overview
The Payment Request Form is used to request payment for transactions that don’t require a purchase order (PO), including cellphone/phone lines, donation/contribution, government fees/visas, guest lodging, honorarium, journal publication fees, memberships, postage/small package courier, refunds, registration fees, student summer programs, subscriptions to periodicals, and utilities.
Important exceptions
Do not use the Payment Request form for the following:
- Payments to research subjects, patient refunds, or petty cash should be submitted using the Check Request Form (U5-2)
- Subcontracts
- Invoices for a BearBuy PO or after-the-fact transaction that doesn't meet the limited scope of the Payment Request form
- Software
- Catering invoices
Payment Handling and Delivery Instructions
Best practice is to mail the check directly to supplier; however, there may be a valid business reason to send the check to the UCSF Campus Department requesting payment. For delivery to department by campus mail, enter the recipient's name and campus box number in the Payment Message on the form (e.g., Bill Smith Box 9999).
Accessing BearBuy
- Login to your UCSF MyAccess account, and go to the App Library.
- Search for BearBuy, and click the Launch button to open the application.
Note: You may need to click the All Applications tab before you search. - Note: You may need to click the Manage Favorites button in UCSF MyAccess to view the complete list of applications.
Navigating to the Payment Request Form in BearBuy
- In BearBuy, scroll to the bottom of the homepage to find the Payment Request form (in the Frequently Used Forms section).
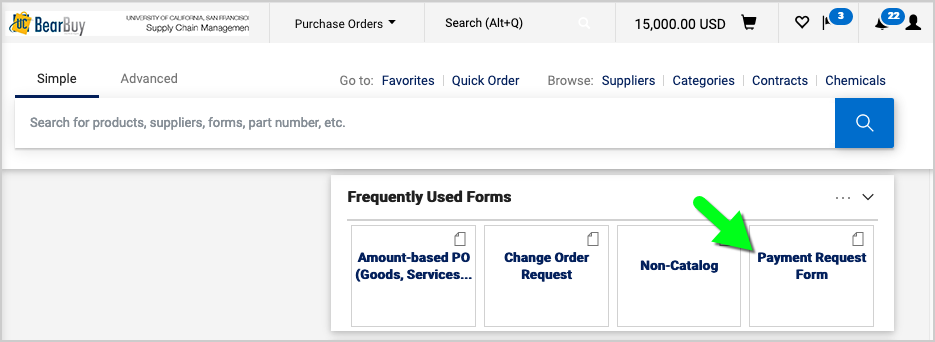
- Click on the form to open it.
- The form opens in your browser window.
Completing the Payment Request Form
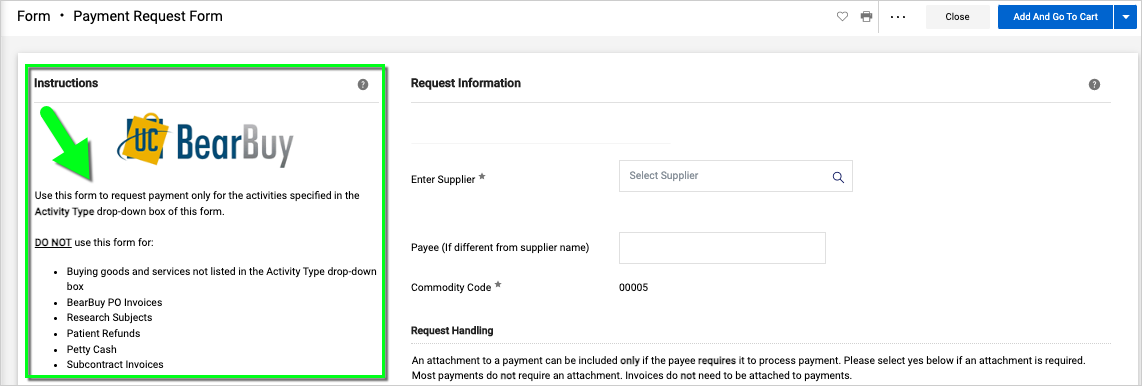
Read the instructions on the left side of the form and enter all required information indicated with an asterisk (*) on the form.
- Supplier: Start typing the supplier name, and select the correct name when it appears. A stop sign may appear next to the supplier name—you can ignore the stop sign when submitting a payment request. To request a new supplier, submit the appropriate Supplier Form to [email protected].
- Payee: If the Payee Name is different from the Supplier Name, e.g., alternate name or DBA, enter it here.
- Attachment to Check Required: Select "Yes" only if there is a required document to be mailed with the check (e.g., registration form). Attach the document to the bottom of the form as an Internal Attachment.
- Do you need to include a payment message?: Select "Yes" only if a message is required on the payment advice, such as a license number, member name/ID, account number, type of fee. Do not include invoice numbers. A message is usually not necessary.
- Payment Message: Description of payment to be printed on remittance advice. If check is to be sent intercampus mail to a UCSF Campus Department, enter the recipient's name and campus box number (e.g., Bill Smith Box 9999).
- Remit To Address: This is the supplier's payment address. The supplier may have more than one address (utilize the Search box to find the correct address). To add a new address, submit a new Supplier Form or formal notice on company letterhead to [email protected].
- Activity Type: From the dropdown, select the Activity Type that matches your transaction.
- Product Description: Enter the description and reason for payment.
- Supplier Inv #: Enter the invoice number exactly as it appears on your invoice or document including special characters. Do not include spaces. If there is NO invoice number, enter the account number followed by the year, month, and day. If there is no account number, enter the year, month, and day only (e.g., 20221128).
- Invoice Date: Enter the invoice date exactly as it appears on your invoice or document.
- Amount: Enter the total desired payment amount.
- Does this payment include sales tax?: Review the invoice and select "Yes" or "No" from the dropdown.
- Attachments: Please attach a copy of all supporting documentation and an invoice if available.
- When finished, select the Add And Go To Cart button located at the top of the form (or select "Add to new Cart" from the dropdown).

Submitting the Payment Request Form in BearBuy
- After adding the form to your cart, assign the cart to your department’s Requester.
- The Requester completes the checkout process and submits the requisition.
- After the requisition is submitted, it will route to your department’s Requisition Approver for approval.
- Once the requisition is fully approved, a purchase order (PO) and voucher will be generated in BearBuy for internal UCSF use only. The PO will not be sent to the supplier. Do not give the PO Number to the supplier; do not submit the invoice through Transcepta.
- Finally, the voucher will route to UCSF Accounts Payable for review/approval. Accounts Payable will review the request for policy compliance and special handling instructions before payment is issued to the supplier.