Overview
Details on the SHOPPER role and how to make basic purchases in BearBuy.
The BearBuy System

Anyone with a UCSF MyAccess account can log into BearBuy and place items in a shopping cart. However, only Requesters can submit orders. If you do not have the Requester role, assign your shopping cart to one of your department’s designated Requesters to submit the order for you. Your department’s Access Administrator can tell you who is a Requester in your department.
Note: Most UCSF Health departments do not use BearBuy at this time. For assistance with purchases, please contact UCSF Health Supply Chain.
Accessing BearBuy
- Login to your UCSF MyAccess account.
- Click on the BearBuy link to open the application.
BearBuy Shopping Process
Most purchases follow a routine BearBuy workflow. When a shopping cart is going through checkout or approvals, it may be referred to as a "requisition." Once the requisition is fully approved, the purchase order (PO) will be generated. The supplier will process the order and it will be fulfilled.
Shopping Instructions: Place an order using the Catalogs
The BearBuy catalogs contain thousands of items from preferred suppliers, such as Fisher Scientific and Office Depot, at UC-contract prices.
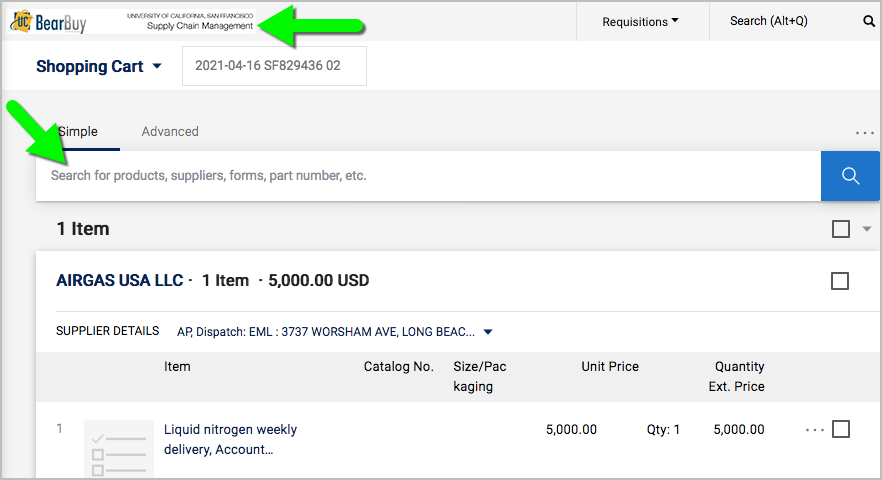
- Enter a description of the item in the large search box at the top of the BearBuy homepage, and click the magnifying glass to start your search.

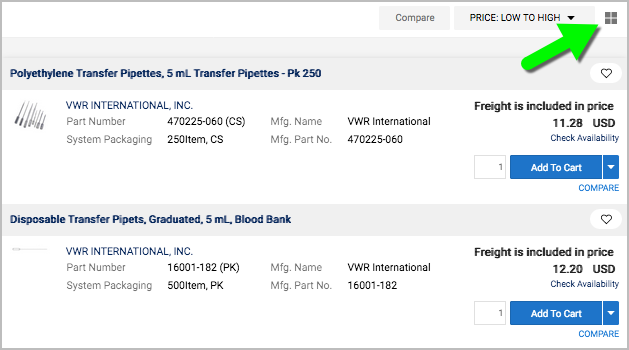
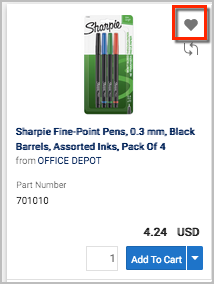
- Enter the quantity and click the Add to Cart button.

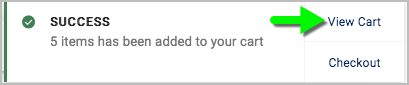
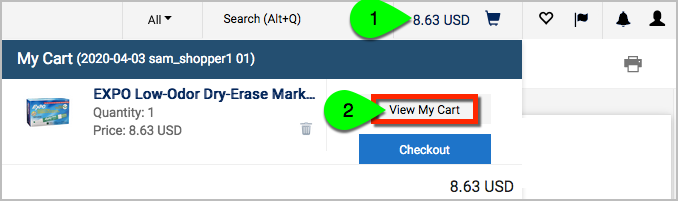
- A pop-up message confirms the items were added to your cart. From here, you can select View Cart or continue shopping.
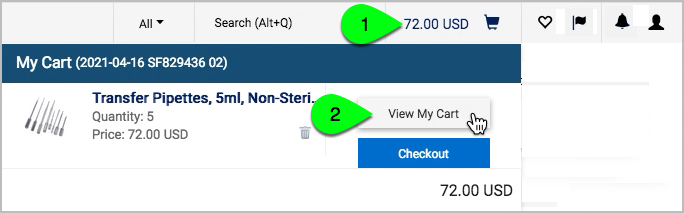
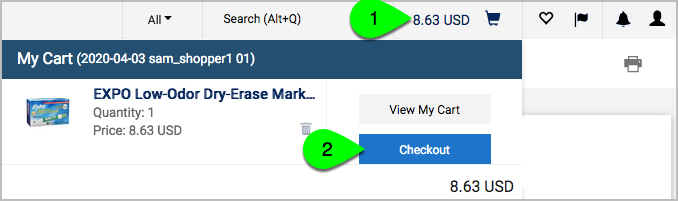
- When you are finished shopping, click the View Cart button in the pop-up or click on the shopping cart icon at the top of BearBuy and then click View My Cart.
- Assign the cart to your department's Requester.

Helpful Hints for Searching for Catalog Items:
- Search terms: To narrow your search, enter more specific criteria, such as the product description, catalog number, part number, supplier or manufacturer name, and dimensions.

- Supplier catalog: Click on a supplier's icon to reveal a search box where you can search for items from only that supplier. Note: For most suppliers, this will only search the BearBuy catalog (not a punch-out).

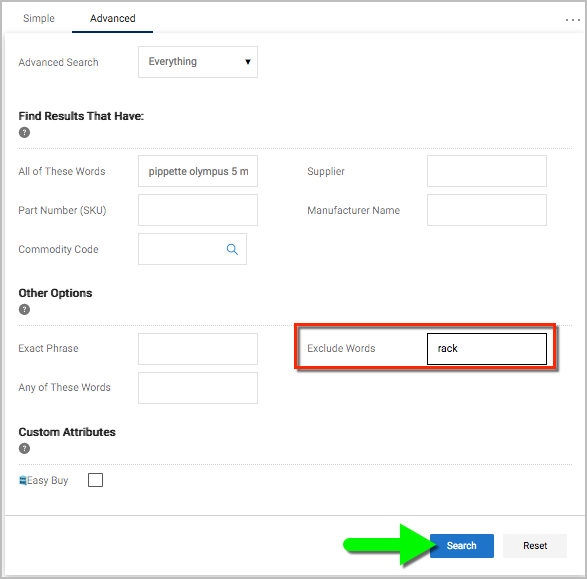
- Advanced Search: Click the Advanced link (located above the search bar) to narrow your search further or exclude keywords.
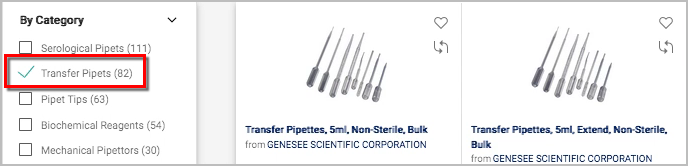
- Filter: The filters on the left can help you narrow your search results based on the supplier, supplier class (such as small business), manufacturer, or product category.
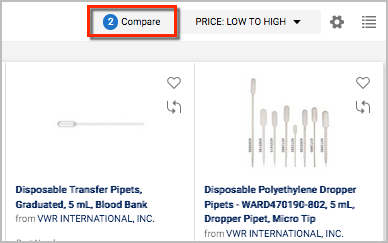
- Sort: By default, search results will be sorted by Best Match. Select a different option from the dropdown, such as Price: Low to High.
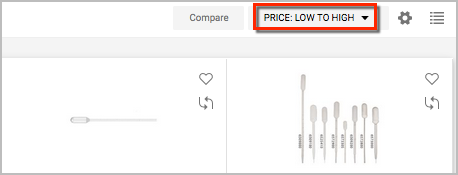
- List vs. grid view: By default, search results will be displayed in a grid view. Click the list icon to display the items in a list. Click the grid icon to return to the grid display.

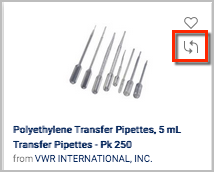
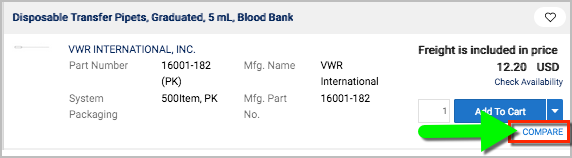
- Compare: Select items to compare side by side. In the grid view, select the arrows icon, or in List view select the Compare link next to the item. Once you have selected several items to compare, click the Compare link at the top (located above the search results).
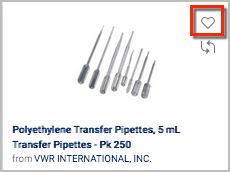
- Favorite: Save favorite items for quicker reordering. Click the heart icon next to the item. For more details, jump to Favorites.
Shopping Instructions: Place an order using a punch-out
A punch-out is an e-commerce website maintained by the supplier specifically for UC and other government/education customers. The sites contain products available to purchase at UC-contract prices and customizable items, such as computers, furniture, and lab materials including oligos. Punch-out sites retain the look and feel of the supplier’s regular public website; however, checkout will result in the products being returned to your BearBuy shopping cart.
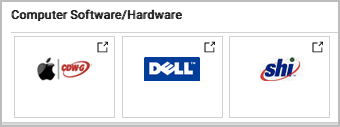
- Example punch-outs include Dell, CDW-G (for Apple products), One Workplace (for furniture purchases), Fisher Scientific, Life Technologies, and Integrated DNA Technologies (IDT).
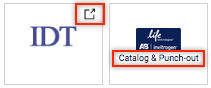
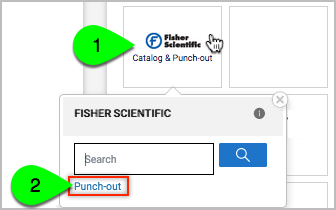
- All punch-outs are accessible through the BearBuy Shopping Homepage. They are identified by an arrow symbol above the supplier’s logo, or the supplier’s icon will display the text Catalog & Punch-out.
- Note: Product pricing and availability may vary between the supplier’s public and University websites.
- Click on the supplier's logo to open the Punch-out site. Note: You may need to click a second Punch-out link that appears when you click on the supplier’s icon (ignore the search box – that will only search within the BearBuy catalog, not the punch-out).
- Wait a moment for the punch-out to open in a new browser window.
- In the punch-out, search and add items to your shopping cart.
- For assistance using the punch-out or to obtain a quote, contact the supplier: Catalog Suppliers 411
- Additional guidance is available for the following suppliers:
- Amazon Business
- America To Go (catering)
- Dell and CDW-G (computers and peripherals)
- Blackhawk Network (physical gift cards)
- Tango (digital gift cards)
- One Workplace (furniture)
- After adding items to your cart in the punch-out, follow the supplier’s directions for submitting the items back to BearBuy (each supplier’s site may differ).
- To exit the punch-out, you may need to close the browser window and click the Cancel Punch-out button.

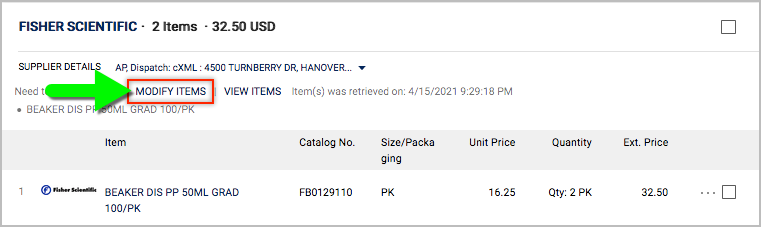
- When viewing your BearBuy shopping cart, you may be able to return to the punch-out and edit your order by clicking the Modify Items link (located above the line items in your cart).
- Assign the cart to your department's Requester.
Shopping Instructions: Place an order using forms
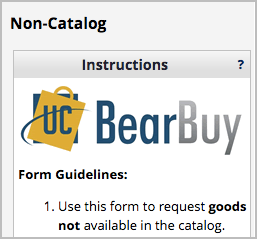
Place your order using a form if you can't find the item in the BearBuy catalogs or you need to order services, such as gas deliveries, document shredding services, or hiring a translator.
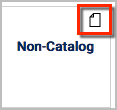
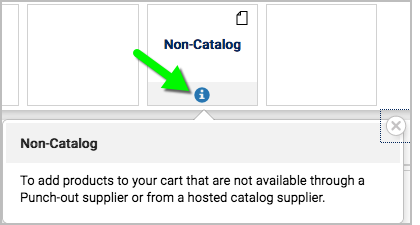
- The forms are located on the BearBuy homepage, near the bottom. They are identified by a paper symbol.
- The forms available for placing orders with suppliers are Amount-based PO, Non-Catalog, Capital Equipment, DEA Controlled Substances, Facility Rental, Professional/Personal/Consulting Services, Relocation/Household Moves, Software and Cloud Computing, and Standing Order Amt (for ReadyRefresh).
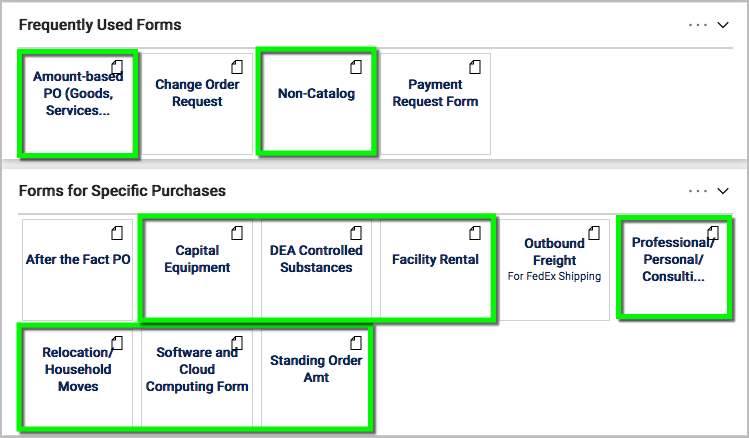
Hover over the form to reveal an information icon with a description of the form's purpose, or click on the form and read the description on the left side of the form.
When you're ready to start your order...
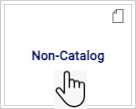
- Click on the form to open it. The form will open in your browser window.
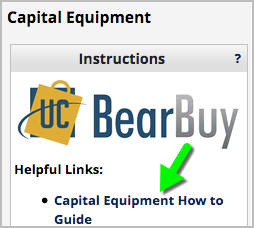
- Carefully read the instructions on the left side of the form and follow any links to additional guidance on the SCM website.
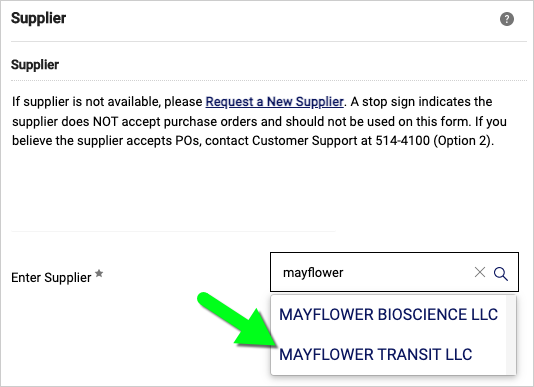
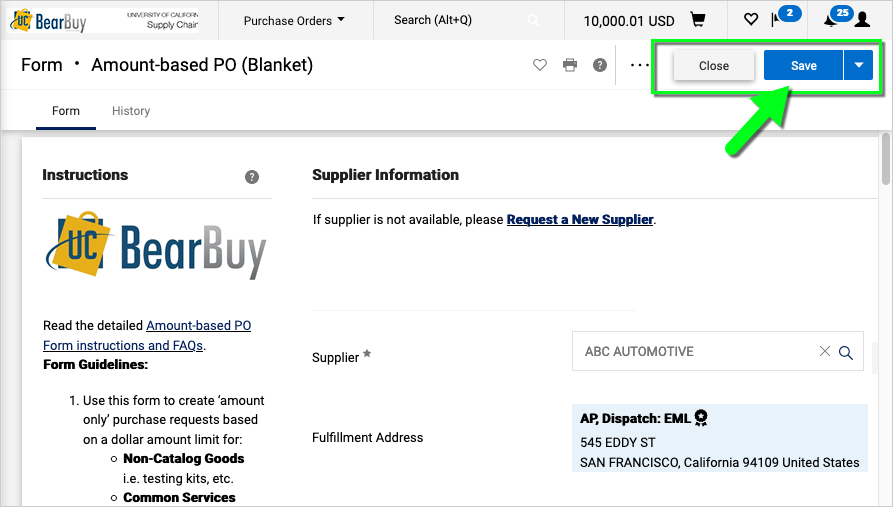
- Supplier: Start typing the supplier name and select it, or click the Request a New Supplier link to redirect to the Supplier Registration forms required to add a new supplier to BearBuy.
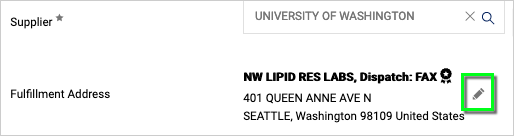
- Fulfillment Address: This is the supplier's address where the order will be fulfilled. You may be able to select a different address if the pencil icon appears. For example, when placing an order with another university, you'll want to select the correct department or lab. To add or update an address, email [email protected] for assistance.

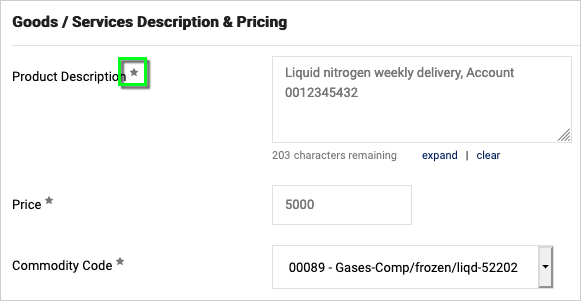
- Enter all required information indicated with an asterisk (*) on the form, such as the product description and price.
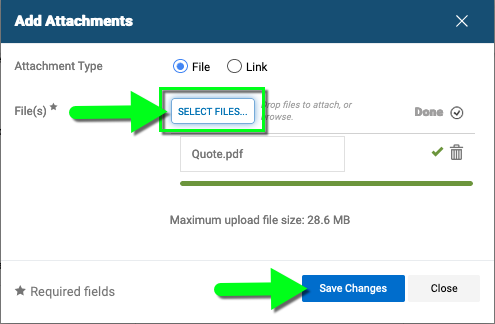
- Attach any required or relevant documentation, such as a quote or contract. Helpful Hint: The supplier only needs one copy of each document – don't attach the same document multiple times to the same order.
- Click the Add button to add an Internal Attachment or External Attachment. Internal Attachments are viewable only in BearBuy, whereas External Attachment are viewable within BearBuy and a copy will be sent to the supplier.

- Click the SELECT FILES button and browser for the document. Wait for the document to fully load, and then click the Save Changes button.
- The document now appears on the form.
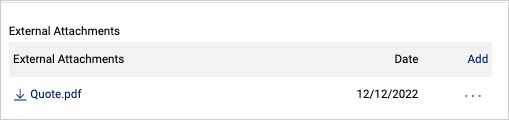
- To remove the attachment, click the ellipses (...) and select Remove.

- Click the Add button to add an Internal Attachment or External Attachment. Internal Attachments are viewable only in BearBuy, whereas External Attachment are viewable within BearBuy and a copy will be sent to the supplier.
- When you're ready, select the Add And Go To Cart button located at the top of the form (or select "Add to new Cart" from the dropdown).
- Note: Add to Cart will add the form to your cart and keep a copy of the form open and completed on your screen so you can quickly add another item to your order. Remember to edit any relevant fields before adding the form to your cart again.
- Note: Add to Cart and Return will add the form to your cart and keep the form open but blank so you can add another item to your order.

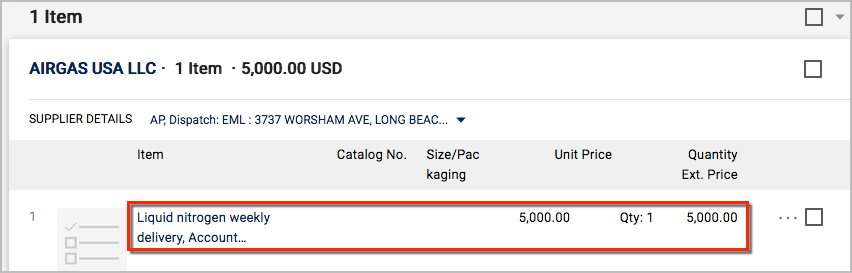
- The form now appears in your cart as a line item. If you need to edit the information on the form, click on the Item description to re-open the form.
- From here, you can click the BearBuy logo to return to the Shopping homepage to continue shopping.
- When you're finished shopping, assign the cart to your department's Requester.
Shopping Instructions: Assign a Cart to your department's Requester
Assign the cart to your department's Requester to complete the checkout process and place the order on your behalf.
- Navigate to your shopping cart by clicking on the shopping cart icon at the top of BearBuy, and select View My Cart.
Alternatively, from the side navigation bar, go to Shop > My Carts and Orders > View Carts. On the Cart Management page, select the Draft Carts tab, and click on the Shopping Cart Name to view the cart. - When viewing your shopping cart, click the Assign Cart button.
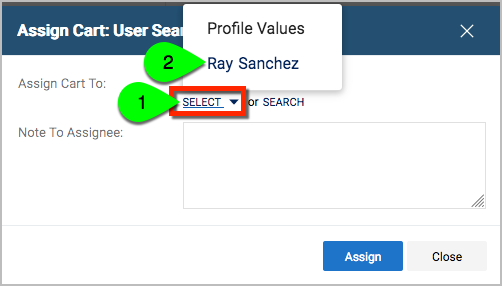
- If you saved a Requester in your profile as your "Preferred" cart assignee, their name will appear by default. Otherwise, press the Select link to select a Requester from your profile. Add a note for the Requester, and click the Assign button.
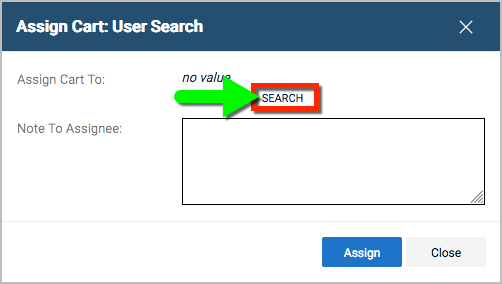
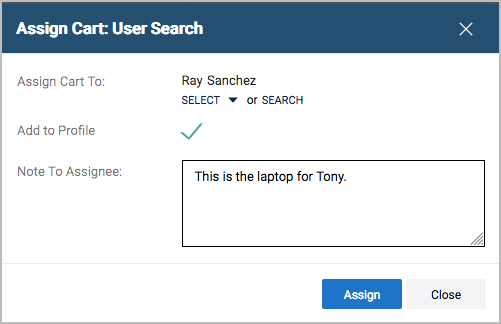
- If the Requester is not saved in your profile, search for the Requester.
- Press the Search link.
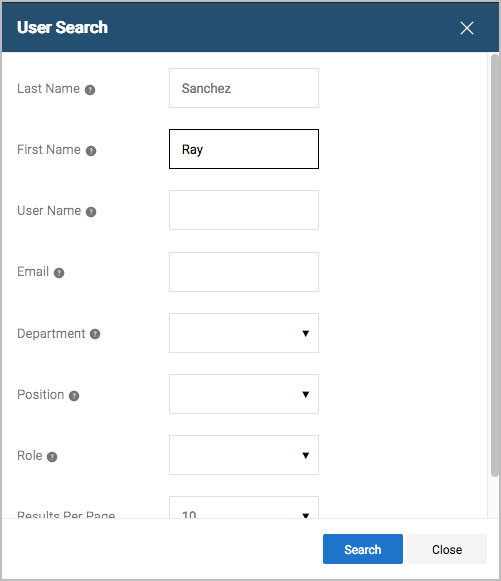
- Enter the Requester's name (or search by Department, Role, etc.), and click the Search button.
- Click the plus sign to select the Requester.

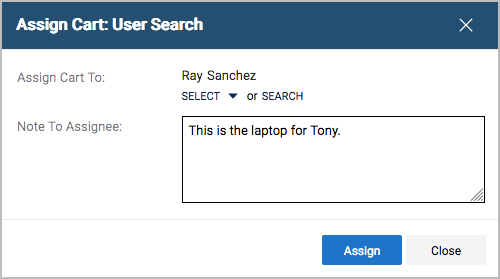
- Check the Add to Profile box. Add a note for the Requester, and click Assign.
- Press the Search link.
- A confirmation page will display on your screen.
- BearBuy will send a notification email to the Requester.
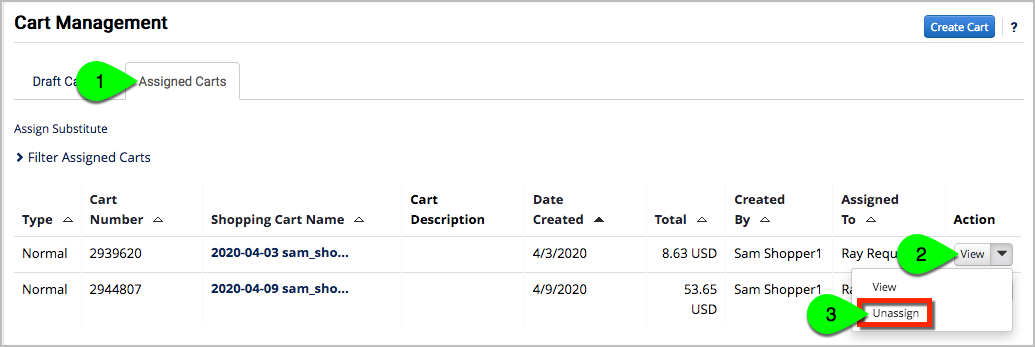
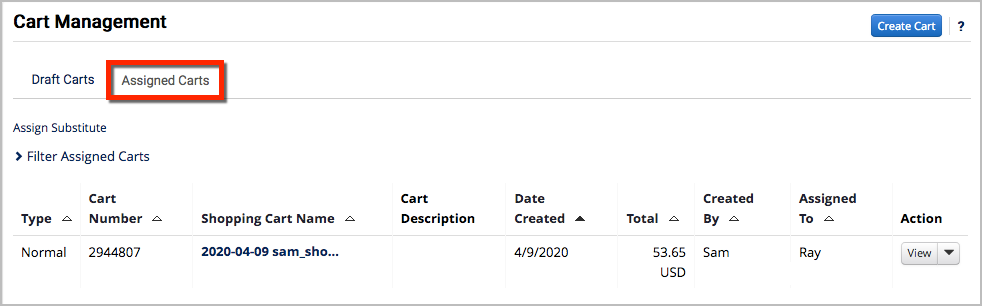
- After assigning your cart to a Requester, you can still view the cart by navigating to Shop > My Carts and Orders > View Carts and click the Assigned Carts tab. From there, you can unassign the cart if necessary.
Shopping Instructions: Edit or Delete Items in a Cart
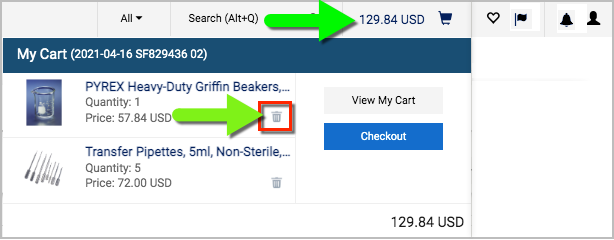
- To delete an item from your cart, click on the shopping cart icon at the top of BearBuy, and then click the trash can next to the item.
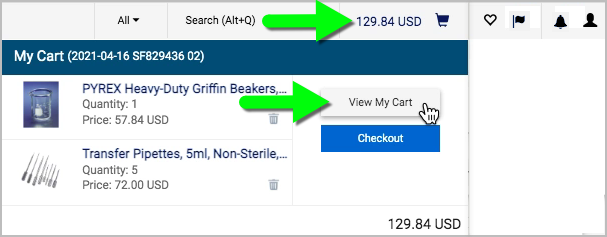
- To edit items in the cart, click on the shopping cart icon at the top of BearBuy, and then click View My Cart.
- Click the ellipses (...) next to the line item to reveal a submenu.
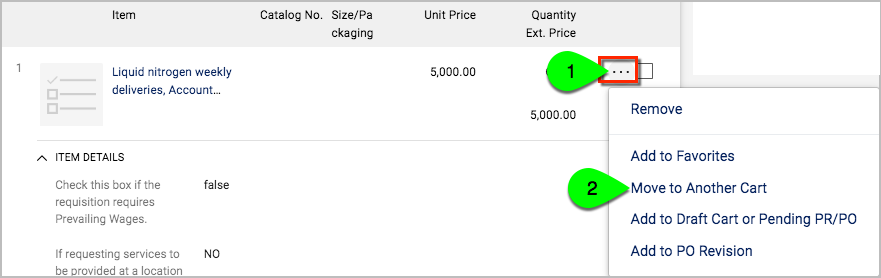
- Editing forms: To edit the information on a form, click the Item description to re-open the form (or right-click the Item description to open the form in a new browser tab). After editing the information on the form, click Save. Next, you may need to click the Close button.
- Click the ellipses (...) next to the line item to reveal a submenu.
Shopping Instructions: Unassign a Cart from the Requester
You may be able to unassign the cart from the Requester, as long as the Requester hasn't submitted the order.
- From the side navigation bar, go to Shop > My Carts and Orders > View Carts.
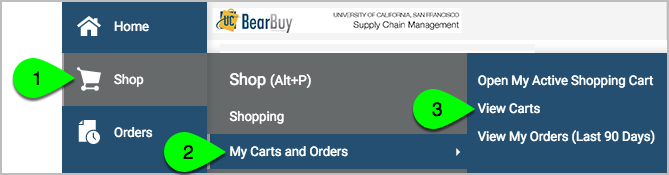
- On the Cart Management page, select the Assigned Carts tab. Then, click the Action dropdown (located to the right of the cart), and select Unassign.
- You may now edit or delete the cart, or assign it to a different Requester.
Shopping Instructions: Create a New Cart
- From the side navigation bar, go to Shop > My Carts and Orders > View Carts.
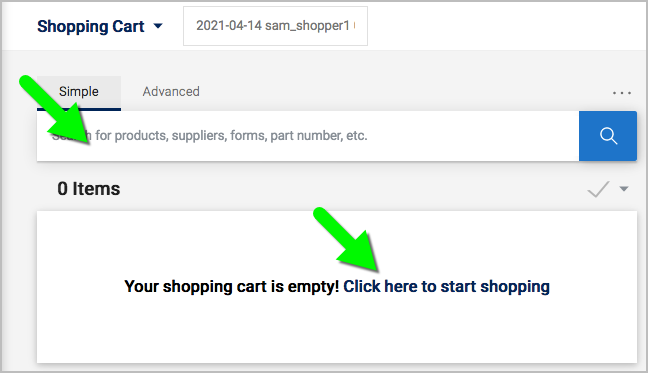
- On the Cart Management page, click the Create Cart button.

- This will take you to a new, empty shopping cart. From here, you can search for catalog items or select the Click here to start shopping link to return to the BearBuy Shopping homepage.
Shopping Instructions: After you assign a cart
After you've assigned the cart to the Requester, the Requester will complete the checkout process and submit the order. The order will route for any necessary approvals in BearBuy, and then the Purchase Order (PO) will be dispatched to the supplier. Typically, the supplier will email you an order confirmation. For order status inquiries, please contact the supplier directly—order status/tracking is not available in BearBuy. Learn what types are orders are delivered by UCSF Logistics.
Shopping Instructions: Checkout
Although the Requester is typically responsible for completing the checkout process, Shoppers may start the process by adding information to the order, such as the Shipping Address, before assigning the cart to the Requester.
- Navigate to your shopping cart by clicking on the shopping cart icon at the top of BearBuy and select Checkout.
 Alternatively, from the side navigation bar, go to Shop > My Carts and Orders > View Carts. On the Cart Management page, select the Draft Carts tab, and click on the Shopping Cart Name to view the cart. When viewing the shopping cart, click the Proceed to Checkout button.

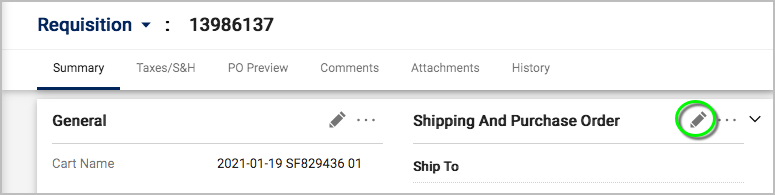
- Click the pencil icon next to a section to edit the information.
- For more detailed instructions, read the Requester materials:
- Shipping Address
- Accounting Codes
Shopping Instructions: View an Order
This will display your carts that the Requester hasn't submitted, yet.
- From the side navigation bar, go to Shop > My Carts and Orders > View Carts.
- On the Cart Management page, click the Assigned Carts tab.
- Click the Shopping Cart Name to view the order details.
Shopping Instructions: Copy an Order to a New Cart
Note: Shoppers can only view/copy their own orders.
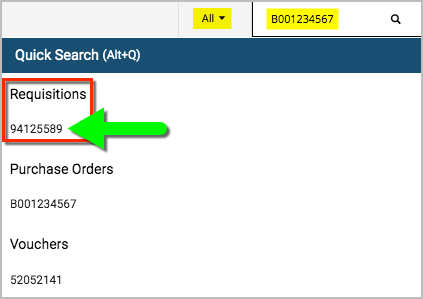
- Navigate to the order in BearBuy. When using the search bar at the top of BearBuy, select the requisition.
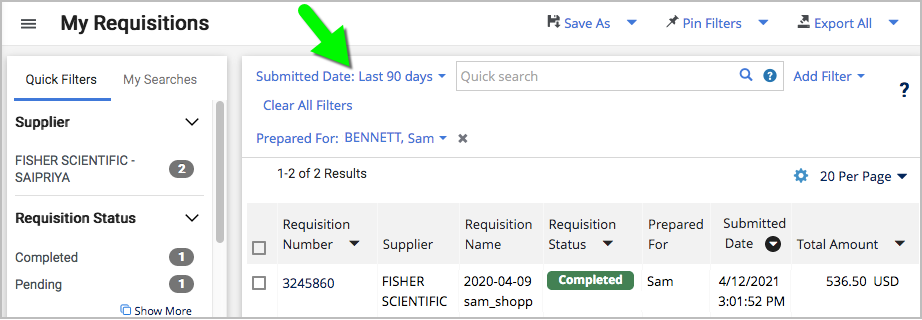
Alternatively, search using the side navigation bar, go to Orders > My Orders > My Requisitions and adjust the filters as needed.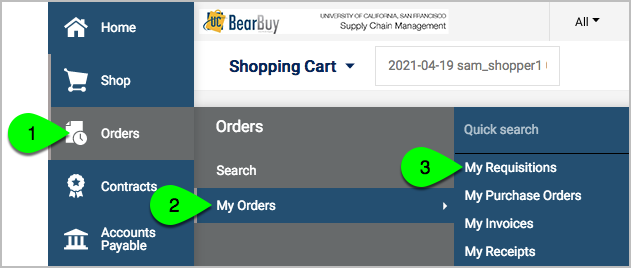
- When viewing the requisition, select the ellipses (...) located at the top of your screen to reveal a menu. Then, select Copy to New Cart.

- You will be redirected to the new cart. From here, you can edit the items in the cart, search for catalog items, or click the BearBuy logo to return to the Shopping homepage.

- Assign the cart to your department's Requester.
Shopping Instructions: View My Pending and Recent Orders
Click on your User Profile icon at the top of BearBuy to reveal a submenu with links to your pending and recently approved orders.
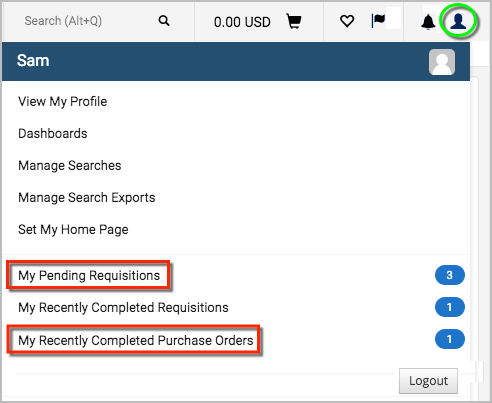
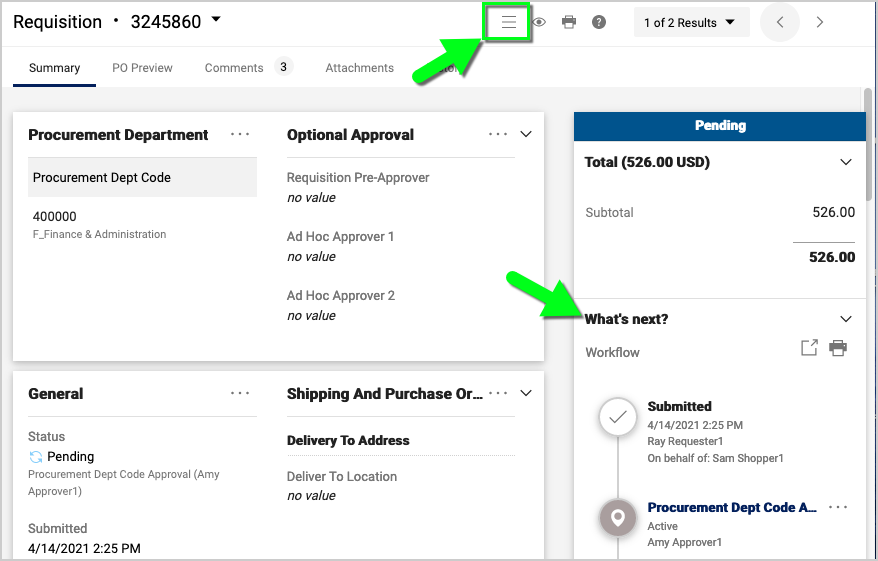
- My Pending Requisitions lists your orders that were submitted by the Requester and pending approval. Click the My Pending Requisitions link to view your pending orders. Then, click the Requisition Number to view a particular order. Finally, you may need to click the Show/Hide Sidebar icon to view the approval workflow.
- My Recently Completed Purchase Orders lists your orders that were submitted by the Requester and fully approved. Please note that the Purchase Order (PO) will be sent to the supplier immediately.
Shopping Instructions: View My Returned Carts/Requisitions
The Requester may return the shopping cart to you to edit.
Returned carts will appear under your Action Items flag > My Returned Requisitions.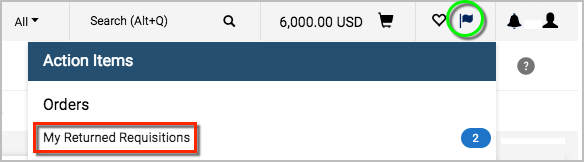
Shopping Instructions: Cancel an Order
- You may be able to unassign the cart from the Requester, as long as the Requester hasn't submitted the order.
- If the Requester submitted the order, they may be able to withdraw the requisition, as long as the order isn't fully approved.
- Once an order is submitted and fully approved, the Purchase Order (PO) is sent to the supplier. At this stage, you would need to contact the supplier to cancel the order. Once the order is canceled, you may submit a Change Order in BearBuy to request to close the PO. On your Change Order, please explain that the order was canceled with the supplier.
Modify/Edit a Purchase Order (PO)
To request to edit or close a Purchase Order (PO), please submit a Change Order in BearBuy. You may need to contact the supplier before requesting to edit the PO to ensure the supplier will accept a revised PO.
Helpful Hint: Use BearBuy Comments
Communicate using BearBuy Comments
Requesters and other BearBuy users may send you messages using the Comments feature in BearBuy. The messages will be sent to your email. To respond to a comment, you can email the person directly or send a comment through BearBuy.
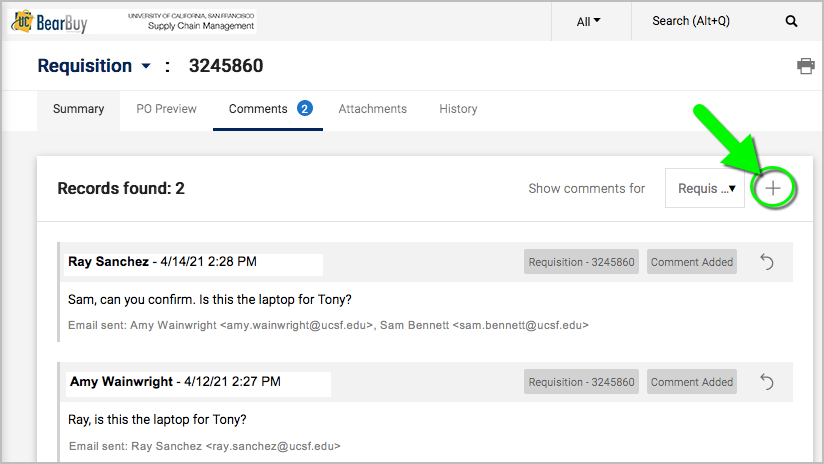
- Click on the View Comment link in the email you received from BearBuy. This will open BearBuy to the order or invoice where the Requester or other user entered the comment.
- Click the Plus sign to add a new comment.
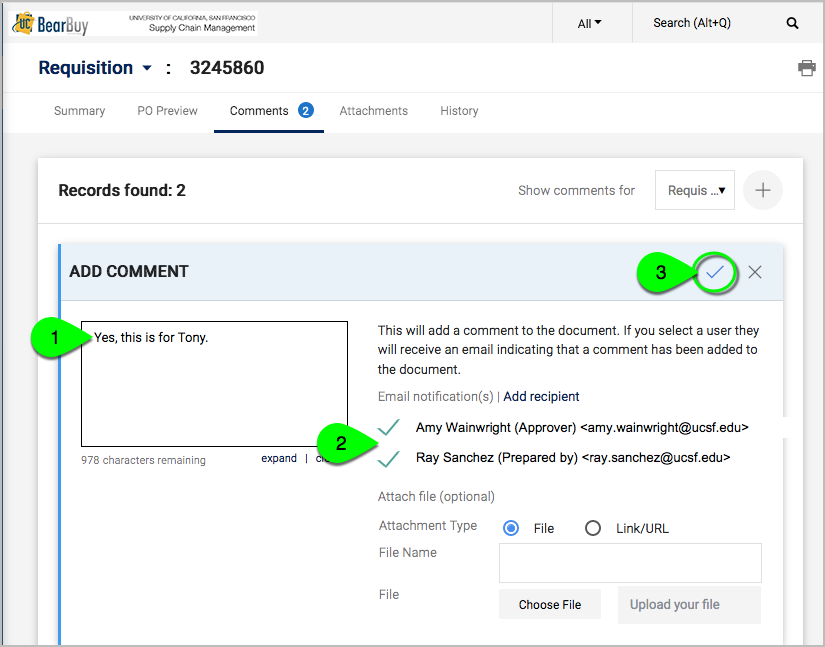
- The Add Comment pop-up box appears.
- Enter your comments in the text box.
- To send the comment to another user, select the recipient or use the Add recipient link to search for another user.
- To upload an attachment, use the Choose File link.
- When finished, click the Checkmark.
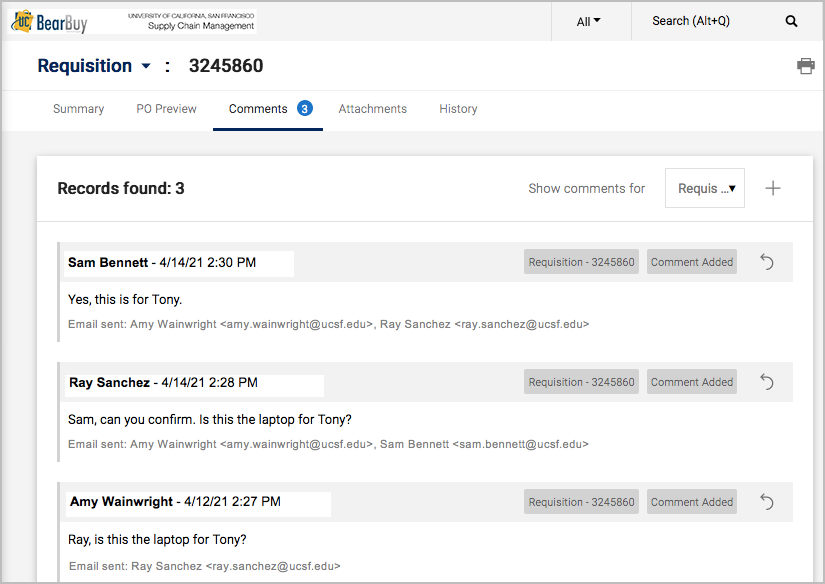
- The comment will now appear in BearBuy, and an email will be sent to the selected recipients.
Helpful Hint: Using Favorites
Add routinely ordered items to a Favorites folder for quick reordering.
- Only the Catalog items and Forms can be saved as Favorites.
- Punch-out items cannot be saved as Favorites.
Catalogs:
- Search for the item in BearBuy.

- Select the item’s corresponding heart icon.

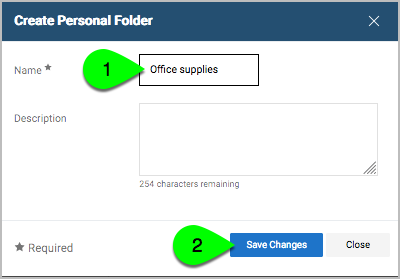
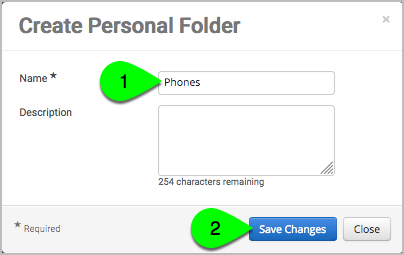
- A pop up window appears. Select a folder where you would like to save the item, or click the Create New link (then select Top level personal folder, give the new folder a Name and click the Save Changes button).

- The folder is now selected, and you may click the Save Changes button.
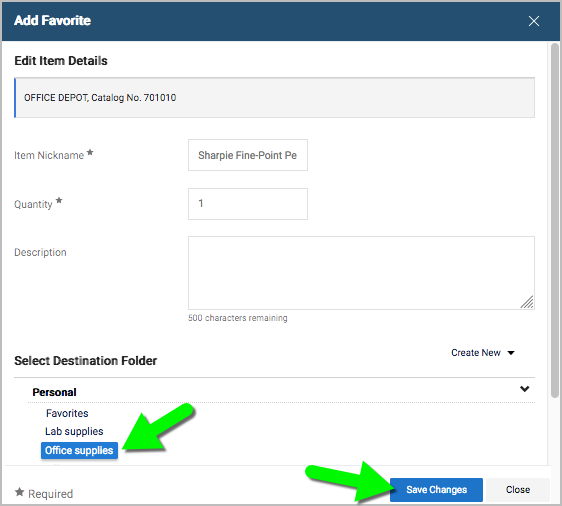
- A message will appear confirming the product was added to the folder.
Forms:
- Open the form you would like to favorite.
- Fill out the form with information you want to save. This information will be retained whenever you add the form to your cart.
- Select Add to Favorites from the Available Actions dropdown on the form, and click the Go button.

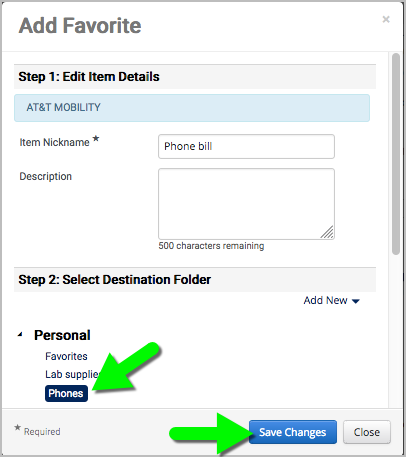
- A pop-up window appears. Give the form a Nickname. Select a folder where you would like to save the form, or click the Add New link (then select Top level personal folder, give the new folder a Name and click the Save Changes button).
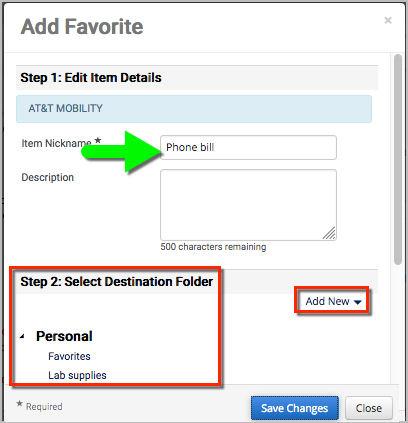
- The folder is now selected, and you may click the Save Changes button.
- A message will appear confirming the product was added to the folder.
Viewing Your Favorites:
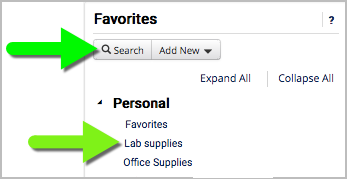
- To access your saved favorites, click the Favorites link (located above the product search bar) on the BearBuy Shopping homepage. Then, select the folder where you saved the item, or click the Search button to search for the item.

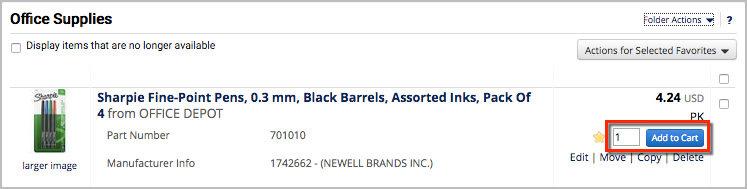
- Then, enter the desired quantity and click the Add to Cart button.
Helpful Hint: Invoices
Warning: Do not use a BearBuy form to submit an invoice for goods/services if you have a purchase order (PO). Read more about submitting an invoice for payment.
Submit an Invoice using a Form
Invoices may be submitted for payment in BearBuy using the Payment Request form, Meeting & Entertainment Payment Request form, or After The Fact PO form.
- Warning: Invoices attached to other forms will not be reviewed or processed for payment.
When you are ready to submit the invoice, select the appropriate form in BearBuy. Complete the form and attach a copy of the invoice/bill. Carefully read the instructions on the left side of the form to avoid delays. From the Available Actions on the form, select Add and go to Cart or Add to new Cart. Then, click the Go button. Assign the cart to your department's Requester to complete the checkout process and submit the request on your behalf.
For a Payment Request or After The Fact PO, the PO Number is generated for internal reference only; the PO will not be sent to the supplier. A voucher (invoice) will be generated in BearBuy and undergo approvals before the invoice is paid. For more details, go to Payment Status.